
The Hard Reality of Ground Preparation
Planning a landscape installation requires more than just picking a grass variety and ordering a few pallets of turf. Roughly 80% of the work happens before you buy a single square foot of sod. I always drill into my new crew members: if you don’t fix the soil grading and structure first, every plant you put in the ground is just expensive compost. You cannot skip the engineering phase. If the subgrade is compacted, the roots will hit a wall, literally. They will turn sideways, girdle, and the grass will die the first time the temperature hits 90 degrees. This is non-negotiable. Don’t skip this.
Why Tilling is the Foundation of a Permanent Lawn
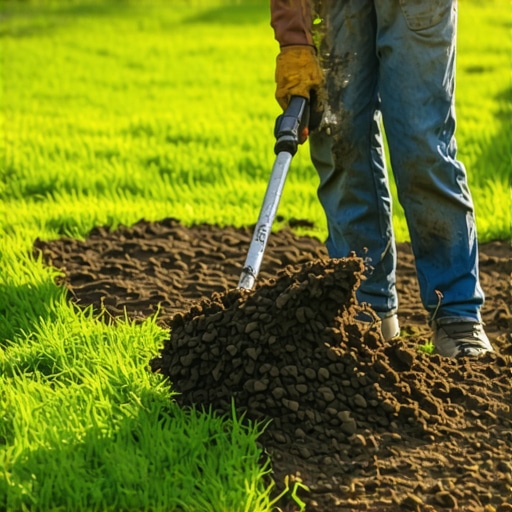
Tilling before sod installation is critical because it fractures compacted soil layers, improves aeration, and facilitates deep root penetration into the subsoil. By mechanically breaking the soil’s surface tension, you create a capillary environment where water and nutrients can move vertically, preventing the shallow rooting that leads to turf failure. [image_placeholder_1]
When you ignore tilling, you are essentially laying a carpet over concrete. Most residential lots have high soil bulk density due to construction equipment and foot traffic. High bulk density means there is no pore space for oxygen or water. Turf grass is a living, breathing biological system. It needs gas exchange. Without tilling, the interface between the bottom of the sod and the top of the existing dirt acts as a barrier. This is known as soil layering. It prevents water from moving downward, leading to a saturated thatch layer and a bone-dry root zone. It will rot.
“Soil compaction is the single most difficult challenge for turfgrass establishment in urban environments, as it limits the movement of air and water through the soil profile.” – Penn State Center for Turfgrass Science
The Physics of Soil Compaction and Root Girdling
Soil structure is defined by the arrangement of sand, silt, and clay particles. In a healthy landscape, 50% of the soil volume should be pore space. When the yard is compacted, that pore space collapses. This increases the hydrostatic pressure required for roots to push through the dirt. If a root has to work too hard to expand, it consumes more energy than the plant can produce via photosynthesis. The result is a stunted, yellowing lawn that requires constant irrigation and chemical intervention just to stay alive. We call this a ‘life-support lawn.’ Real landscaping involves building a self-sustaining system. You must till to at least 6 inches. This depth ensures that the primary root mass can establish itself before the heat of summer. Tilling also allows you to incorporate organic matter directly into the rhizosphere, improving the Cation Exchange Capacity (CEC) of the soil.
How deep should I till before sod?
To ensure a successful sod install, you must till to a minimum depth of 4 to 6 inches using a rear-tine tiller. This depth allows for the integration of soil amendments and ensures that the transition zone between the new sod and the native soil is porous enough for deep root development. Shallow tilling is useless. If the blades only scratch the surface, you are just creating a muddy mess that will settle unevenly.
Can I lay sod on hard dirt?
No, laying sod on hard, compacted dirt is the primary cause of sod failure and root desiccation. Hard dirt prevents the roots from knitting into the ground, leaving the grass vulnerable to drought and disease. You must perform a thorough yard cleanup, remove debris, and till the area to create a receptive seedbed for the turf. If you can’t push a screwdriver 4 inches into the ground with ease, your soil is too hard for sod.
The Ground-Up Build: Materials and Engineering
Before the tiller ever touches the dirt, you have to manage the logistics of yard cleanup and grading. This isn’t just about raking leaves. It is about civil engineering on a micro-scale. You must identify the ‘fall’ of the land. A standard landscape requires a 1% to 2% grade away from the home foundation to prevent basement flooding and hydrostatic pressure buildup against the walls. We use transit levels to ensure the grade is perfect. If you till a low spot, you’ve just created a pond. Below is a comparison of how soil preparation affects long-term turf health.
| Soil Condition | Root Depth (Inches) | Water Retention | Fertilizer Efficiency |
|---|---|---|---|
| Compacted Clay | 1 – 2 | Poor (Runoff) | Low (Leaching) |
| Untreated Loam | 3 – 4 | Moderate | Medium |
| Tilled & Amended | 6 – 10 | Excellent | High |
Quality investments beat big-box shortcuts every time. Do not buy ‘mystery soil’ from a bag. Get a bulk delivery of a 70/30 sandy loam and compost mix. Incorporate this during the tilling process. This creates a homogeneous growing medium that won’t layer or shear. If you are in a region with heavy clay, you may need to add gypsum to help flocculate the clay particles, making them more manageable for the tiller and the grass roots. Do not ignore the 811 call either. I’ve seen ‘professionals’ chew through irrigation lines and fiber optic cables because they were too lazy to wait for a utility mark. That is a quick way to turn a profitable job into a lawsuit.
“Proper subgrade preparation is the only way to prevent differential settlement in hardscapes and uneven surfaces in turf management.” – ICPI Hardscape Standards
The Installation Process: Sensory Checks
Once the tilling is done, the ground will be ‘fluffy.’ You can’t lay sod on fluffy soil or it will settle and create a trip hazard. You need to use a water-filled lawn roller to firm the surface. The goal is ‘firm but not hard.’ Your boots should leave a faint impression, but you shouldn’t sink. This is where the artistry of landscaping meets the science. You are looking for a perfectly smooth ‘tabletop’ finish. If the irrigation system is already in place, this is the time to flag the heads. Ensure you have head-to-head coverage. If one sprinkler head is buried 2 inches too deep because you didn’t account for the sod thickness, you’ll have a brown spot within a week. The tamper should literally bounce off the compacted base of any nearby hardscape edges. Tight edges are the mark of a pro. No gaps. No overlaps. Just a seamless green carpet that is ready to work.
Pre-Sod Installation Checklist
- Call 811 to mark all underground utilities.
- Perform yard cleanup: remove all rocks, roots, and existing weeds.
- Test soil pH and apply lime or sulfur as needed.
- Till the entire area to a depth of 6 inches.
- Incorporate 2 inches of high-quality organic compost.
- Grade the soil at a 2% slope away from structures.
- Roll the soil to firm the surface and eliminate air pockets.
- Verify irrigation coverage and adjust sprinkler head heights.
After the sod is down, the ‘settling in’ period begins. You aren’t done. For the first 14 days, you are a professional irrigator. You need to keep the soil moisture consistent, but not anaerobic. The water needs to soak through the sod and into that newly tilled soil. This ‘knitting’ process is what determines the lifespan of the lawn. By year one, a tilled lawn will have roots twice as deep as a non-tilled lawn. It will survive the freeze. It will survive the heat. It will be a legitimate piece of engineering, not a temporary decoration.