
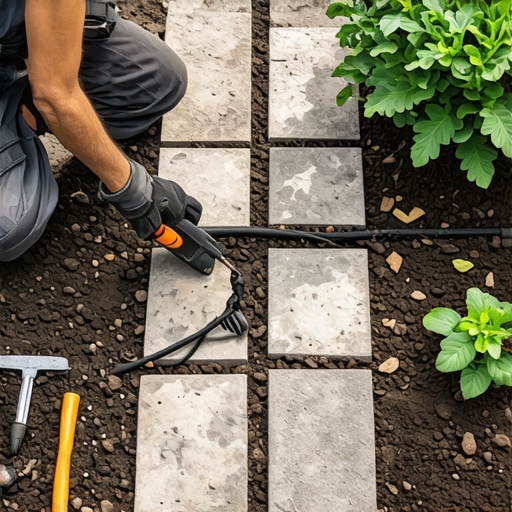
Diagnosing the Subsurface Failure Beneath Your Pavers
To identify a broken drip line under a hardscaped path, you must look for localized paver settling, efflorescence buildup on stone edges, or unexplained moisture in the surrounding sod install zones. These symptoms indicate a pressurized leak that is eroding your compacted gravel base and compromising the structural integrity of the walkway.
I recently got called out to tear up a $30,000 patio that was sinking because the previous contractor decided to run a standard poly drip line directly through the 3/4-inch modified stone base without a protective sleeve. Within three years, the vibration from foot traffic and the sharp edges of the crushed limestone literally sawed through the tubing. The homeowner didn’t notice the leak until the hydrostatic pressure had washed away the leveling sand, causing a massive structural dip. It was a complete hardscape autopsy. I had to explain that if you don’t account for the physical friction between stone and plastic, you’re just building a ticking time bomb.
“A retaining wall or hardscaped surface doesn’t fail because of the stone; it fails because of the water trapped behind or beneath it, leading to the loss of friction in the subgrade.” – Hardscape Engineering Axiom
The Physics of Irrigation Failure in Hardscaping
When you perform a yard cleanup or landscaping overhaul, the irrigation is often an afterthought. However, a drip line under a path is subject to immense pressure. Standard 1/2-inch poly tubing has a low burst strength when compressed. If that line isn’t inside a Schedule 40 PVC sleeve, the weight of the pavers and the base material will eventually crimp it. Furthermore, the soil microbiology around a leak changes rapidly. Anaerobic conditions take over, and if you have nearby sod install projects, the excess water will cause root rot before you even see a puddle on the surface. Check your meter. If the leak indicator is spinning while the zones are off, the main lateral is blown. If it only spins when the zone is active, the break is downstream.
The Engineering Solution: Sleeving and Bore Techniques
To repair a broken drip line under a path without excavating the entire structure, you must utilize a horizontal boring method or install a structural sleeve to house the new line. This prevents future mechanical damage from soil shifting or hydrostatic pressure and ensures the hardscape base remains undisturbed and dry.
How much modified gravel do I need for a patio base?
For most pedestrian paths, you need a minimum of 4 to 6 inches of compacted 2A modified stone. If you are running irrigation through this zone, the line must be buried at least 2 inches below that stone layer or encased in a pipe. Do not skip this. If you place the tubing in the sand setting bed, it will be crushed. Period. Most DIYers fail here because they want to save three inches of digging. Don’t be that guy. Use a jumping jack or a plate compactor to reach 95% Proctor density, but only after your sleeve is safely buried.
| Repair Method | Estimated Labor Time | Structural Impact | Longevity Rating |
|---|---|---|---|
| Direct Trenching | 6-8 Hours | High (Requires Re-leveling) | Moderate |
| Horizontal Boring | 3-4 Hours | Zero | High |
| Line Rerouting | 5-10 Hours | Low | Very High |
| Sleeve Retrofitting | 4-5 Hours | Minimal | Maximum |
How do I find a leak under a stone walkway?
Start by isolating the zone. Use a moisture meter to probe the edges of the landscaping timber or stones. If the soil at the edge of the path is at 80% saturation while the rest of the yard is at 30%, you’ve found your entry point. Listen for the hiss. You can also use a compressed air test. Blow air into the drip line and watch for bubbles in the gaps of your polymeric sand after wetting the surface. It works every time.
“Irrigation systems should be designed to deliver water with a distribution uniformity of at least 80% to prevent localized soil saturation and subsequent structural settling of adjacent hardscapes.” – ASABE Standards for Landscape Irrigation
Step-by-Step Remediation Process
First, identify the two points where the drip line enters and exits the hardscaped area. Dig a small access pit on both sides. Do not use a pickaxe near the edge of the pavers; you’ll blow out the edge restraint. Use a sharp spade. Cut the damaged line on both sides. Now, you have two options: try to pull the old line out or bore a new hole. If the old line is stuck, take a 1-inch piece of PVC pipe and sharpen one end. Drive it through the subsoil under the path base with a sledgehammer, clearing the core as you go. This creates a permanent sleeve. Slide your new 1/2-inch drip line through the sleeve. Connect your fittings using high-quality compression couplings, not those cheap barbed ones that leak after one season. Test the pressure for 20 minutes before backfilling. If it leaks now, it will fail later.
Post-Repair Hardscape Checklist
- Check for voids under the pavers using a rubber mallet; listen for a ‘hollow’ sound.
- Re-apply polymeric sand to any joints that were disturbed to prevent water ingress.
- Verify that the irrigation pressure regulator is set to 25-30 PSI to avoid blowing the new couplings.
- Inspect the yard cleanup area for any soil displacement that could affect drainage.
Landscaping is about managing water. If you don’t control the flow, the flow will control your budget. Fix it right once, or fix it often. The choice is yours.