
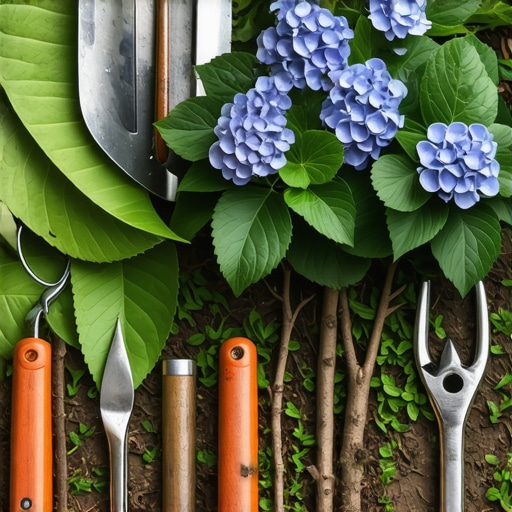
3 Pruning Errors That Stop Your Hydrangeas from Blooming
I always drill into my new crew members: if you don’t fix the soil grading first, every plant you put in the ground is just expensive compost. It is the same with pruning. I have seen guys who have been in the landscaping business for ten years walk up to a Hydrangea macrophylla and shear it like a boxwood. It is painful to watch. They are literally cutting off next year’s profit and the homeowner’s joy because they do not understand the difference between terminal buds and lateral growth. In my 20 years running a firm, the biggest issue I see is not the weather or the bugs; it is the human with the bypass pruners who thinks every shrub needs a haircut in November. If you treat a hydrangea like a hedge, it will reward you with nothing but a wall of green leaves and zero color. This is not just about aesthetics; it is about the vascular health and reproductive cycle of the plant. If you do not respect the wood, the wood will not produce.
Error #1: Pruning Old Wood Varieties at the Wrong Time
Pruning Old Wood Hydrangeas like Bigleaf or Oakleaf varieties in late winter or early spring removes the dormant flower buds set during the previous summer. These terminal buds are the only source of blooms for the upcoming season, and removing them ensures a flowerless year.
When we talk about ‘old wood,’ we are talking about the stems that grew during the last growing season. Inside those stems, the plant has already chemically signaled for flower production. If you come through during your fall yard cleanup and whack these back to the ground to ‘tidy up,’ you are tossing your flowers into the green waste bin. I have had clients complain that their irrigation system is broken because the plants won’t bloom, but the irrigation is fine. The problem was the ‘mow-and-blow’ crew they hired who didn’t know a macrophylla from a paniculata. You have to identify the species before the blade touches the wood. It is a biological mandate. For these varieties, you only prune immediately after the flowers fade in mid-summer. This gives the plant enough time to generate new growth and set buds before the first frost hits. If you wait until the leaves are gone, you are guessing, and in this business, guessing is how you lose clients.
How do I know if my hydrangea blooms on old or new wood?
Check the bloom time and the bud structure. Varieties that bloom in early summer, like the classic blue mopheads, are almost always old wood. If you see fat, green buds along the stem in December, that is your next season’s bloom. Leave it alone. Conversely, those that start blooming in mid-to-late summer on fresh green growth, like Hydrangea paniculata ‘Limelight,’ are new wood bloomers. You can be more aggressive with those because they develop their flowers on the growth they produce in the current spring.
“A hydrangea’s flowering habit is genetically determined; pruning a plant that flowers on old wood in the spring will always result in a loss of blooms for that season.” – University of Georgia Extension
Error #2: The Flat-Top ‘Haircut’ vs. Thinning Cuts
The flat-top pruning method creates a dense outer canopy that blocks sunlight from the inner node sites, leading to poor air circulation and powdery mildew. This structural mistake prioritizes a geometric shape over the physiological requirements of the shrub, often resulting in weak, spindly stems that cannot support heavy flower heads.
I see this constantly during routine yard cleanup. Homeowners want their shrubs to look like neat little meatballs. This is a death sentence for bloom quality. When you shear the tips of the branches, you stimulate a flush of lateral growth just below the cut. This creates a thick ‘shell’ of foliage on the outside of the plant. Inside that shell, the humidity spikes and the sunlight disappears. Without sun hitting those interior stems, the plant won’t develop the strength to hold up those massive ‘Annabelle’ heads after a rainstorm. Instead of shearing, you should be doing ‘thinning cuts.’ This means taking the oldest, thickest canes all the way down to the ground. This encourages the plant to send up fresh, vigorous shoots from the root flare. It also improves the hydrostatic balance within the plant, allowing your irrigation system to actually reach the root zone instead of just wetting the leaves and causing fungal issues.
| Hydrangea Type | Pruning Window | Wood Type | Recommended Intensity |
|---|---|---|---|
| Bigleaf (Macrophylla) | Post-bloom (July) | Old Wood | Minimal (Deadheading only) |
| Oakleaf (Quercifolia) | Post-bloom (August) | Old Wood | Thinning cuts only |
| Panicle (Paniculata) | Late Winter | New Wood | Up to 30-50% reduction |
| Smooth (Arborescens) | Late Winter | New Wood | Can be cut to 12 inches |
Error #3: Ignoring the Root Flare and Soil Nitrogen Levels
Excessive nitrogen fertilization during the pruning recovery phase stimulates vegetative growth at the expense of floral development. Furthermore, failing to clear debris from the root flare during yard cleanup leads to stem rot and girdling roots, which restricts the nutrient transport necessary for large blooms.
Everyone wants to dump a bag of 10-10-10 on their plants and call it a day. If you are doing a sod install nearby, your fertilizer run-off is likely hitting your hydrangeas. High nitrogen is great for your grass, but it turns your hydrangeas into leafy giants with zero flowers. Nitrogen tells the plant to make chlorophyll, not seeds or flowers. I tell my guys to look at the soil pH and the phosphorus levels. Phosphorus is what drives the reproductive engine. Also, watch the mulch. I see ‘mulch volcanoes’ piled up against the stems of hydrangeas every day. This traps moisture against the bark and invites borers. It will rot. You need to see the root flare—the spot where the stem widens out into the roots. If that is buried, the plant is stressed. A stressed plant will drop its buds to save itself. It is survival physics.
“Excessive nitrogen applications are a common cause of ‘blind’ wood—stems that are healthy in appearance but fail to produce any flower primordia.” – Penn State Agricultural Extension
How much modified gravel do I need for a patio base?
While unrelated to the biological needs of a hydrangea, if you are planting near a new hardscape, remember that you need a minimum of 6 inches of compacted 2A modified stone for a pedestrian walkway and 10-12 inches for a driveway. If you don’t manage the drainage of that base, the runoff will drown the root systems of your nearby hydrangeas. Poor drainage is the silent killer. It causes root anoxia, which prevents the plant from taking up the very nutrients it needs to bloom.
- Identify your species: Look at leaf shape and bloom time.
- Check the buds: If you see green ‘nubs’ in winter, don’t cut.
- Sanitize your tools: Use 70% isopropyl alcohol to prevent spreading blight.
- Cut at an angle: 45 degrees, 1/4 inch above the bud to shed water.
- Remove the 3 Ds: Dead, damaged, or diseased wood first.
- Stop the ‘meatball’ shape: Use thinning cuts for air flow.
Landscaping is about long-term management, not a single afternoon of work. If you are doing a yard cleanup, keep the blowers away from the delicate stems. High-velocity air can desiccate dormant buds in seconds during a cold snap. Treat your irrigation like a precision tool; hydrangeas need deep soaking at the base, not a misting on the leaves. If you follow the biology of the plant instead of your own desire for ‘neatness,’ you will have blooms every year. Don’t skip the soil test. Don’t ignore the drainage. Most importantly, put the shears down until you know exactly what wood you are cutting. Respect the meristematic tissue and it will respect your landscape design.