
The Autopsy of a Failed Veneer Installation
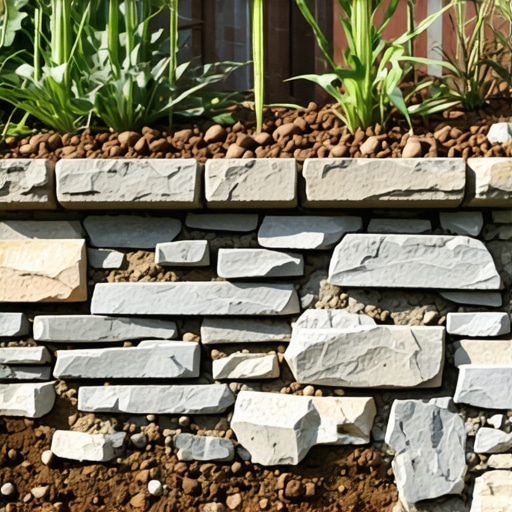
Stone veneer peels off retaining walls because of hydrostatic pressure and moisture entrapment. When water infiltrates the gap between the substrate and the stone—often due to poor drainage or missing weep holes—freeze-thaw cycles and vapor drive force the bond to fail, causing delamination. It is a structural failure disguised as a cosmetic issue. [IMAGE_PLACEHOLDER]
I recently got called out to tear up a $30,000 patio and retaining wall system that was sinking and shedding its stone skin like a molting snake. The previous contractor, a classic mow-and-blow hack who thought he could pivot to hardscaping, had slapped expensive natural stone veneer directly onto damp CMU blocks using a cheap thin-set meant for indoor kitchens. He didn’t install a single weep hole. He didn’t use a drainage mat. Within two winters, the hydrostatic pressure built up behind those stones was so immense it literally popped the veneer off the wall. The homeowner was left with a pile of expensive rubble and a mud pit where their sod install used to be. It was a $30,000 lesson in why engineering matters more than aesthetics. When I arrived, the wall was weeping white crusty salt—efflorescence—which is the death rattle of a poorly drained masonry project. We had to excavate the entire backfill, which was just native clay instead of the required #57 clean stone. It was a mess. Water always wins. Always.
The Invisible Culprit: Hydrostatic Pressure and Vapor Drive
Hydrostatic pressure is the force exerted by water at rest against the back of your retaining wall. If your landscaping design doesn’t account for this, the wall becomes a dam. Water is heavy. It weighs about 62.4 pounds per cubic foot. When saturated soil sits behind a wall without a French drain or proper 1-inch clean stone backfill, that weight pushes against the structure. If the wall is CMU with a stone veneer, that water will eventually find its way through the block. This is called vapor drive. The moisture moves from the high-pressure wet side (the soil) to the low-pressure dry side (the face of the wall). If you have sealed the stone too early or used an impermeable mortar, that moisture gets trapped. It then freezes. Ice expands. The bond breaks. The stone falls. It is a simple, brutal physical cycle.
“A retaining wall doesn’t fail because of the stone; it fails because of the water trapped behind it.” – Hardscape Engineering Axiom
How much modified gravel do I need for a patio base?
For a standard pedestrian patio, you need a minimum of 6 inches of compacted 21A or modified gravel, while driveways or heavy retaining wall footings require 12 inches or more. You must calculate the cubic yardage by multiplying your square footage by the depth in feet and then dividing by 27. Do not guess. If your base is thin, the wall will settle, creating micro-cracks in your veneer mortar that invite water infiltration. A solid base is the only way to prevent the shifting that leads to veneer delamination. If you’re doing a yard cleanup and notice your wall has shifted even a quarter inch, your bond is likely already compromised.
Material Realities: Mortar Types and Substrate Prep
The chemistry of your mortar is just as important as the physics of your drainage. Many contractors use Type N mortar because it is easy to work with. That is a mistake for exterior veneer. Type N has a lower compressive strength. For a stone veneer on a retaining wall, you need Type S mortar, which is designed to withstand higher lateral pressures and has a much stronger bond to the masonry substrate. Furthermore, you cannot skip the scratch coat. You must apply a metal lath, followed by a 1/2-inch layer of mortar that is allowed to cure before the stone is ever touched. This creates a mechanical bond. Without it, you are just sticking rocks to a wall with hope and prayers. Neither of those is a recognized engineering standard.
| Substrate Type | Required Prep | Expected Bond Strength (PSI) | Moisture Sensitivity |
|---|---|---|---|
| CMU (Concrete Block) | Scratch Coat & Lath | 1800+ | High |
| Poured Concrete | Mechanical Scarification | 2500+ | Medium |
| Plywood (Interior Only) | Full Lathe System | N/A | Extreme |
| Existing Brick | Acid Wash & Scratch | 1200+ | High |
The Role of Irrigation and Yard Cleanup in Wall Health
Your irrigation system is often the silent killer of your stonework. If your sprinkler heads are hitting the face of the wall daily, you are forcing water into the pores of the stone and the mortar joints. This accelerates the freeze-thaw damage. During a yard cleanup, you should check your zones. Ensure no heads are overspraying onto the masonry. Additionally, check your gutters. If a downspout is dumping water at the end of a retaining wall, it will erode the base and saturate the backfill, leading to the same hydrostatic issues mentioned earlier. Proper landscaping isn’t just about plants; it is about water management. If you don’t control the water, it will control your bank account.
“Proper drainage is the single most important factor in the longevity of any masonry or hardscape installation.” – Penn State Agricultural Extension
Why is my stone veneer turning white?
The white powdery substance on your stone is efflorescence, which occurs when water dissolves mineral salts within the mortar or substrate and carries them to the surface. As the water evaporates, the salt remains. While it can be cleaned with a mild acid wash, it is a warning sign. It means water is moving through your wall. If you see this, your stone veneer is at high risk of peeling. You need to address the drainage behind the wall immediately before the bond fails completely. Do not just seal over it. Sealing a wall with active efflorescence traps the salt inside, leading to sub-florescence, which can shatter the stone from the inside out.
The 10-Point Installation Integrity Checklist
- Install a 4-inch perforated French drain at the base of the footing.
- Use #57 clean crushed stone for backfill, at least 12 inches wide.
- Apply a heavy-duty waterproofing membrane (like a bituthene or liquid rubber) to the back of the wall.
- Ensure a proper scratch coat with Type S mortar has cured for 24 hours.
- Use stainless steel veneer ties if the stone is heavy or natural.
- Leave weep holes every 32 inches along the bottom course of the veneer.
- Verify the soil grading slopes away from the wall at a minimum of 2%.
- Adjust irrigation heads to prevent direct spray on the masonry.
- Use high-quality polymeric sand or grout specifically for exterior use.
- Wait at least 30 days of dry weather before applying a breathable silane-siloxane sealer.
It will rot. If you ignore the drainage, your wall will fail. It’s not a matter of if, but when. Most homeowners want the pretty stone, but they don’t want to pay for the gravel and pipe behind it. That is a recipe for disaster. If you are planning a sod install near your wall, ensure the soil level stays at least 2 inches below the bottom of the veneer to prevent moisture wicking. Every detail matters. Your wall is a machine. If one part of the engineering fails, the whole system collapses. Don’t be the person who pays for the same wall twice. Do it right the first time. Stop the water. Save the stone.