
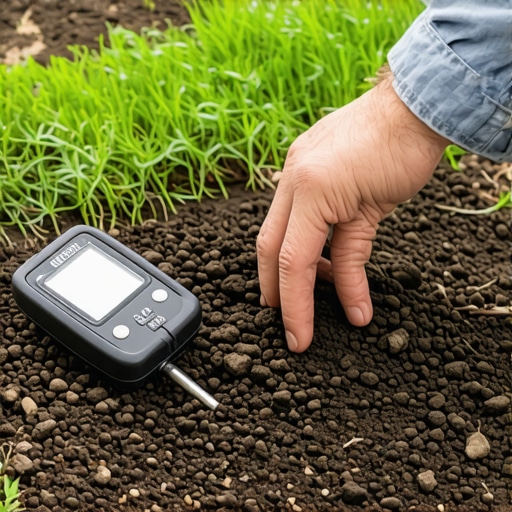
The Chemical Nightmare: Why Most Sod Jobs Fail Before the First Roll
A homeowner called me in a panic after they completely torched their front lawn by applying a high-nitrogen starter fertilizer on a 90-degree day without any baseline soil testing. The result was a necrotic, charred mess of salts that dehydrated the root zones of the existing grass instantly. I told them the hard truth: you cannot fix a chemical burn with more chemicals. You have to start at the microbial level. Most people view sod as a carpet they can just roll out over a dirt floor. That mindset is why 40% of sod installs fail within the first eighteen months. If you do not understand the engineering behind soil grading and the biology of the rhizosphere, you are just buying expensive compost.
How to Determine if Your Soil is Chemically Ready for New Sod
To determine if soil is ready for new sod, you must verify a friable soil structure at a depth of 6 inches, ensuring a pH level between 6.0 and 7.0, and a compaction density that allows for root penetration while preventing waterlogging or localized dry spots. If your soil chemistry is off, the roots will simply sit on top of the soil and bake in the sun.
“Soil structure is the arrangement of the solid parts of the soil and of the pore spaces located between them. It is critical for the movement of air and water.” – USDA Natural Resources Conservation Service
We start with a professional soil test. Forget those $10 plastic kits from the big-box stores. You need a lab analysis that gives you the Cation Exchange Capacity (CEC) and specific levels of Phosphorus (P) and Potassium (K). If your pH is sitting at a 5.0 (acidic), your new turf cannot uptake nutrients, no matter how much you water it. You’ll need to work in pelletized lime at least two weeks before the sod arrives. If it’s too alkaline, elemental sulfur is your only hope. It is chemistry, not magic.
How do I test my soil pH for sod?
You need to take six to ten core samples from across the yard at a depth of 4 to 6 inches. Mix them in a clean plastic bucket and send them to your local agricultural extension office. Do not use a metal bucket; the zinc can contaminate the sample results. Wait for the lab report before you spend a dime on amendments.
The Engineering of Grading and Drainage
Before the first piece of turf touches the ground, the subgrade must be engineered to handle hydrostatic pressure and surface runoff. Poor grading leads to the ‘bathtub effect,’ where water collects in low spots, rots the roots, and creates anaerobic conditions that kill the grass. You need a minimum of a 1% to 2% slope away from any structural foundations. If you have heavy clay, you aren’t just grading; you’re managing water movement. This often requires the installation of a French drain or a catch basin system integrated with your irrigation setup. I have seen $10,000 sod jobs turn into swamps because the contractor didn’t check the transit levels. Check the levels. It is non-negotiable.
| Soil Component | Ideal Percentage | Impact on Sod Health |
|---|---|---|
| Sand | 40-60% | Drainage and pore space for root expansion |
| Silt | 30-40% | Nutrient retention and moisture holding |
| Clay | 10-20% | Provides structure and cation exchange capacity |
| Organic Matter | 5-10% | Microbial fuel and nitrogen cycling |
Compaction and Pore Space: The Silent Killers
Root systems require oxygen to survive. If your soil is compacted, there is no oxygen. Most residential lots are compacted by construction equipment to a point where the soil is as hard as concrete. You need to achieve a bulk density of less than 1.5 grams per cubic centimeter. If you can’t push a screwdriver 6 inches into the ground with ease, your soil is not ready. You must till in 2 to 3 inches of high-quality organic compost. This breaks up the clay platelets and creates the capillary action needed for water to move vertically. Don’t just scratch the surface. Go deep. It will rot if you don’t.
What is the best soil amendment for new sod?
Avoid cheap ‘fill dirt.’ You want a 70/30 mix of screened topsoil and organic leaf compost. This provides the soil microbiology needed to break down the thatch layer that will eventually form. Avoid fresh manure; the ammonia levels will scorch the tender new roots of your sod install. We use a power harley rake to blend the amendments into the top 4 inches of the native soil for a seamless transition.
The Final Readiness Checklist
Before the sod truck pulls into your driveway, run through this checklist. If you skip a step, the clock starts ticking on the turf’s mortality.
- Herbicide Window: Ensure all existing weeds were killed with a non-residual glyphosate product at least 7 days prior.
- Irrigation Test: Run your irrigation system. Check for 100% head-to-head coverage. Dry spots in the first 48 hours are fatal.
- Pre-Plant Fertilizer: Apply a low-nitrogen, high-phosphorus starter (e.g., 5-20-10) to the bare soil to encourage root strike.
- The Finger Test: The soil should be moist but not muddy. If it sticks to your boots, it is too wet. If it’s dusty, it’s too dry.
- Final Grade: The soil level should be 1/2 inch to 1 inch below your hardscape edges (sidewalks, driveways) so the sod sits flush.
“A retaining wall doesn’t fail because of the stone; it fails because of the water trapped behind it. The same logic applies to turf; it fails because of the soil beneath it.” – Hardscape Engineering Axiom
The “Settling In” Period
Once the sod is down, the work actually begins. The first 14 days are critical. You aren’t just watering the grass; you are maintaining the soil moisture at the interface where the sod meets the earth. Deep, infrequent watering is the goal after the first two weeks to force the roots to chase the moisture downward. If you water for 5 minutes every day, the roots will stay shallow and the lawn will die the first time the temperature hits 90 degrees. Deep roots are resilient roots. Use a rain gauge. You want 1 inch of water per week, delivered in two heavy sessions. Don’t listen to your neighbor. Listen to the biology. It never lies.