
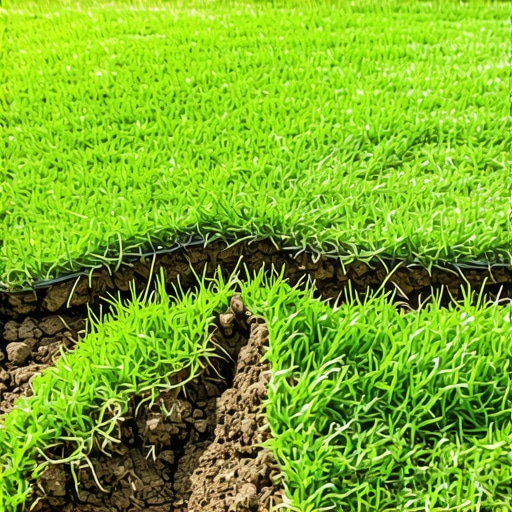
The Anatomy of a Failed Sod Install
Sod pulling apart is primarily caused by desiccation-induced shrinkage where the turf loses water faster than the roots can intake it. This gap formation indicates a failure in irrigation frequency or a lack of mechanical rolling to eliminate air pockets between the sod and the subgrade. When the edges of the sod rolls dry out, they pull inward, creating a grid of exposed dirt that ruins the uniformity of the lawn.
I always drill into my new crew members: if you don’t fix the soil grading first, every plant you put in the ground is just expensive compost. I remember a job in late July where a homeowner had spent four grand on high-quality Zoysia but ignored the site prep. By day three, the seams had opened up two inches wide. They thought the grass was defective. It wasn’t. The soil underneath was as hard as concrete and as dry as a bone. We had to lift the edges, hand-water the subsoil, and backfill the gaps with a proprietary mix of peat and topsoil just to save the investment. That is the reality of the dirt. If the foundation is flawed, the surface will fail every single time. Landscaping is not just aesthetics; it is civil engineering with living materials.
“The success of sodding depends largely on the intimate contact between the sod and the soil surface. Air pockets prevent root penetration and lead to localized drying.” – Penn State Center for Turfgrass Science
The Site Prep Disaster: Why Soil Contact is Non-Negotiable
Poor soil preparation leads to root girdling and hydrophobic soil conditions that prevent the new sod from ever anchoring to the earth. If you skip the yard cleanup and leave rocks, old thatch, or construction debris under the new turf, you create an air barrier that stops the roots from diving deep into the profile. This lack of contact is the primary reason for seam separation. You cannot just lay grass over dead grass and expect it to live.
When we talk about yard cleanup, we are not just talking about raking leaves. We are talking about a total excavation of any organic matter that will rot and create air pockets. Roots need a firm, level, and nutrient-rich medium. We measure the soil compaction using a penetrometer. If the PSI is too high, the roots will hit that layer and turn sideways. That is not a lawn; that is a carpet waiting to die. We use a power harley rake to chew up the top three inches of soil, incorporating organic fines to break up heavy clay. If you are dealing with red clay, you need to add gypsum to flocculate the soil particles, increasing the pore space for oxygen and water. Without this, the sod stays perched on top, drying out at the edges because it has no vertical water source to pull from.
How long does it take for sod seams to disappear?
Under optimal conditions with proper irrigation and soil-to-root contact, sod seams should become invisible within 14 to 21 days. This timeline requires the roots to penetrate the first two inches of the subgrade, locking the individual slabs into a singular monolithic turf system. If gaps remain after three weeks, your establishment protocol has failed. You will need to intervene with top-dressing to prevent weed encroachment in the exposed soil channels.
| Grass Type | Shrinkage Risk | Rooting Speed | Soil Preference |
|---|---|---|---|
| Bermuda | High | Fast (7-10 days) | Sandy Loam |
| Zoysia | Moderate | Slow (14-21 days) | Well-drained Loam |
| St. Augustine | Low | Moderate (10-14 days) | Wide Range |
| Tall Fescue | High | Moderate (14 days) | Clay/Loam |
Irrigation: The 1-Inch Rule and Evapotranspiration
Proper irrigation for new sod requires a deep-saturation strategy that maintains 100% moisture levels in the first four inches of the soil profile without causing anaerobic rot. Inconsistent watering leads to the crown of the grass plant shrinking, which pulls the edges of the sod rolls away from each other as the soil substrate contracts. You must measure your output with rain gauges to ensure you are hitting the one-inch mark per day during the first week. Do not guess. Guessing kills grass.
The physics of water in a new lawn is complex. You are fighting evapotranspiration, which is the sum of evaporation from the soil and transpiration from the plant. On a 90-degree day, a new lawn can lose a quarter-inch of water in hours. If the seams are pulling apart, you are losing the battle against the sun. You need to water at 4:00 AM to ensure the water reaches the roots before the sun can steal it. Irrigation systems must be checked for head-to-head coverage. Any dry spot will manifest as a gap in the seams within 48 hours. I have seen entire lawns lost because one sprinkler head was clogged with grit. It is a game of inches and gallons.
“Turfgrass roots require a balance of 50% solids, 25% air, and 25% water within the soil pores to facilitate gas exchange and nutrient uptake during the establishment phase.” – Agronomy Handbook
Why is my new sod turning brown at the edges?
Browning at the edges of new sod is the hallmark of localized dry spot (LDS) and desiccation. Because the edges of the sod rolls have the most surface area exposed to the air, they lose moisture faster than the center of the piece, leading to cell death and chlorosis. This is often exacerbated by overlapping seams or gaps left during the initial install. If the edge is brown, the root system in that specific zone is already in a state of dormancy or death. Immediate saturation is required to reverse the wilt.
The Mechanical Solution: Rolling and Tamping
The use of a 300-pound water-filled roller is required to eliminate the microscopic air gaps between the sod’s thatch layer and the prepared soil bed. Mechanical compaction of the sod into the soil ensures that the capillary action of the water can move from the subgrade into the root zone. Without rolling, the sod is merely sitting on the soil like a piece of paper on a desk. There is no bond. No bond means no life.
- Soil test for pH: Aim for a range of 6.0 to 7.0 for most turf varieties.
- Subgrade leveling: Remove any rocks larger than 0.5 inches to prevent air pockets.
- Starter Fertilizer: Use a high-phosphorus (the ‘P’ in NPK) blend to stimulate root branching.
- Staggered Seams: Lay sod like bricks to prevent long, continuous run-off channels.
- Tight Fit: Butt the edges tightly together without overlapping; do not stretch the sod.
- Post-Install Rolling: Roll the entire area twice in perpendicular directions.
If you find that the gaps have already opened, do not try to pull the sod together. You will just tear the tender new roots. Instead, you must treat it like a surgical site. Mix a 50/50 blend of screened topsoil and organic compost. Sift this into the cracks. This acts as a moisture bridge, allowing the rhizomes or stolons of the grass to grow across the gap. It is tedious work, but it is the only way to fix a botched install. A hack will tell you it will grow in eventually. A professional knows that those gaps are a highway for crabgrass and poa annua. You fix it now, or you fight weeds for the next three years. There is no middle ground in high-end landscaping. It is either done to spec, or it is a failure. Monitor your moisture levels, check your soil chemistry, and for the love of the craft, use a roller.