
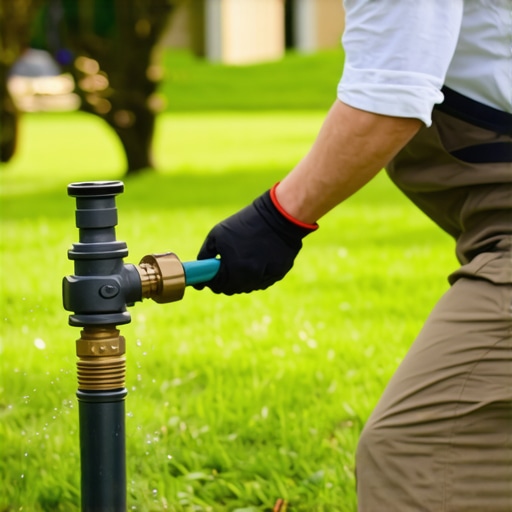
The Anatomy of a Leaking Valve: A Forensic Diagnosis
A leaking irrigation valve is rarely a sign of a broken part; it is usually a symptom of structural contamination or mechanical fatigue within the internal diaphragm. When you notice a constant seep around a sprinkler head or a swampy patch of sod install that never dries, you are looking at a valve that cannot fully seat due to grit, PVC shavings, or calcification. This microscopic debris prevents the rubber diaphragm from creating a watertight seal against the valve body, allowing a constant stream of pressurized water to bypass the system. If ignored, this minor weep becomes a catastrophic failure. It will drown your root zones. It will rot your expensive turf. Stop the leak at the source before you are forced to excavate the entire manifold.
The Apprentice Lesson: Why Clean Lines Matter
I always drill into my new crew members: if you don’t fix the soil grading and flush the lines first, every plant you put in the ground is just expensive compost. Last season, I had a rookie skip the line-flush after a yard cleanup and irrigation repair. Within forty-eight hours, three brand-new valves were stuck open, dumping four thousand gallons of water into a fresh sod install. The sediment from the pipe repair had migrated directly into the valve’s pilot hole. We didn’t just lose the water; we lost the structural integrity of the soil. You must treat every open pipe like a surgical site. Contamination is the enemy of performance.
“Irrigation valves operate on pressure differentials; even a grain of sand lodged in the diaphragm seat can prevent the valve from achieving a positive shut-off, leading to constant weeping.” – Irrigation Association Technical Manual
How to Flush Your Irrigation Valves Without Full Disassembly
To flush an irrigation valve effectively, you must force high-velocity water through the internal chambers to dislodge particulates from the diaphragm seat and the solenoid port. This process, often called a ‘manual bleed flush,’ utilizes the internal pressure of the mainline to eject debris without requiring a full teardown of the valve bonnet. Start by locating the manual bleed screw—usually a small plastic toggle or screw on top of the valve. Turn it counter-clockwise. You should hear the hiss of air and see a geyser of water. This bypasses the solenoid and forces the diaphragm to lift fully, allowing the flow to sweep the valve seat clean.
How much pressure is needed to flush a line?
Most residential irrigation systems require at least 30 to 40 PSI to effectively move heavy sediment or PVC burrs out of a 1-inch valve body. If your static pressure is lower, you may need to flush the valves one at a time while all other zones are closed to maximize the scouring velocity of the water. Low pressure leads to stagnation. It fails to lift the grit.
| Debris Type | Source of Contamination | Impact on Valve Operation |
|---|---|---|
| PVC Shavings | Post-repair pipe cutting | Stops diaphragm from seating; causes constant leaks. |
| Fine Silt/Sand | Well water or broken mains | Clogs the solenoid pilot hole; valve fails to open. |
| Calcium Scale | Hard water buildup | Creates a rough surface on the valve seat; slow weeping. |
| Algae/Biofilm | Recycled water sources | Gums up the internal spring; inconsistent timing. |
The Deep Clean: Disassembling the Valve Bonnet
When a manual flush fails, the forensics move to the internal components. You must remove the bonnet screws—usually four to six stainless steel bolts—to inspect the diaphragm. Use a 5/16-inch nut driver. Avoid using a power drill; you will strip the plastic housing. Once open, inspect the rubber diaphragm for ‘memory’ or hardening. If the rubber feels brittle or has visible tears, it’s trash. Look at the plastic seat inside the valve body. Even a tiny scratch here means the valve will never seal again. Clean the orifice—the tiny hole in the center—with a thin wire or a needle. This is the brain of the valve. If it’s blocked, the physics of the valve fails. Don’t skip this.
Can I flush my valves without taking them apart?
Yes, you can perform a top-down flush by removing the solenoid entirely while the water is off, then briefly turning the main water supply back on. The resulting ‘geyser’ out of the solenoid port will eject any debris trapped in the upper chamber. Be prepared to get wet. It is messy but highly effective for clearing out sand that a standard bleed screw won’t move.
“A well-maintained irrigation system can reduce water waste by up to 30%, but failure to address weeping valves often results in localized soil saturation and anaerobic conditions.” – ASABE Standards for Landscape Irrigation
Irrigation System Maintenance Checklist
- Monthly Solenoid Check: Inspect wires for corrosion or nicks from yard cleanup tools.
- Quarterly Manual Bleed: Open the bleed screw for 30 seconds to clear seasonal sediment.
- Diaphragm Inspection: Every two years, pull the bonnet on the master valve to check for rubber fatigue.
- Static Pressure Test: Ensure your regulator is maintaining 50-60 PSI to prevent ‘water hammer’ damage to valves.
- Filter Cleaning: If on a well, clean the central disc filter every month to prevent sand from reaching the valves.
Remediation and Long-Term Stability
After you have successfully flushed the valves and stopped the leaks, you must address the damage caused by the water. Over-saturated soil leads to compaction and root rot. If the leak occurred on a new sod install, you might need to core aerate the area once it dries to re-introduce oxygen to the root zone. Check the soil pH; excessive water can leach nitrogen and alter the chemical balance of your landscaping. A professional yard isn’t just about the hardware; it’s about the biology. Keep your valves tight, your lines clean, and your pressure regulated. Your landscape depends on it. High-end systems require high-end maintenance. Don’t be a hack. Do the work right the first time.