
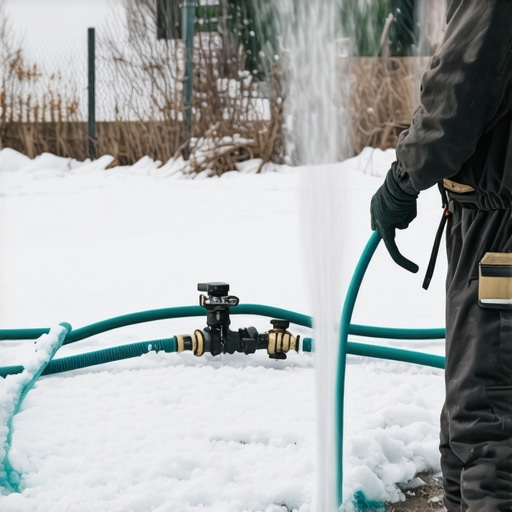
The Engineering Reality of Winterization
Properly winterizing an irrigation system requires moving a high volume of air at low pressure to evacuate water before the frost line penetrates the soil depth. For the 2026 season, homeowners must understand that failing to clear lines leads to ice expansion, which exerts up to 30,000 PSI of internal pressure—enough to shatter schedule 40 PVC and tear through poly-pipe walls. I always drill into my new crew members: if you don’t fix the soil grading and clear these lines properly, every plant you put in the ground is just expensive compost. I’ve seen $15,000 sod install projects ruined by a single forgotten zone that leaked all winter, creating a subsurface ice sheet that suffocated the root zone by spring. If you think a small shop compressor will do the job, you’re mistaken. You need volume, not just pressure.
“The most common cause of irrigation system failure in cold climates is improper winterization, leading to freeze-thaw expansion that compromises PVC tensile strength.” – Irrigation Association Technical Manual
Why CFM Matters More Than PSI
CFM (Cubic Feet per Minute) is the measurement of air volume, which is the primary force required to push water through irrigation pipes during a blow-out. While high PSI (Pounds per Square Inch) can burst a pipe, high CFM ensures the water is pushed out as a solid slug rather than the air simply bubbling over the top of the water in the pipe. For most residential systems, you need a compressor capable of 100 to 185 CFM. Most DIY units barely hit 5 CFM. It won’t work. The air will bypass the water, leaving enough behind to settle in low spots, freeze, and crack your fittings. This is a physics problem, not a DIY project. Don’t skip the equipment specs.
| Compressor Type | CFM Output | Suitability | System Risk |
|---|---|---|---|
| Pancake Compressor | 2.0 – 4.5 | None | Critical Failure |
| Small Industrial | 15 – 30 | Single Zone Only | High Residual Water |
| Tow-Behind Diesel | 185+ | Professional Grade | Minimal Risk |
The Step-by-Step Blow-Out Protocol
A professional yard cleanup isn’t complete until the backflow is isolated and the lines are dry. Start by shutting off the main water valve in the basement or the insulated pit. Use the blow-out method by connecting your air lead to the downstream side of the backflow preventer. Never blow air through the backflow device itself; the friction of high-velocity air can melt the internal rubber seals and plastic check valves. Set your compressor regulator to 50 PSI for PVC systems or 80 PSI for poly-pipe. Any higher and you risk friction-welding the sprinkler heads to their housings.
- Close the main water supply and drain the interior line.
- Attach the compressor to the blow-out port via a Chicago-style fitting.
- Activate the furthest zone from the compressor first to relieve initial pressure.
- Run each zone for 2-3 minutes until only a fine mist is visible.
- Repeat the cycle once more to clear residual seepage from low-head drainage.
Common Failures in Modern Irrigation Systems
How much modified gravel do I need for a patio base? While that’s a hardscape question, it relates to irrigation because poor drainage around your valve boxes leads to faster freezing. If your valve box is sitting in heavy clay, it will hold water like a bucket, freezing the manifold even if the lines are blown clear. You need a 6-inch layer of 3/4-inch clean stone under every valve box to ensure drainage.
“A retaining wall doesn’t fail because of the stone; it fails because of the water trapped behind it.” – Hardscape Engineering Axiom
This applies to your irrigation too. If water can’t drain away from the components, ice will find a way to break them. How do I know if my sprinkler lines are empty? You watch the heads; when the heavy spray turns to mist, and the mist turns to a steady stream of air, you are 95% there. But don’t let the heads run dry for more than a minute. The plastic gears in rotary heads are lubricated by water. Without it, the friction of the air will smoke the gears. It will rot the internal seals. Don’t be a hack. Do it right or pay me to fix it later.
The Interconnectivity of Landscaping Maintenance
When performing a yard cleanup, ensure all sprinkler heads are clear of debris. Grass clippings and mulch can be sucked into the nozzle during the vacuum phase of a blow-out if the seals are old. This creates clogs that you won’t find until you try to start the system in May. If you’re planning a landscaping overhaul, map your lines before you dig. I can’t tell you how many times I’ve seen a sod install ruined because a shovel went through a lateral line that wasn’t properly winterized and had become brittle. High-end landscaping is about the systems you don’t see. The soil microbiology, the drainage, and the integrity of the irrigation. If you ignore the blow-out, you’re just gambling with your equity. The 2026 season will likely see deeper frost lines based on current meteorological shifts. Adjust your depth of bury accordingly. 12 inches isn’t enough in the north; you need 18.
Maintenance and Post-Blow-Out Care
Once the air is disconnected, leave the manual test petcocks on the backflow preventer at a 45-degree angle. This prevents water from being trapped in the ball valve, which is the #1 reason for backflow failure. If the valve is fully open or fully closed, water stays behind the ball and splits the brass casing when it freezes. It’s a simple mechanical truth. Professional landscaping requires attention to these microscopic details. It’s about the PSI, the CFM, and the specific gravity of the materials you’re working with. Take care of the system, and it will take care of your turf. Neglect it, and you’ll be digging up your yard in the mud of April. Work smart. Keep the pressure low and the volume high.