
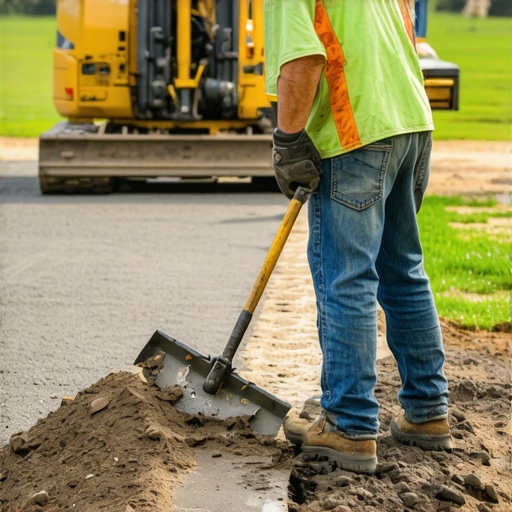
Landscape architecture is not a cosmetic industry; it is a structural one. When we discuss the 2026 standards for driveway edging, we are looking at the critical interface between rigid pavement and biological turf systems. A vertical spade cut is the only professional method to manage this transition. It requires more than a steady hand; it requires an understanding of soil shear strength and the mechanical properties of root systems. If you are still using plastic bender board or thin-gauge aluminum strips, you are not landscaping. You are just delaying the inevitable collapse of your edge. Proper edging is about creating a structural void that manages water and prevents biological encroachment. It is the invisible backbone of a high-end property. Do not compromise on the incision.
The Engineering Logic of the Vertical Spade Cut
The vertical spade cut serves as a structural drainage channel and root barrier that prevents turfgrass stolons from infiltrating the driveway subbase while providing a 90-degree mechanical break that facilitates clean yard cleanup and sod install integrity. This method relies on the physics of a ‘V-trench’ to manage hydrostatic pressure at the edge of the asphalt or pavers. By creating an air gap, you effectively stop the lateral migration of grass through air-pruning. It is simple biology met with a sharp blade.
I always drill into my new crew members: if you don’t fix the soil grading first, every plant you put in the ground is just expensive compost. I remember a job back in ’08 where a homeowner had spent fifty grand on a custom paver driveway, only to have the entire perimeter undermined within two seasons. Why? Because the previous contractor used a power edger to just ‘scuff’ the surface. They didn’t understand that without a true vertical cut, water traps against the edge of the stone. That water freezes, expands, and heaves the pavers. I had to go in, rip out the perimeter, re-compact the 21A modified stone base, and establish a true six-inch vertical spade edge. It was a lesson in why the right tool and the right angle matter more than the speed of the job. Precision is the only thing that lasts in this dirt.
“A retaining wall doesn’t fail because of the stone; it fails because of the water trapped behind it.” – Hardscape Engineering Axiom
How deep should a driveway edge be cut?
To achieve a professional result, the vertical cut should penetrate exactly 4 to 6 inches into the soil profile, ensuring you bypass the thatch layer and reach the compacted subgrade. This depth ensures that the rhizomes of aggressive grasses like Kentucky Bluegrass or Bermuda cannot easily dive under the edge. If the cut is too shallow, the roots will simply find a path through the top two inches of organic matter. You must hit the mineral soil to create a lasting barrier.
| Edging Method | Structural Integrity | Drainage Efficiency | Maintenance Frequency |
|---|---|---|---|
| Vertical Spade Cut | High | 9/10 | Bi-Annual |
| Plastic Strip | Low | 2/10 | Monthly (Repair) |
| Concrete Curbing | Very High | 5/10 | Annual |
| Power Edger (Surface) | Zero | 4/10 | Weekly |
The Metallurgy and Mechanics of the Perfect Cut
The choice of tool dictates the success of the landscaping project. A stamped-steel spade from a big-box store will flex under the pressure of clay-heavy soil, resulting in a jagged, unprofessional line. We use forged, high-carbon steel spades with a sharpened 15-degree bevel. This allows the blade to slice through sod install layers like a scalpel through skin. When the blade hits a rock, it shouldn’t deflect; it should either move the rock or cut a clean line around it. A dull blade crushes grass tissue, leading to necrosis and fungal entry points. A sharp blade severs the cells cleanly, allowing the plant to seal the wound within 48 hours. This is agronomy in action. Don’t skip the sharpening stone. It is a tool, not a toy.
Will a vertical spade cut damage my irrigation lines?
A properly installed irrigation system should have lateral lines buried at least 8 to 12 inches deep, well below the 6-inch vertical spade cut zone, though swing pipes near the edge require careful marking and depth verification. If your lines are at 3 inches, the system was installed by hacks. Before we start any yard cleanup or edging, we pressure-test the zones and mark every head. We never assume the depth is correct. We verify. It is cheaper to hand-dig a few feet than to repair a poly-pipe blow-out in the middle of a new sod install.
“Effective root zone management requires a clear physical separation between the managed turf and the non-permeable hardscape surface to prevent moisture-induced structural decay.” – University of Georgia Agricultural Extension
- Verify utility locations (Call 811) before any deep trenching.
- Ensure soil moisture is at 20-30% for a clean, non-crumbling cut.
- Use a tensioned string line for runs exceeding 15 feet.
- Execute the 90-degree vertical incision first.
- Remove the 45-degree wedge (the ‘biscuit’) to create the V-trench.
- Backfill the trench with high-quality triple-shredded hardwood mulch, never dyed mulch.
Integrating Edging with Sod and Irrigation
When performing a sod install, the edging is the last step of the preparation and the first step of the finish. You cannot simply lay sod up to a driveway and hope it stays. You must tuck the edge. This involves cutting the sod slightly long and hand-pressing the roots into the vertical cut. This prevents the edges from drying out—a common failure point in landscaping projects. Furthermore, your irrigation heads should be set back exactly 2 inches from the edge. This allows the spade to pass between the head and the driveway without damage. If the head is flush with the asphalt, it will get crushed by a vehicle or clipped by a mower. These measurements are not suggestions. They are the difference between a project that ages gracefully and one that falls apart in eighteen months.