
The Hardscape Autopsy: Why Water Always Wins
I recently got called out to tear up a $30,000 patio that was sinking because the previous contractor thought a few bags of leveling sand could outsmart gravity and hydro-physics. The homeowner was devastated. The pavers were undulating like a mountain range because water was trapped in the base layer with nowhere to go. This is what happens when you treat landscaping as a cosmetic hobby instead of an engineering challenge. A dry creek bed is not just a collection of pretty rocks; it is a functional swale designed to mitigate hydrostatic pressure and prevent the structural failure of your hardscape and foundation. If you do not give water a path, it will carve its own through your bank account.
What is a Dry Creek Bed?
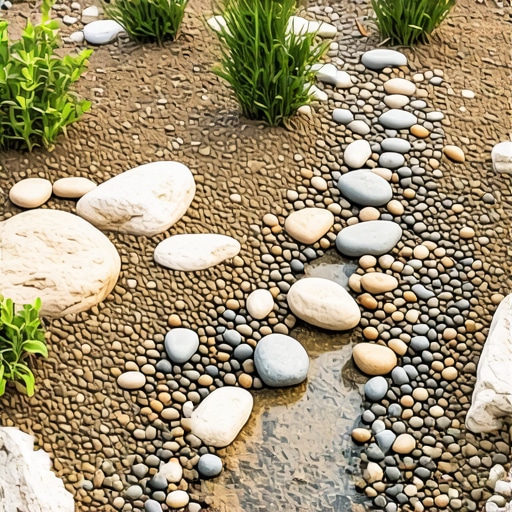
A dry creek bed is a functional drainage swale designed to direct surface runoff away from structures and low spots using engineered grading, non-woven geotextile fabric, and multi-sized river rock to manage water velocity and volume effectively. It serves as a relief valve for your yard during heavy precipitation events.
“A retaining wall doesn’t fail because of the stone; it fails because of the water trapped behind it.” – Hardscape Engineering Axiom
The Physics of Site Assessment and Grading
Before you touch a shovel, you must understand the topography of the lot. Water follows the path of least resistance, governed by the laws of thermodynamics and gravity. You need a minimum 2 percent slope for positive drainage. This means the elevation must drop 2 inches for every 10 feet of run. Use a transit level or a simple line level to verify this. Guessing is for amateurs. If your yard has heavy clay soil, common in many regions, the percolation rate is nearly zero. This makes the dry creek bed even more critical because the soil will not absorb the irrigation runoff or storm surge fast enough to prevent pooling. Call 811 before you dig. Striking a gas line or a fiber optic cable will end your project before the first rock arrives.
Material Selection: Beyond the Big Box Store
The biggest mistake DIYers make is buying bags of pea gravel. Pea gravel is round and small; it acts like ball bearings and will wash away in the first heavy rain. You need angular and rounded stones of varying sizes to create an interlocking matrix. We use a mix of 2-inch to 6-inch river jacks for the base and larger 12-inch to 24-inch boulders for the banks. This creates “roughness” which slows down water velocity. Speeding water causes erosion. Slowing water allows for sediment dropout and controlled redirection.
| Material Type | Function | Professional Grade Specification |
|---|---|---|
| Non-woven Geotextile | Separation and Filtration | 4 oz or 6 oz needle-punched fabric |
| River Jacks (3-5 inch) | Main Channel Bedding | Smooth, rounded granite or river stone |
| Rip-Rap / Boulders | Bank Stabilization | Angular limestone or fieldstone |
| Modified Gravel | Structural Underlayment | ASTM D2940 standards |
Step 1: Excavation and Trench Geometry
Most people dig a shallow trench and call it a day. It will fail. You need to excavate a trench that is at least 12 to 18 inches deep in the center, tapering upward to the edges in a shallow “U” shape. A “V” shape concentrates too much pressure at the bottom and can tear your fabric. The width should be proportional to the volume of water you are moving. If you are catching a downspout from a 2,000 square foot roof, your creek bed needs to be wider to handle the cubic feet per second (CFS) of flow. Dig it deep. Don’t skip the labor.
Step 2: Installing the Geotextile Barrier
Never use cheap plastic weed barrier. It is garbage. Use a professional-grade, non-woven geotextile fabric. This fabric allows water to pass through into the subsoil while preventing the heavy stones from sinking into the mud. If the stone mixes with the dirt, you lose your drainage capacity. Overlap your seams by at least 12 inches and pin them down with 6-inch steel landscape staples. Ensure the fabric extends past the edges of the trench; you will trim the excess later after the boulders are set. This is a critical step in any yard cleanup or long-term landscaping plan.
How deep should a dry creek bed be?
A professional dry creek bed should have an excavation depth of 12 to 18 inches to allow for 4 inches of bedding stone and 6 to 10 inches of larger structural rock while still maintaining a defined channel below the surrounding grade. This depth ensures that the water remains contained within the swale during peak flow periods rather than cresting the banks and saturating the surrounding sod install areas.
Step 3: Managing Water Velocity with Boulders
Place your largest boulders first. These are your “anchor” stones. Put them at the bends of the creek bed. In nature, water hits the outside of a curve with the most force. By placing heavy boulders there, you prevent the water from blowing out the side of your channel. This is basic hydraulic engineering. Mix the sizes. Use smaller 1-inch stones to fill the gaps between the larger rocks. This prevents the fabric from being visible and creates a natural look. It must look like it has been there for a hundred years.
“Surface drainage systems must be designed to accommodate the 10-year storm event to prevent structural inundation.” – Agricultural Extension Drainage Manual
Integrating Irrigation and Sod
If you are doing a sod install at the same time, ensure the edges of the sod are tucked down below the lip of the creek bed. If the sod is higher than the rock, water will run under the grass and wash out your soil. This is a common failure point. Furthermore, check your irrigation zones. Do not have sprinkler heads spraying directly into the creek bed. You are wasting water and potentially creating unnecessary erosion patterns. The creek bed is for drainage, not for collecting your expensive municipal water.
How do I maintain a dry creek bed?
Maintenance is non-negotiable. At least twice a year, perform a yard cleanup to remove leaves, twigs, and sediment that have collected in the rocks. If organic matter builds up, it will turn into compost, and weeds will start growing in your creek bed. Use a leaf blower to clear out the debris. If you see the rocks shifting after a major storm, reposition them immediately. Maintenance is cheaper than reconstruction.
Common Pitfalls to Avoid
Don’t use mulch inside the creek bed. It will float away. Don’t use sand as a base; it will wash into the fabric and clog the pores. Don’t build it too small. Most DIY creek beds look like a skinny snake crawling through the yard. Scale it up. Make it look like a feature, not an afterthought. If you have a steep slope, you may need to install “check dams”—small walls of rock that create tiny waterfalls—to slow the water down even further. Gravity is a relentless force; you must respect it.
The Settling-In Period
In the first year, your dry creek bed will settle. This is normal. You might see some small areas where the fabric is exposed or where rocks have shifted. Keep a few extra buckets of river jacks on hand to fill these gaps. After a few heavy rains, the rocks will “lock” into place as the fines in the soil settle around the fabric. Once the surrounding vegetation or sod install takes root, the entire system becomes much more stable. A well-built drainage system is the foundation of a high-end landscape. Without it, everything else is just temporary decor.