
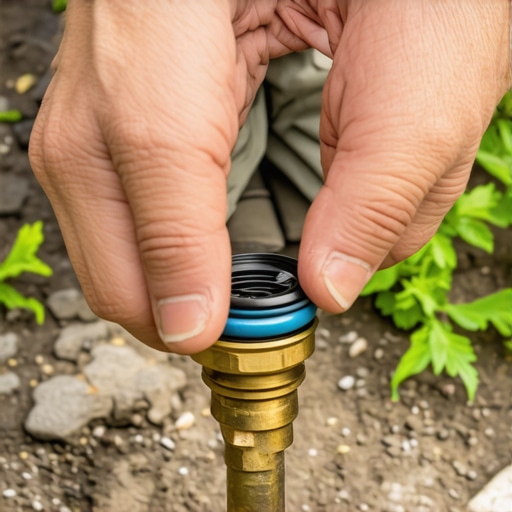
A leaking sprinkler valve is not just a nuisance; it is a mechanical failure that compromises the entire hydraulic integrity of your landscaping system. When you notice a constant puddle around your valve box or a specific zone that never seems to dry out, you are witnessing the slow death of your soil structure. This is not about a few drops of water. It is about hydrostatic pressure and the failure of a component that costs less than fifty cents but manages hundreds of gallons of flow. In my twenty years of managing high-end irrigation systems, I have seen five-figure sod installs ruined because a homeowner ignored a weeping valve for three weeks. The soil becomes anaerobic, the roots rot, and the grass dies. It is avoidable.
The Anatomy of a Leaking Valve
A weeping sprinkler valve is usually caused by a degraded O-ring or a failed diaphragm within the valve body, allowing water to bypass the seal under pressure. This leads to swampy turf, high water bills, and potential foundation damage from constant soil saturation. Most modern valves use a pilot-operated design where a small solenoid controls the pressure balance between the upper and lower chambers. When an O-ring at the solenoid interface or the bonnet seal fails, that balance is lost. The valve stays partially open. The result is a constant flow of water that bypasses the shut-off command.
“Irrigation valves are the heart of the system; a failure of 1/1000th of an inch in a seal can waste 1,000 gallons of water per month.” – Irrigation Association Technical Manual
I always drill into my new crew members: if you don’t fix the soil grading first, every plant you put in the ground is just expensive compost. But the second lesson is that water always wins. I remember a job in a heavy clay region where a simple O-ring leak on a solenoid turned a backyard into a literal bog in forty-eight hours. The apprentice thought it was just ‘a little damp.’ By the time we got there, the hydrostatic pressure had saturated the sub-base of a nearby paver patio, causing the edge restraints to heave. We had to dig out three tons of muck just because a rubber ring had a hairline fracture. Do not be that guy. Fix the leak the moment you see it. You are not just saving water; you are protecting the engineering of your yard.
How do I know if my sprinkler valve diaphragm is bad?
You can identify a bad diaphragm if the valve fails to shut off completely or if water leaks from the bonnet assembly even when the solenoid is tightened. Often, a small pebble or grain of sand gets lodged between the diaphragm and the valve seat, preventing a watertight seal. This is common after a yard cleanup or a new sod install where dirt enters the lines during construction. If the rubber is brittle or has visible tears, the diaphragm must be replaced immediately to prevent soil erosion and water waste.
Can I replace just the O-ring on a jar-top valve?
Yes, replacing the O-ring on a jar-top valve is a standard maintenance task that involves unscrewing the threaded bonnet and swapping the large-diameter seal. Jar-top valves are notorious for O-ring failure because the threaded caps can expand and contract with temperature swings, eventually pinching the rubber. When performing this fix, ensure the O-ring seat is free of mineral deposits. A single speck of calcium can create a bypass channel that leads to a persistent leak. Use a silicone-based lubricant to ensure a proper seal during reassembly.
| Material | Durability Rating | Best Use Case | Chemical Resistance |
|---|---|---|---|
| Buna-N (Nitrile) | Standard | Residential irrigation | Good for oils and water |
| Viton (FKM) | Extreme | Reclaimed water / High Heat | High chemical resistance |
| EPDM | High | Outdoor UV exposure | Excellent for weathering |
The physics of the valve depend on the pilot hole. In a standard 24VAC solenoid valve, water enters the top chamber through a small orifice in the diaphragm. Because the top surface area is larger than the bottom, the water pressure holds the valve shut. When the solenoid activates, it lifts a plunger, opening a small port that allows the top chamber to vent. This drops the pressure, and the main line pressure pushes the diaphragm up. If the O-ring around that solenoid plunger or the one sealing the solenoid to the bonnet is cracked, the venting never stops or the pressure never builds. This is why O-rings matter. They are the gatekeepers of the pressure differential.
The Forensic Autopsy of a Failed Seal
When you pull a valve apart, do not just throw parts at it. Look at the failure. If the O-ring is flattened, it has reached its compression set limit. If it is nibbled or torn, you likely have high-pressure surges (water hammer) hitting your system. Most residential valves are rated for 150 PSI, but they perform best at 40 to 60 PSI. If your street pressure is hitting 100 PSI and you don’t have a regulator, your O-rings will fail every few years. It is a mechanical certainty. High pressure forces the rubber into the gaps between the plastic components, causing microscopic shearing.
“Anaerobic conditions in soil, often caused by persistent irrigation leaks, lead to the buildup of toxic gases like hydrogen sulfide.” – University of California Agriculture and Natural Resources
- Shut off the main water supply to the irrigation manifold.
- Bleed the pressure from the line using the manual bleed screw.
- Unscrew the solenoid counter-clockwise and inspect the small O-ring at the base.
- Clean the threads with a soft brush to remove grit.
- Apply a thin layer of silicone grease to the new O-ring.
- Reseat the solenoid and test for leaks under full static pressure.
Irrigation maintenance is often neglected until the lawn is brown or the water bill is four digits. A proper landscaping professional knows that the irrigation system is a precision instrument. When we do a yard cleanup, we don’t just blow leaves. We check the valve boxes for ‘weeping.’ A weeping valve indicates a seal on its way out. If you catch it early, it is a five-minute fix. If you wait, you are looking at a full valve replacement, which involves cutting PVC, digging in the mud, and potentially introducing more debris into your lateral lines. It is a cycle of failure that is easily broken with a simple maintenance routine.
The Step-by-Step O-Ring Remediation
Start by identifying the exact valve. In a manifold, this can be tricky. Turn the zone on and off via the controller. Listen for the ‘thunk’ of the plunger. Once identified, clear all debris from the valve box. If the box is full of mud, you already have a leak. Use a shop vac to clear the water so you aren’t working in a slurry. Dirt is the enemy of O-rings. If a single grain of sand gets into the valve body while you have it open, you will never get it to seal again. Cleanliness is more important than the tools you use.
Remove the bonnet screws in a star pattern. This prevents the plastic from warping. Once the bonnet is off, inspect the diaphragm. Hold it up to the light. Look for pinholes. If the diaphragm is fine, the leak is likely the solenoid O-ring or the bonnet seal itself. Replace the O-ring with a matching size. Do not guess. Bring the old one to a professional irrigation supply house, not a big-box store. The tolerances in irrigation are tighter than you think. A #12 O-ring and a #13 look identical but are not interchangeable under 60 PSI of head pressure. Reassemble with care. Tighten the screws until they are snug, then another quarter turn. Do not over-torque. Plastic threads strip easily, and then you are replacing the entire manifold.