
The Autopsy of a Dying Lawn: Why Fresh Sod Fails
New sod fails to root primarily due to soil compaction, hydrophobic soil layers, or excessive nitrogen application that burns emerging root nodes. To fix this, you must ensure a loose, nutrient-rich seedbed and maintain consistent moisture at the 2-inch soil depth, not just the surface. I recently walked onto a property where a homeowner had spent $8,000 on premium Tall Fescue sod only to watch it turn into expensive brown straw within fourteen days. They thought they were doing everything right, but they had committed the ultimate cardinal sin of landscaping: they applied a high-nitrogen ‘starter’ fertilizer from a big-box store directly onto the bare ground before laying the turf. When I pulled up a corner of the sod, the soil underneath was bone-dry and hard as a parking lot, despite the surface being muddy. The nitrogen had chemically scorched the few root initials that tried to emerge, and the compacted clay underneath acted like a sealed concrete vault. The roots had nowhere to go. It was a chemical nightmare that required a full yard cleanup and a total restart. If you don’t fix the soil mechanics, you are just throwing money into a wood chipper.
“The most common reason for turf establishment failure is the lack of adequate soil-to-root contact and improper moisture management.” – University of California Agriculture and Natural Resources
The Science of Root Establishment
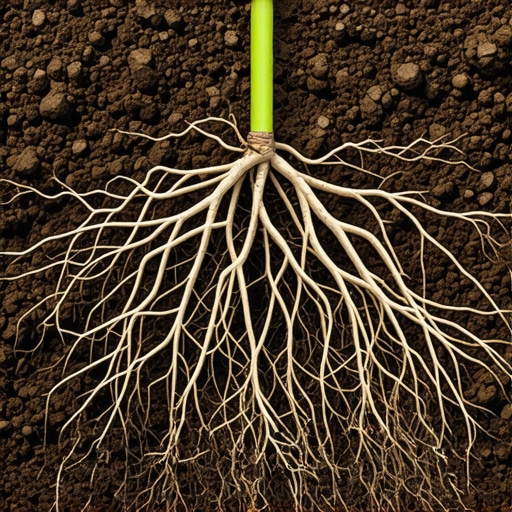
Rooting is not a passive process; it is a biological race against desiccation. For a sod install to succeed, the adventitious roots must penetrate the soil interface within 72 hours. If they hit a layer of compacted clay or an air pocket, they dry out and die. This is why a simple yard cleanup isn’t enough; you need a forensic approach to the substrate.
How long does it take for new sod to root?
New sod typically begins to establish shallow roots within 7 to 14 days and should be fully knitted to the soil within 3 to 4 weeks. Factors such as soil temperature, moisture levels, and the degree of soil compaction will significantly accelerate or hinder this timeline. Check for rooting by gently lifting a corner; resistance means success.
Soil Hack 1: Mechanical Decompaction and the 6-Inch Rule
Most contractors just scrape the weeds and lay the grass. That is a failure waiting to happen. You must achieve a soil density that allows for oxygen exchange. Roots need air as much as water. I mandate a minimum of 6 inches of loosened soil. If you can’t push a screwdriver 4 inches into the ground with one hand, your sod will fail. You need to use a rear-tine tiller to break the surface tension and incorporate organic matter. This destroys the ‘glazing’ effect caused by heavy machinery during the yard cleanup phase. Don’t skip the rolling. A water-filled roller after installation is the only way to eliminate the air pockets that kill root hairs.
Soil Hack 2: Cation Exchange Capacity (CEC) and pH Balancing
Your soil is a battery, and the Cation Exchange Capacity (CEC) determines how much energy (nutrients) it can hold. If your pH is off—either too acidic or too alkaline—the nutrients are ‘locked’ and the grass cannot eat. For most turfgrasses, you are looking for a pH of 6.5. If you are dealing with heavy clay, you likely need pelletized lime to raise the pH. If you’re in a sandy biome, you need humic acid to increase the CEC. Without this balance, your irrigation and fertilizer are useless. Use the table below to evaluate your soil amendment needs.
| Soil Type | Primary Challenge | Required Amendment | Benefit |
|---|---|---|---|
| Heavy Clay | Low Oxygen/Compaction | Gypsum & Compost | Improves drainage and structure |
| Sandy Loam | Nutrient Leaching | Humic Acid/Biochar | Increases nutrient retention |
| Acidic (Low pH) | Nutrient Lockout | Pelletized Lime | Balances pH for root uptake |
“Soil compaction limits oxygen availability to the root zone, effectively suffocating the plant before it can establish a vascular network.” – Texas A&M AgriLife Extension
Soil Hack 3: The Hydrostatic Strategy—Irrigation Beyond the Surface
Most people over-water the leaves and under-water the roots. This is the ‘lazy root’ syndrome. For the first 10 days, you need to keep the soil-sod interface saturated. But after day 10, you must transition to deep, infrequent watering. You want to force those roots to dive deep into the subsoil in search of moisture. If you keep the top half-inch wet, the roots will stay in the top half-inch. Then, when the first heatwave hits, the lawn dies. It’s simple biology. You need a functional irrigation system that delivers exactly 1 inch of water per week, measured by rain gauges, not by ‘minutes on a timer.’
How often should I water new sod?
New sod requires watering 2 to 3 times per day for the first 10 days, ensuring the soil underneath remains moist. Once rooted, transition to one deep watering session every 2 to 3 days to encourage deep root growth and prevent fungal diseases associated with constant surface moisture.
Pre-Installation Checklist: Don’t Lay a Single Piece Until You Check These
- Verify soil pH is between 6.0 and 7.0 using a professional lab test.
- Ensure all weeds are eradicated and old organic debris is removed during yard cleanup.
- Check that the irrigation system provides 100% head-to-head coverage.
- Confirm the grade slopes away from the foundation at a 2% minimum.
- Apply a high-phosphorus (not high nitrogen) starter fertilizer to promote root branching.
Landscaping is an investment in civil engineering. If you treat your sod like a carpet, it will rot like a carpet. Treat it like a living organism that requires a structured environment, and it will survive for decades. It’s not magic. It’s mechanics. Don’t cut corners on the prep work, or you’ll be calling me to tear it all out and start over in six months.