
The Forensic Autopsy of a Dying Lawn
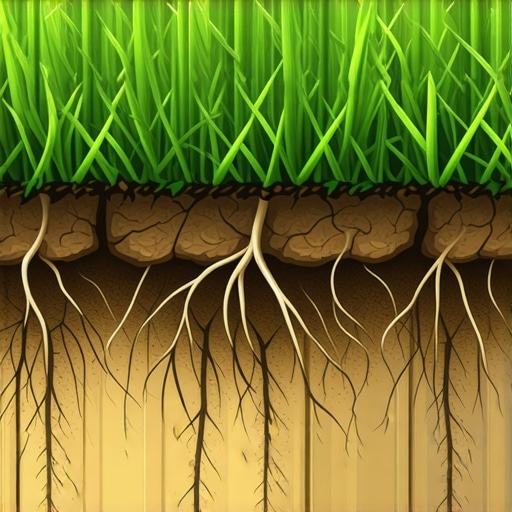
You wake up to find your turf looking like a scorched battlefield. The patches are irregular, yellowing, and have a distinct wilted appearance despite your irrigation schedule. When you walk across it, the ground feels unnervingly spongy, as if there is a void between the grass and the soil. This is not just drought stress. This is a subterranean assault. Lawn grubs, the larval stage of various beetles, are currently severing the vascular system of your yard, one root at a time. They operate in the rhizosphere, the critical zone where nutrient exchange happens. If you do not intervene now, you are not looking at a simple yard cleanup; you are looking at a full-scale sod install to replace the dead organic matter.
The Chemical Nightmare: A Cautionary Tale
A homeowner called me in a panic after they completely torched their front lawn by applying three different types of ‘rescue’ fertilizers and a double dose of high-intensity insecticide in the middle of a 95-degree heatwave. They thought more was better. Instead of killing the grubs, they triggered a massive soil burn. The high salt index in the fertilizer drew every bit of moisture out of the remaining roots, effectively mummifying the grass while the grubs simply burrowed deeper into the cool subsoil to wait out the chemical storm. We had to excavate four inches of contaminated topsoil just to make the ground viable for new growth. Do not treat your lawn like a laboratory experiment without understanding the chemistry of the soil first.
How to Spot Lawn Grubs Before Damage Becomes Irreversible
To spot lawn grubs, look for irregularly shaped brown patches that feel spongy or loose underfoot during late summer or early spring. If the turf peels back like a piece of carpet, revealing C-shaped white larvae with brown heads, you have an infestation exceeding the economic threshold of 6 to 10 grubs per square foot. This visual confirmation is the only way to distinguish grub damage from fungal pathogens like necrotic ring spot. Testing is simple: grab a handful of the affected grass and pull upward. If it comes up with no resistance and no roots attached, the grubs have already finished their meal. You are looking at the ‘instar’ stages of development, where their appetite is at its peak. Every day you wait, the damage area expands exponentially as the larvae migrate to healthier root zones.
“White grubs are the most suppressed and difficult to manage pests in turfgrass because they reside in the soil, which acts as a buffer against many control measures.” – Agricultural Experiment Station Manual
How do I know if I have grubs or just dry spots?
The ‘Tug Test’ is the gold standard for diagnosis. Unlike drought-stressed grass, which remains firmly rooted in the ground but turns brittle, grub-damaged turf has lost its structural anchor. If the grass pulls up easily, it is grubs or a similar root-feeder. If it stays anchored but looks brown, you likely have an irrigation coverage issue or a localized fungal outbreak. Check the soil moisture levels with a screwdriver; if the soil is moist but the grass is dead and detached, grubs are the primary suspect.
The Life Cycle of Destruction: Why Timing Is Everything
Grubs follow a rigid biological clock. Most species, like the Japanese Beetle or the June Bug, have a one-year life cycle. They emerge as beetles in early summer, mate, and lay eggs in the soil. By August, those eggs hatch into tiny larvae that immediately begin feeding on roots to gain mass for winter. This is the window of vulnerability. If you miss this window, the grubs grow larger and more resistant to standard treatments. By the time they reach their third instar stage in late September, their chitinous shell thickens, and their metabolism slows, making them nearly impossible to kill with preventative chemicals. You must hit them when they are young and actively feeding near the surface.
When is the best time to apply grub control?
The optimal window for preventative grub control is between late May and early July, just before the eggs hatch. For curative treatments, the window is August through September, when the larvae are small and close to the soil surface. Applying treatments in the dead of winter or during the height of the beetle flight is a waste of resources, as the larvae are either too deep or have not yet hatched into the soil profile.
| Treatment Type | Active Ingredient | Application Timing | Soil Depth Target |
|---|---|---|---|
| Preventative | Chlorantraniliprole | April – June | 0 – 2 inches |
| Curative | Trichlorfon | August – September | 0 – 1 inch |
| Biological | Milky Spore / Nematodes | Spring / Fall | 2 – 4 inches |
The Forensic Remediation Process
If you have confirmed a high grub count, you need a multi-phase recovery plan. It is not enough to just kill the bugs; you have to rebuild the biological infrastructure they destroyed. First, apply a fast-acting curative insecticide like Dylox (Trichlorfon). This chemical must be watered in immediately with at least half an inch of water to move the active ingredient through the thatch layer and into the root zone. Without water, the chemical sits on the surface and degrades in sunlight. It is useless. Second, once the kill is confirmed (usually within 48-72 hours), you must address the dead zones. Dethatching is often necessary because the dead grass creates a thick layer of debris that prevents oxygen and water from reaching the soil. If the damage is severe, this is the time for a sod install or heavy overseeding. Use a starter fertilizer with a high phosphorus count to encourage rapid root elongation.
The Engineering of a Grub-Resistant Yard
A healthy lawn can actually withstand a low population of grubs without showing any visible damage. The key is root depth and turf density. I always tell my crews: ‘We aren’t growing grass; we are growing roots.’ This starts with irrigation. Stop watering for 10 minutes every day. That shallow watering keeps the roots at the surface, right where the grubs live. Instead, move to deep, infrequent watering. You want to provide one inch of water per week in a single session. This forces the roots to chase the moisture deep into the soil, far below the primary feeding zone of the grubs. Additionally, keep your mower height at 3.5 to 4 inches. Taller grass has a deeper root system and provides more shade to the soil, which can actually deter some beetle species from laying eggs.
“Compacted soils and excessive thatch layers create a micro-environment that protects larvae from temperature extremes and chemical treatments.” – ICPI Hardscape and Turf Standards
- Aerate annually: This reduces soil compaction and allows treatments to penetrate the soil.
- Manage thatch: Keep the thatch layer under 0.5 inches to ensure chemicals reach the grubs.
- Monitor beetle activity: If you see a heavy flight of Japanese beetles in July, prepare for grubs in August.
- Check 811: Before any deep aeration or renovation, ensure your utility lines are marked.
- Use high-quality seed: Endophyte-enhanced fescues can have a natural resistance to some surface-feeding insects.
Post-Infestation Recovery and Maintenance
Once you have cleared the infestation, your job is to stabilize the soil. A yard cleanup should involve removing any dead, loose material that could harbor fungal spores. If you are doing a sod install to patch the holes, ensure the new sod has good soil-to-soil contact. Roll it. Water it heavily for the first 14 days. Do not skip this. The goal is to get the new roots to knit into the existing soil before the next season’s egg-laying cycle begins. Long-term success depends on a consistent NPK (Nitrogen, Phosphorus, Potassium) balance that emphasizes root health over quick green-up. High nitrogen in the late spring can actually lead to succulent root growth that grubs find particularly delicious. Focus on potassium in the fall to increase cell wall strength and winter hardiness. It will rot if you leave the dead grass on top. Get it off. Clean the slate. Start over the right way.