
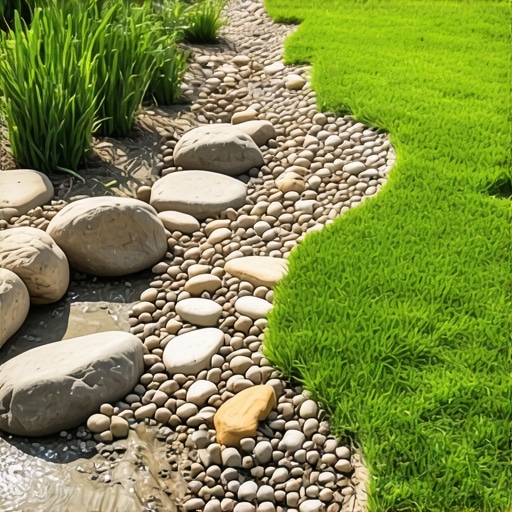
Engineering the Surface: Why Most Yard Drainage Fails
A dry creek bed is a functional drainage system designed to redirect excess surface runoff using a combination of graded excavation, non-woven geotextile fabric, and varied-size river rock to prevent soil erosion and foundation damage. Most homeowners think they can just throw some rocks in a ditch. That is how you end up with a mosquito-breeding swamp. If you do not account for the hydraulic conductivity of your soil and the peak flow rate of your property, your landscaping efforts are wasted. Real drainage work requires moving dirt with a purpose. I always drill into my new crew members: if you don’t fix the soil grading first, every plant you put in the ground is just expensive compost. We once spent four days re-grading a site because a previous contractor thought they could fight gravity with a pile of mulch. Gravity always wins. In this guide, we will treat your yard like the civil engineering project it actually is.
The Physics of Water Management
Before you touch a shovel, you must understand hydrostatic pressure and surface tension. When rain hits your yard, it follows the path of least resistance. If that path leads to your foundation, you have a structural problem. A dry creek bed creates a low-resistance channel that captures this water and moves it to a safe discharge point, such as a rain garden or a municipal storm drain. You need a minimum slope of 2 percent. That is a 2-foot drop for every 100 feet of run. Any less, and the water stays put. Any more, and you risk high-velocity scouring that will wash away your expensive stone. We use laser transits to verify these grades. Eyeballing it is for amateurs who don’t mind getting sued when the neighbor’s basement floods.
“A retaining wall doesn’t fail because of the stone; it fails because of the water trapped behind it.” – Hardscape Engineering Axiom
Soil Compaction and Subgrade Preparation
Your soil’s bulk density determines how much water it can absorb. If you have heavy clay, your infiltration rate is near zero. This is why we don’t just dig a trench and fill it with rocks. You have to prepare the subgrade. When we excavate, we look for ‘soft spots’ where the soil is saturated or unstable. We remove that material and replace it with 3/4-inch crushed limestone, compacted in 2-inch lifts. This creates a stable ‘bench’ for the creek bed. Yard cleanup during this phase is critical. Removing organic debris like old sod and decaying roots prevents future settling. If you leave a stump to rot under your creek bed, the whole thing will collapse in three years. Do it right the first time.
Material Selection: Beyond Aesthetics
The rocks you choose serve a structural purpose. We use the D50 measurement system, which refers to the median diameter of the stones. For the center of the channel where the water velocity is highest, you need larger, heavier stones like 6-to-12-inch river jacks. These stones provide the mass needed to resist the force of moving water. On the banks, you use smaller cobbles to lock the larger stones in place. Don’t use smooth pea gravel for the base. It acts like ball bearings and will shift under the weight of the water. You need angular stones that interlock. Also, never use cheap ‘weed fabric.’ It will clog with silt and turn your creek bed into an impervious slide. Only use 4-ounce or 6-ounce non-woven needle-punched geotextile. It allows water to pass through into the subsoil while keeping the rocks from sinking into the mud.
“Effective drainage design must account for the 100-year storm event to ensure long-term soil stability and prevent catastrophic runoff failure.” – Penn State Agricultural Extension
How deep should a dry creek bed be?
The center of a functional dry creek bed should be excavated to a depth of 12 to 18 inches to allow for proper stone layering and sufficient water volume capacity. You need at least 4 inches of structural stone at the bottom, and the top of the rocks should still sit 2 to 4 inches below the surrounding grade to prevent overtopping during heavy downpours. If the bed is too shallow, the water will simply flow over the sides and continue to erode your lawn or saturate your sod install. Depth is your safety margin. We always over-excavate slightly and backfill with structural aggregate to ensure the bed doesn’t become a trip hazard while still functioning as a high-capacity pipe without the pipe.
What is the best rock for a dry creek bed?
The best rocks for a drainage channel are weathered river rocks and granite cobbles because their weight and durability prevent them from being displaced by heavy flow. You want a mix of sizes. A uniform stone size creates large voids where silt can collect. A ‘well-graded’ mix of 2-inch, 4-inch, and 8-inch stones creates a self-filtering matrix. Avoid limestone if you are planting acid-loving species nearby, as it will leach minerals and spike your soil pH. For the edges, use surge stone or rip-rap to anchor the fabric and provide a transition to the rest of your landscaping.
| Material Type | Size Range | Engineering Function |
|---|---|---|
| Non-woven Geotextile | 4oz – 6oz | Soil separation and filtration |
| River Jacks | 6″ – 12″ | Energy dissipation and flow anchoring |
| Cobbles | 2″ – 4″ | Filling voids and stabilizing banks |
| Crushed Limestone | 3/4″ minus | Sub-base compaction and leveling |
Step-by-Step Installation Protocol
- Mark the Route: Use marking paint to layout a natural, meandering path. Avoid straight lines. Nature doesn’t use rulers, and straight lines accelerate water to dangerous speeds.
- Call 811: Never dig without utility marking. Striking a gas line or an irrigation main will turn a $2,000 project into a $20,000 disaster instantly.
- Excavate the Swale: Dig the center deeper than the edges. Maintain a consistent 2 percent pitch toward the exit point.
- Install Geotextile: Lay the fabric across the entire trench, extending it 6 inches past the edges. Pin it down with 6-inch landscape staples every 3 feet.
- Place Structural Stones: Start with the largest boulders. Place them at ‘bends’ in the creek where water impact is highest.
- Fill and Grade: Add the medium and small stones around the boulders. Ensure no fabric is visible.
- Finish the Edges: Tuck the excess fabric under the edge stones and backfill with topsoil.
System Maintenance and Long-term Function
A dry creek bed is not a ‘set it and forget it’ solution. Silt and organic matter will eventually accumulate between the rocks. Every spring, you need to perform a yard cleanup that includes blowing out leaves and checking for ‘blowouts’ where water might have bypassed the channel. If you see significant silt buildup, you may need to power-wash the stones to keep the fabric pores open. If the water isn’t disappearing into the ground within 24 hours of a storm, your subsoil is likely compacted, and you may need to integrate a 4-inch perforated French drain pipe beneath the creek bed. This hybrid approach handles both surface runoff and subsurface saturation. Precision matters. Don’t cut corners on the depth or the fabric. Your foundation depends on it.
“,”image”:{“imagePrompt”:”A professional technical cross-section illustration of a dry creek bed. It shows a 12-inch deep trench with a 2% slope, lined with gray non-woven geotextile fabric. The layers include a 4-inch base of crushed aggregate, large 8-inch river boulders in the center, and 3-inch cobbles on the sides. Labels indicate the flow of water and the soil compaction zones.”,”imageTitle”:”Technical Dry Creek Bed Cross-Section”,”imageAlt”:”An engineering diagram showing the proper layering and rock sizing for a yard drainage dry creek bed.”},”categoryId”:0,”postTime”:””} Ready to post.