
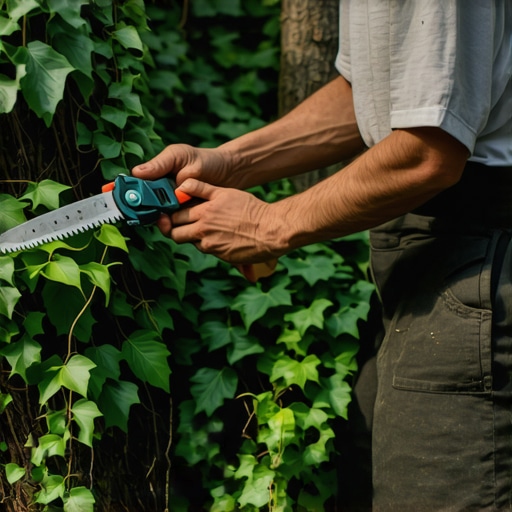
The Bio-Mechanical Reality of Ivy Infestations
Manual ivy removal involves severing main vines at the base and systematic hand-pulling or grubbing to remove the root crown without damaging native soil structure or harming the trees it climbs. This process requires a deep understanding of Hedera helix biology and soil physics. It is hard work. It requires leverage. You cannot rush it.
I always drill into my new crew members: if you don’t fix the soil grading first, every plant you put in the ground is just expensive compost. I remember an apprentice, eager and green, who thought clearing a quarter-acre of English Ivy would take an afternoon with a brush hog. He was wrong. Power tools often exacerbate the problem by shredding the vines into thousands of nodes, each capable of regenerating a new plant. We spent three weeks hand-digging that site because the organic layer had become a six-inch thick mat of rot. If you don’t get the root crown, you haven’t done the job. Landscaping is 90% preparation and 10% aesthetics. This guide covers the preparation.
The Structural Forensic of Ivy Damage
When you look at a forest floor covered in ivy, you aren’t seeing a groundcover. You are seeing a biological parasite that traps moisture against the bark of trees and the foundations of homes. This causes hydrostatic pressure issues and fungal rot. The weight of mature ivy in a tree canopy can reach several tons, increasing the sail area and leading to wind-throw during storms. In my 20 years of yard cleanup and landscaping, I have seen more retaining walls collapsed by the relentless expansion of ivy roots than by any other single biological factor.
“English ivy is a vigorous, fast-growing evergreen perennial vine that can outcompete and kill native vegetation from the forest floor to the canopy.” – Penn State Extension
The Strategic Equipment List
Forget the chainsaws. Forget the string trimmers. These just spray sap and waxy residue everywhere. You need manual leverage. Get a high-quality soil knife (Hori Hori), a bypass lopper with at least 30 inches of handle for leverage, and a pointed spade. Wear thick leather gloves and long sleeves. Ivy contains falcarinol, which can cause severe contact dermatitis for many people. Safety isn’t optional. It is the job.
How much modified gravel do I need for a patio base after clearing?
After clearing ivy for a hardscape project, you typically need 6 to 8 inches of compacted 21A or 57 stone to ensure stability. This prevents the settling that occurs when the organic material from dead ivy roots decomposes and creates voids in the subgrade. Do not skip the compaction phase. The tamper should literally bounce off the compacted base when it is ready. If it sinks, you have more work to do.
| Material Type | Removal Effort (1-10) | Root Depth (Inches) | Regrowth Risk |
|---|---|---|---|
| English Ivy | 9 | 4 to 12 | High |
| Boston Ivy | 6 | 2 to 5 | Medium |
| Native Virginia Creeper | 4 | 3 to 6 | Low |
Phase 1: The Tree Girdle Method
Start by saving the trees. This is the most critical part of any yard cleanup. Use your loppers to cut the vines at shoulder height and again at the base of the tree. This creates a gap. Do not pull the vines off the tree. If you pull them, you will rip the bark off the tree, exposing the cambium layer to pathogens. Let the top portion die and wither on its own. It will take months. Be patient. Focus your energy on the ground.
Phase 2: The Ivy Roll Technique
This is where the physics of manual removal comes into play. Locate the edge of the ivy mat. Use your spade to cut a line into the soil. Start rolling the ivy like a carpet. As you roll, use your soil knife to sever the vertical roots anchoring the mat to the earth. This keeps the biomass together and makes disposal easier. You are using the weight of the roll itself to pull the next section of roots out of the ground.
- Identify the root crowns (the thickest part of the vine where it enters the dirt).
- Sever the lateral runners first to isolate a section.
- Use a fulcrum (like a rock or a piece of timber) with your spade to pop the crown out.
- Keep the soil moist; dry clay is like concrete.
- Bag the debris immediately; do not compost it.
Soil Remediation and the Sod Install Prep
Once the ivy is gone, your soil is likely depleted and acidic. Ivy is a nutrient hog. To prepare for a sod install or new landscaping, you must test the pH. Most turf grasses prefer a pH between 6.0 and 7.0. If the ivy has been there for decades, your soil might be sitting at a 5.0. Add pelletized lime and organic compost to restore the microbiology. You cannot just throw sod over ivy-cleared dirt and expect it to live. It will die.
“A successful lawn starts with soil-to-seed contact and a properly prepared seedbed, free of competing vegetation and thatch.” – Texas A&M AgriLife Extension
How to fix irrigation after ivy removal?
Often, ivy hides old, broken irrigation lines. Once the ground is clear, run a zone test. Look for bubbling water or dry spots. Manual removal allows you to see the actual state of your sprinkler heads and lateral lines. This is the time to upgrade to drip irrigation for your new plant beds to prevent the over-watering that encourages ivy regrowth in the first place. High moisture at the surface is the enemy.
The Maintenance Schedule
You are not done when the rolls are gone. Ivy seeds can remain dormant for years. Spend ten minutes every week walking the perimeter. If you see a sprout, pull it immediately. If you leave one node, the forest returns. It is that simple. After the first year, you can relax, but the first 12 months are a war of attrition. Stay diligent. Keep the shovel sharp. The dirt never lies.