
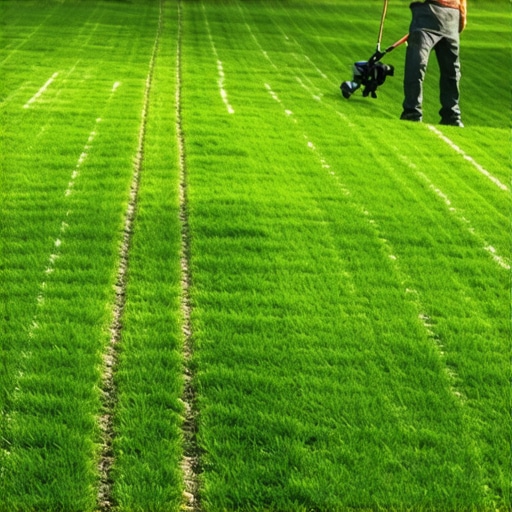
The Engineering of Incline Turf Establishment
Staking sod on an incline is a mechanical engineering solution for a biological problem. By using 6-inch biodegradable wooden stakes driven at an angle against the grade, you increase the shear resistance of the turf layer, preventing gravity-driven slippage during heavy irrigation or rain events. This mechanical bond holds the mat in place until the roots can penetrate the subsoil and create a permanent anchor.
I always drill into my new crew members: if you don’t fix the soil grading and compaction first, every plant you put in the ground is just expensive compost. I have seen countless $10,000 sod jobs slide down a 3:1 slope because some ‘mow-and-blow’ contractor thought gravity was a suggestion. They lay the rolls horizontally, don’t use stakes, and then wonder why the first thunderstorm turns the backyard into a green landslide. We do things differently. We treat a slope like a structural element. You have to account for the hydrostatic pressure and the literal weight of water-saturated turf. A single pallet of wet sod can weigh over 2,000 pounds. On a 30-degree incline, that weight is constantly trying to migrate downward. Without stakes, it wins.
“Surface erosion on slopes can be reduced by 90% or more when high-quality turfgrass is established, but the initial phase requires mechanical stabilization to prevent rill formation under the sod mat.” – Penn State Center for Turfgrass Science
The Physics of the Slope: Why Sod Fails
Sod fails on slopes because of a lack of capillary connection between the sod base and the site soil. When you place a flat mat of grass on a hardened, compacted hillside, you are essentially placing a sponge on a slide. When you water that sponge, it gets heavy and the interface between the sod and the soil becomes a lubricated failure plane. The stakes act as structural ‘rebar’ for the turf. You aren’t just pinning it; you are stitching the new biological layer into the existing geological one. You must address the soil texture. If you are dealing with heavy clay, your stakes need to be longer to bite into the unyielding sublayer. If it is sandy loam, you need more stakes per square yard because the friction coefficient is lower.
| Slope Gradient | Staking Density | Stake Length | Overlapping Requirement |
|---|---|---|---|
| 1:4 (Gentle) | 1 Stake per 2 sq. ft. | 4 Inches | Standard Butt-Joint |
| 1:3 (Moderate) | 2 Stakes per roll | 6 Inches | Tight Compression |
| 1:2 (Steep) | 3-4 Stakes per roll | 8 Inches | Staggered/Stitched |
How do you keep sod from sliding down a hill?
To keep sod from sliding down a hill, you must install the rolls perpendicular to the slope and use biodegradable stakes or sod staples driven in at a 45-degree angle toward the top of the hill. This orientation disrupts the natural flow of water down the incline, forcing it to infiltrate the soil rather than carving channels underneath the turf mats.
The Staking Protocol: Step-by-Step Installation
Preparation is the most ignored part of the process. Most guys just rake the surface and start laying. We use a power harley rake to scarify the top 2 inches. This creates ‘teeth’ in the soil. If the soil is too smooth, the sod will never grab. We then apply a high-phosphorus starter fertilizer (something like a 10-20-10 ratio) to encourage immediate root elongation. Nitrogen makes it green, but phosphorus builds the anchors. Don’t let a salesman tell you otherwise. We want roots, not just clippings.
- Scarification: Break the surface tension of the slope so the roots can penetrate immediately.
- Moisture Prep: Lightly mist the soil before laying. Never lay sod on bone-dry, baked earth. It will suck the moisture out of the sod roots instantly.
- Staggered Seams: Lay sod rolls like bricks. Never align the vertical seams. This prevents ‘gully’ formation.
- Staking Angle: Drive stakes at a 45-degree angle pointing uphill. This creates a counter-force to gravity.
- Tamping: Use a sod roller or a hand tamper to ensure 100% contact. Air pockets are the enemy of life.
What is the best way to stake sod on a slope?
The best way to stake sod is using wooden stakes rather than metal staples on steep grades. Wood stakes swell when wet, increasing their grip on the soil and the sod mat. Place one stake 6 inches from each corner and one in the center of each roll, ensuring the stake head is flush with the soil surface to avoid mower damage.
“Proper compaction of the subgrade and the use of mechanical fasteners are critical for turfgrass stability on any gradient exceeding 25 percent.” – USDA Soil Conservation Service
Irrigation Logic for Sloped Turf
Watering a slope is a lesson in patience. If you turn on a rotor for 30 minutes, you’ll have a puddle at the bottom and a desert at the top. We use the ‘Cycle and Soak’ method. You run the irrigation for 5 minutes, let it soak for 20, and repeat. This allows the water to move vertically into the soil rather than horizontally across the surface. On a new sod install, you need to keep that mat saturated for the first 10 days. If the edges turn brown, you’ve already lost. That’s the rhizomes dying. Once they die, they don’t come back easily. You’ll be looking at gaps in your yard cleanup for months.
Long-Term Maintenance and Stabilization
After about three weeks, you should be able to tug on the grass and feel resistance. That is the sound of success. That is the roots taking over the job of the stakes. The wooden stakes will eventually rot away, adding organic matter to the soil, which is why we never use plastic. Plastic is for hacks. It stays in the ground forever and eventually gets caught in a core aerator. Don’t do it. Use wood or corn-starch based pins. Keep your mower blade high for the first two months. Scalping a new slope is the fastest way to kill it. High grass means deeper roots. Deeper roots mean a stable hillside. It’s basic biology. If you treat your lawn like a golf course before it’s ready, it will fail. Focus on the soil, focus on the stakes, and the rest will follow.