
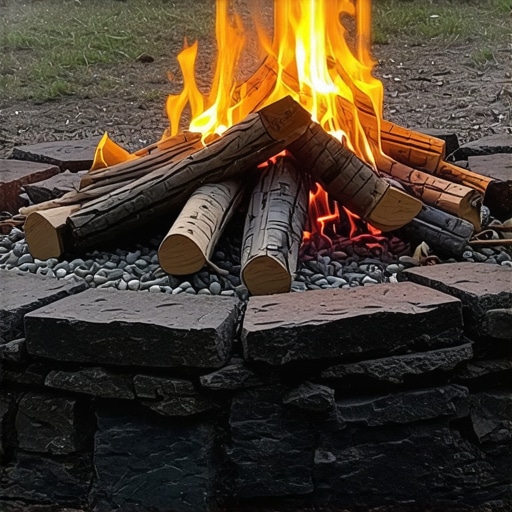
Why Most Budget Fire Pits Fail Before the Second Season
To build a durable wood-burning fire pit on a budget, you must prioritize a 4-inch compacted gravel base, use heat-resistant interior liners, and ensure a 10-foot clearance from structures. Skipping the excavation or using porous stones leads to structural shifting and dangerous rock explosions from trapped moisture.
I recently got called out to tear up a $30,000 patio that was sinking because the previous contractor thought he could skip the compaction phase. The homeowner wanted a fire pit added, but the entire sub-base was a mess of uncompacted topsoil and organic debris. Every time it rained, the water sat under those pavers like a sponge. If you don’t fix the soil grading and base prep first, every cent you spend on stone is just a down payment on a future demolition. The same logic applies to a simple fire pit. You aren’t just stacking rocks; you are managing thermal expansion and hydrostatic pressure.
Selecting the Site and Preparing the Landscaping
Selecting a fire pit site requires identifying a level area at least 15 feet away from flammable structures, overhanging trees, and property lines. You must perform a thorough yard cleanup to remove all organic matter and verify that no underground irrigation lines or utility cables reside beneath the dig site.
Before you swing a pickaxe, call 811. I’ve seen guys nick a 1-inch irrigation lateral and turn a simple afternoon project into a $500 plumbing repair. Once the site is marked, you need to scalp the grass. Don’t just kill it; remove it. If you leave sod under your fire pit, it will rot, compress, and cause your stone to heave within six months. Excavate a circle that is 12 inches wider than your intended pit diameter. This extra space allows for a structural shoulder of gravel that prevents the outer stones from kicking out over time. We are looking for mineral soil—that hard, clay-heavy or sandy sub-layer that doesn’t compress under your boot. If you are still seeing black, loamy organic material, keep digging. You can’t build on top of fluff.
“A retaining wall doesn’t fail because of the stone; it fails because of the water trapped behind it.” – Hardscape Engineering Axiom
How deep should a fire pit base be?
For a standard wood-burning pit, you need at least 6 to 8 inches of total depth for the base. This includes 4 inches of 3/4-inch modified gravel (often called CR6 or 21A) and 2 inches of fire-rated material or a steel ring insert. Do not use sand as your primary structural base. Sand washes away. Use a hand tamper to compact the gravel in 2-inch lifts. It should feel like concrete when you’re done. The tamper should literally bounce off the surface. If it feels soft, keep hitting it. You are fighting physics here. Don’t let physics win.
The Materials Breakdown: Concrete vs. Natural Stone
Budget-friendly fire pits typically utilize concrete retaining wall blocks or heat-treated natural stones like granite. Avoid porous stones like river rock, limestone, or sandstone, as trapped moisture inside these rocks can expand rapidly when heated, causing them to shatter or explode with significant force.
| Material | Est. Cost | Heat Resistance | Complexity |
|---|---|---|---|
| Concrete Wall Blocks | $100 – $250 | High (with liner) | Low |
| Natural Granite/Basalt | $200 – $500 | Very High | Medium |
| River Rock / Sandstone | $50 – $150 | EXTREMELY LOW | High Risk |
| Steel Fire Ring Insert | $50 – $120 | Essential | Low |
If you’re on a budget, go to a local masonry supply yard, not the big-box home improvement store. Their blocks are often higher density and withstand the freeze-thaw cycle better. If you use standard concrete blocks, you MUST use a steel fire ring. Concrete is not meant to be direct-fired. Without a liner, the heat will calcify the concrete, turning your expensive blocks into grey dust in a single season. This is where most DIYers fail. They think the stone is the barrier. It isn’t. The air gap between the steel ring and the stone is your true insulator.
Can I build a fire pit on top of grass?
No. Never. It is a fire hazard and a structural disaster. Grass and roots will burn, creating air pockets under your pit. The heat will also kill the root systems of your surrounding sod install, leaving a dead brown ring around your project. Always excavate down to the subsoil and replace the volume with compacted aggregate. It’s the difference between a project that lasts twenty years and one that lasts twenty days.
Step-by-Step Installation: The Forensic Method
To install the fire pit, lay your first course of blocks perfectly level on the compacted gravel base. Apply high-temperature masonry adhesive between subsequent layers, ensuring staggered joints for structural integrity. Leave two small gaps in the bottom course to allow for oxygen intake and drainage.
The first course is the only one that matters. If the first ring is 1/8th of an inch off-level, the fourth ring will be an inch out of plumb. It will look like a drunk built it. Use a 4-foot level and a dead-blow hammer to set the stones into the gravel. Once the first ring is locked, the rest is just Legos. Use a bead of polyurethane masonry adhesive—not the cheap stuff, get the high-temp rated tube—to keep the blocks from shifting when someone inevitably kicks them. Oxygen is the fuel. If you seal the pit completely, your fire will smoke like a wet cigar. Leave two ‘weep holes’ on opposite sides. These holes serve a dual purpose: they feed the base of the fire with oxygen and allow rainwater to drain out of the center so you aren’t left with a stagnant mosquito pond. It’s simple engineering. Don’t skip it.
“Proper drainage is the foundation of any hardscape longevity; without it, the soil’s natural movement will destroy even the heaviest structures.” – Penn State Agricultural Extension
Post-Build Care and Maintenance
Maintaining a fire pit involves regular ash removal to prevent moisture retention and inspecting the stone for hairline cracks. Never use water to extinguish a fire, as the sudden temperature drop (thermal shock) will crack the stone and the steel liner, compromising the entire structure.
After you finish, you might be tempted to do a quick sod install around the edge to make it look pretty. Wait. Give the ground time to settle. Use a heavy mulch or decorative river rock (outside the pit only) for the first 12 inches around the perimeter. This creates a fire break. Clean out the ashes after every few fires. Ash is alkaline and, when mixed with rain, creates a caustic paste that eats through steel liners and degrades masonry. Cover it when not in use. Keep it dry. Treat it like a piece of equipment, not a trash can. If you treat it right, you’ll be cooking hot dogs on this thing for a decade. If you hack it together, you’ll be back at the quarry next spring buying more stone.