
The Physics of Hillside Hardscaping and Why Most DIY Paths Fail
Building a stable walkway on a steep hill requires more than just laying stone; it is an exercise in civil engineering and soil stabilization that must account for gravity and water velocity. To succeed, you must manage hydrostatic pressure and soil friction through deep excavation, proper drainage aggregate, and mechanical compaction. Don’t skip the site prep. It will fail.
I recently got called out to tear up a $30,000 patio and walkway system that was sinking and sliding into a client’s basement because the previous contractor ignored the basic laws of soil mechanics. They had used ‘decorative’ gravel instead of a structural modified base and completely neglected the drainage pipe behind the timber retainers. After a heavy spring rain, the entire hillside turned into a slow-moving river of mud and expensive pavers. I had to bring in a mini-excavator to gut the whole project, haul away forty tons of saturated soil, and start from the virgin subgrade. It was an expensive lesson for the homeowner that could have been avoided with a transit level and four inches of crushed limestone. That is why I tell my crew: we aren’t just landscapers, we are earth-movers who occasionally plant things.
The Engineering Behind Slope Stability
Before you even look at a paver, you have to understand the angle of repose. This is the steepest angle at which soil remains stable without sliding. Most local clays and loams fail at 30 to 45 degrees. When you cut a path into a hill, you are interrupting that stability. You need to compensate for that lost structural integrity using geo-textiles or mechanical anchors. Gravity is constant. It never sleeps.
“A retaining wall doesn’t fail because of the stone; it fails because of the water trapped behind it.” – Hardscape Engineering Axiom
Site Preparation and Soil Grading for Slope Success
Effective site preparation for a hillside walkway involves calculating the rise and run to determine if the path needs switchbacks or integrated steps to maintain a safe 5 to 8 percent grade. Professional crews use a transit level or a laser level to mark the exact elevation changes across the entire length of the planned path before the first shovel hits the dirt. Do not eyeball it. You will be wrong.
Once the path is marked, you must clear the area of all organic matter. This is where yard cleanup becomes a structural requirement, not an aesthetic one. Turf, roots, and leaf litter will rot and create voids under your path, leading to settling. Dig down until you hit firm, undisturbed sub-soil. If you are in a region with heavy frost cycles, your excavation depth must account for the local frost line to prevent heaving. For most hillsides, a 6 to 8-inch excavation is the bare minimum for the base alone.
How much modified gravel do I need for a patio base?
To calculate the amount of base material, multiply the square footage of your walkway by the depth of the base (usually 0.5 feet for 6 inches) and divide by 27 to get cubic yards. A standard walkway on a hill requires 21A or 3/4-inch minus crushed limestone to ensure a mechanical lock during compaction. This material is not the same as ‘clean’ stone; the ‘fines’ or dust are what create the structural bond. Use a plate compactor with at least 3,000 lbs of centrifugal force. One pass is not enough. You need four to six passes in 2-inch lifts.
The Material Matrix: Selecting the Right Components
Selecting the right materials for a hillside path depends on the grade percentage, local rainfall intensity, and soil permeability. While timber is cheaper, it rots over a 10 to 15-year horizon, whereas natural stone or interlocking concrete pavers provide a 50-year structural solution when installed on a properly compacted bed. Your choice determines the maintenance schedule.
| Material Type | Max Slope Grade | Structural Longevity | Permeability Rating |
|---|---|---|---|
| Pressure Treated Timber | 15% | 10-15 Years | Low |
| Interlocking Pavers | 12% | 30+ Years | Medium to High |
| Natural Flagstone | 10% | 50+ Years | Low (unless dry-set) |
| Crushed Basalt/Granite | 5% | 5-7 Years | Very High |
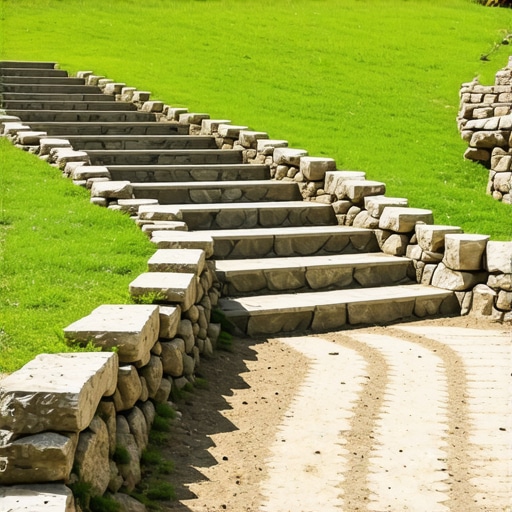
If the slope is steeper than 12 percent, you should stop thinking about a ‘walkway’ and start thinking about integrated steps. Stairs on a hill should be ‘inset,’ meaning the weight of the step is supported by the earth behind it, not just the step below it. This prevents the ‘slinky effect’ where the whole staircase shifts downhill over time.
How do you secure steps on a steep incline?
To secure steps on a steep grade, you must use deadman anchors or 4-foot rebar pins driven through the base material into the undisturbed subgrade. For timber steps, 12-inch galvanized spikes are mandatory, while stone steps require a 6-inch compacted gravel ‘footing’ for each individual riser to prevent tilting. Always use a 1 percent forward pitch on the step treads to ensure water sheds away from the hill. Standing water is the enemy of stone.
Water Management: Drainage, Irrigation, and Sod
Water management is the most critical component of hillside landscaping, as uncontrolled runoff will erode the base of your walkway in a single season. You must install a 4-inch perforated drain pipe, often called a French drain, on the uphill side of the walkway to intercept subsurface water before it reaches your structural base. Wrap the pipe in a non-woven geotextile ‘sock’ to prevent silt from clogging the system. Drainage is non-negotiable.
Furthermore, when you disturb a slope, you must re-stabilize the surrounding soil immediately. This often involves a sod install or heavy seeding with a tackifier. Roots are nature’s rebar. If you have an existing irrigation system, you must recalibrate the zones to ensure you aren’t dumping excess water onto the new walkway. Over-saturation will liquefy the subgrade. Use low-flow drip lines for any plantings adjacent to the path rather than high-pressure spray heads. Keep the water where the roots are, not where the pavers are.
“Soil compaction is the most underrated phase of hardscaping; 90% of failures are due to air pockets in the sub-base.” – ICPI Installation Standards
The Compaction Checklist
- Excavate to virgin sub-soil (no organic matter).
- Lay 3.5-ounce non-woven geotextile fabric.
- Install base in 2-inch ‘lifts’ or layers.
- Run a plate compactor over every lift until the machine ‘bounces.’
- Check grade with a transit after every 5 feet.
- Backfill the uphill side with 3/4-inch clean stone for drainage.
Closing the Project: Long-Term Slope Integrity
Once the stones are set and the landscaping is restored, the first year is the ‘settling’ period. You should expect the polymeric sand in the joints to need a minor touch-up after the first winter. This isn’t a failure; it is the natural adjustment of the earth. Monitor the uphill drainage exits during heavy rain. If you see ‘fines’ or dirt washing out, you have a gap in your fabric or a clog in your pipe. Fix it immediately. A small hole becomes a sinkhole in months.
Avoid the temptation to use salt or chemical de-icers on new pavers for at least two seasons. The chemical reaction can cause spalling on the surface of concrete products. Use sand for traction instead. Your walkway is a structural asset, not just a decoration. Treat it like one. If you follow the engineering, it will stay exactly where you put it for thirty years. If you cut corners, the hill will take it back. [IMAGE_PLACEHOLDER]