
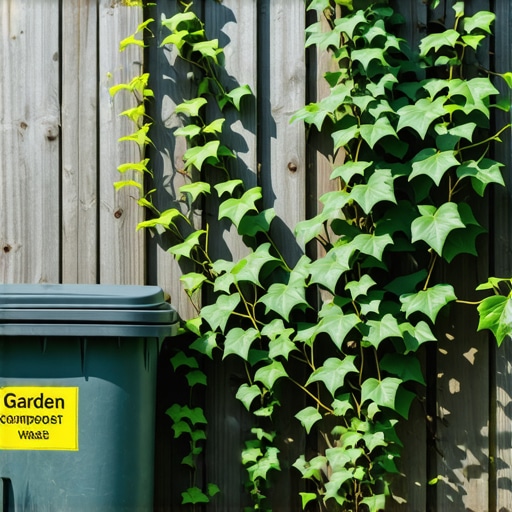
The Fatal Mistake of Composting English Ivy
To dispose of invasive ivy effectively, you must avoid the compost pile because species like Hedera helix possess adventitious roots and rhizomes that survive the decomposition process. Adding these to a backyard compost bin ensures future yard cleanup nightmares as the ivy regenerates and chokes out new sod installs. I always drill into my new crew members: if you don’t fix the soil grading first, every plant you put in the ground is just expensive compost. But even worse is when a rookie thinks they’re being ‘green’ by tossing invasive English Ivy into the compost pile. Last year, a client’s entire $15k perennial bed was swallowed in six months because their previous ‘mow-and-blow’ guy dumped shredded ivy vines into the mulch. It didn’t die. It just waited. It crawled out of the mulch like a biological ghost, strangling the drip irrigation emitters and suffocating the root flares of their Japanese Maples. If you aren’t careful, you aren’t just gardening; you’re cultivating an infestation.
“A home compost pile rarely reaches the sustained internal temperature of 140 to 160 degrees Fahrenheit required to neutralize the vascular tissue of aggressive perennial invasives.” – Agronomy Manual for Invasive Species Management
The Biological Architecture of Hedera Helix
Invasive ivy survives through a process called vegetative reproduction, where any small fragment containing a root node can establish a new colony. This makes yard cleanup a precision engineering task rather than a simple removal, as leftover debris will compromise new sod install projects. The plant’s waxy cuticle, composed of a fatty substance called cutin, is designed to repel water and resist microbial breakdown. When you throw these vines into a standard compost heap, that waxy barrier prevents the moisture and bacteria from penetrating the stem. Instead of breaking down, the ivy sits in a nutrient-rich, moist environment—essentially a five-star hotel for invasive species. It will rot the heart of your garden while the ivy itself stays perfectly preserved. Don’t skip the proper disposal steps. One missed node can lead to 10 feet of growth in a single season.
How do you permanently kill invasive ivy?
To permanently kill English ivy, you must use a combination of mechanical excavation and solarization or off-site disposal. Simply cutting the vines is insufficient; you must remove the root system to at least 6 inches of depth to prevent regrowth from dormant rhizomes. | Disposal Method | Success Rate | Risk Level | | :— | :— | :— | | Home Composting | 5% | Extremely High | | Bagging & Landfill | 98% | Low | | On-site Solarization | 85% | Moderate | | Professional Incineration | 100% | Zero | This table isn’t just a suggestion; it is a roadmap to a clean yard. I have seen guys try to tilled ivy back into the soil thinking it would add nitrogen. It doesn’t. It just distributes thousands of potential starts across the entire property. It’s a disaster waiting to happen.
The Impact on Irrigation and Sod Health
Failing to properly dispose of ivy can lead to irrigation failure because the vines are attracted to the high-moisture zones around emitter heads and poly piping. Once the ivy enters a sod install area, it creates a thick mat that prevents aeration cores from reaching the soil, leading to thatch buildup and fungal pathogens.
“Ivy produces adventitious roots along its stems, allowing it to adhere to surfaces and absorb moisture directly from the air, making it incredibly difficult to kill via desiccation alone.” – Penn State Agricultural Extension
When we prep a site for new sod, we ensure the ground is stripped of all organic invasive material. We use a 3,000 PSI plate compactor to check for soft spots where old root masses might be decaying. If those roots aren’t gone, the soil will settle unevenly, ruining the grade. Fix the soil first. Every time.
Can ivy grow back from a small piece of root?
Yes, Hedera helix is capable of regenerating from a single vascular node. If even a two-inch segment remains in contact with moist soil or is buried in a compost pile, it will strike new roots and begin the infestation cycle again. To prevent this, follow this checklist:
- Sever all vertical vines at shoulder height to kill the ‘climbing’ portion.
- Excavate the root ‘basket’ using a specialized grubbing tool.
- Place all debris on a tarp; never let it touch bare soil once removed.
- Double-bag the material in 3-mil contractor bags.
- Leave bags in direct sun for 3 weeks to ‘cook’ the nodes before disposal.
This isn’t just about aesthetics; it’s about structural integrity. Ivy that climbs houses can trap moisture against the siding, leading to rot and hydrostatic pressure issues in masonry. It’s a parasite, plain and simple.
Remediation and Year-One Maintenance
After a major yard cleanup involving ivy, the soil chemistry is often depleted or altered by the heavy shade the ivy once provided. Before laying new sod, perform a soil pH test to ensure the ground hasn’t become overly acidic. Most turf grasses prefer a pH between 6.0 and 7.0. If the ivy was thick, you likely have a nitrogen deficiency. Apply a slow-release starter fertilizer with a high middle number (Phosphorus) to encourage deep root growth for your new grass. This forces the roots to chase moisture down 8 to 10 inches, making them more resilient than the shallow-rooted ivy you just fought to remove. Monitor the area monthly. If you see a single waxy leaf popping up, pull it immediately. Dig deep. Get the node. It’s a war of attrition, and you can’t afford to lose a single battle.