The Wet Spot Mystery: Why Your Drip System is Bleeding
To find a leak in a drip irrigation system, you must monitor for low static pressure, unusual surface saturation, and emitter discharge rates. Check the backflow preventer and pressure regulator first, as these often fail before the polyethylene tubing itself. I always drill into my new crew members: if you don’t fix the soil grading first, every plant you put in the ground is just expensive compost. It is the same with irrigation. You can have the most expensive 2026 smart-valve system on the market, but if your grading allows water to pool, you will never distinguish a line break from a natural drainage issue. I have seen guys spend three days digging up a sod install only to realize the ‘leak’ was just a low spot in the clay collecting runoff from the neighbor’s yard. You have to be a detective before you become a laborer.
“A retaining wall doesn’t fail because of the stone; it fails because of the water trapped behind it.” – Hardscape Engineering Axiom
How much pressure should a drip system have?
Most landscaping drip lines are engineered to operate between 15 and 30 PSI. If your irrigation pump is pushing 60 PSI, you are going to blow the emitters right out of the poly tubing. This is why a dedicated pressure regulator is non-negotiable. When I perform a yard cleanup on a neglected property, the first thing I check is the regulator. If it is grit-clogged, the pressure spikes. The result is micro-fractures in the 1/2 inch distribution line that are nearly impossible to see with the naked eye until the soil is fully saturated. You need a liquid-filled pressure gauge to get an accurate reading on these systems. Don’t guess. Measure.
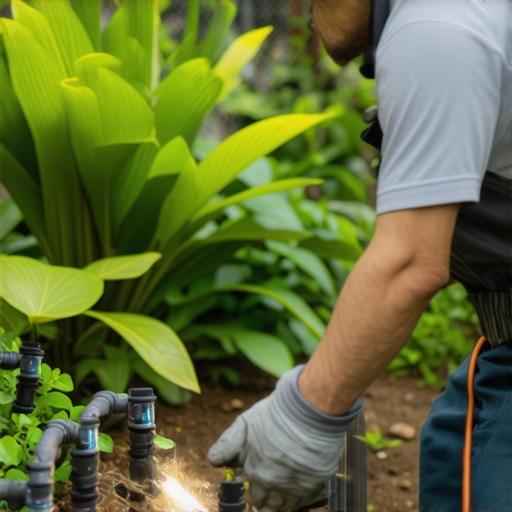
The Forensic Diagnostic: Step-by-Step Leak Location
Locating a subsurface leak requires an understanding of hydrostatic pressure and soil capillary action. In heavy clay soils, water moves laterally, meaning the surface puddle might be ten feet away from the actual poly tubing puncture. For 2026 systems, we now use ultrasonic flow meters that can detect a variance as small as 0.1 gallons per hour. If your controller is flagging a high-flow alert, shut down all other zones. Watch the meter. If the numbers climb while the emitters are supposedly closed, you have a mechanical failure at the valve diaphragm. It is usually a pebble or a piece of PVC glue stuck in the seal. It happens. Fix it fast.
| Component Type | Typical Operating PSI | Common Failure Mode | Detection Method |
|---|---|---|---|
| 1/2″ Poly Distribution Tubing | 20-30 PSI | Linear Stress Fracture | Visual Surface Pooling |
| Pressure Compensating Emitter | 15-45 PSI | Calcium Carbonate Scaling | Flow Rate Testing |
| Smart Solenoid Valve | 10-120 PSI | Diaphragm Tear | Ultrasonic Metering |
| 1/4″ Micro-tubing | 10-25 PSI | Rodent Damage | Manual Inspection |
Why is my drip line leaking at the connection?
Connections leak primarily because of improper barbed fitting sizing or the absence of a locking compression nut. When doing a sod install, the weight of the wet turf can shift the underlying soil. If the irrigation lines aren’t properly trenched at least 4 to 6 inches deep, that shifting soil pulls the tubing right off the fittings. I don’t use the cheap friction-fit tees from big-box stores. They fail under 25 PSI within two seasons. Use spin-lock fittings. They cost twice as much. They last ten times longer. It is a simple math problem that most homeowners get wrong. Do not be that person.
“Drip irrigation efficiency is contingent upon the uniformity of the emission device, which is often compromised by physical blockages or pressure fluctuations exceeding 20% of the design capacity.” – Texas A&M AgriLife Extension
- Check the Controller: Modern 2026 units provide amperage data for solenoids. High amps mean a short; low amps mean a broken wire.
- Isolate the Zone: Turn off the main supply and use a manual hand pump to pressurize the line with air. Listen for the hiss.
- Expose the Headers: Most leaks occur at the manifold or the transition from PVC to poly. Dig here first.
- Inspect the Emitters: If one plant is drowning while the next is dry, the line is pinched.
- Verify Grading: Ensure water isn’t just following a 2% slope and pooling at the end of the run.
Remediation and Long-Term Maintenance
Once the leak is found, do not just wrap it in electrical tape. That is a hack move. Cut the damaged section out cleanly with a dedicated tubing cutter. Use a double-barbed coupler and a stainless steel O-ear clamp to secure the fix. Soil chemistry matters here too. If you have high acidity, your metal clamps will corrode. Use plastic locking collars in those environments. If you are dealing with a yard cleanup where the landscaping has overgrown the lines, you must relocate the emitters to the drip line of the plant canopy. Roots grow. Systems must adapt. If the emitter is buried against the trunk, it causes root flare rot. It kills the tree. Keep it 12 inches away. Always.