The Forensic Autopsy of a Failed Water Feature
Fixing a leaky water feature basin requires identifying the specific point of structural failure, typically caused by hydrostatic pressure, UV degradation, or poor sub-grade compaction. To remediate a leaking basin, one must choose between localized patches or a full overlay with a 45-mil EPDM rubberized liner to ensure a watertight seal that withstands freeze-thaw cycles and root intrusion.
I recently got called out to tear up a $30,000 stone waterfall and patio that was sinking because the previous contractor used a thin 20-mil PVC liner designed for shelf-stable garden ponds, not a high-pressure basin. The water had been weeping through a microscopic tear at the base for eighteen months. By the time I arrived, the soil under the adjacent pavers was a liquefied mess, causing the entire hardscape to shift three inches off-axis. This wasn’t just a leak; it was a slow-motion engineering disaster. The ‘mow-and-blow’ crew had tried to fix it with a tube of silicone from a big-box store. Silicone doesn’t bond to EPDM or stone in high-moisture environments. It failed in forty-eight hours. We had to excavate the entire feature, re-compact the base to 95% Proctor density, and start from the dirt up.
The Physics of Water Loss: Evaporation vs. Structural Failure
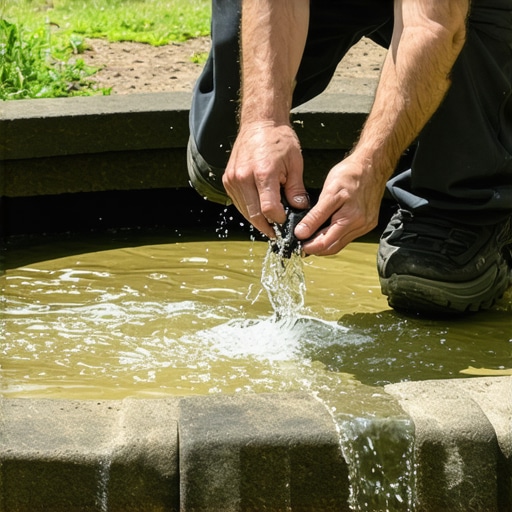
Before you start a yard cleanup or tear out your landscaping, you must determine if you actually have a leak. On a hot, windy day, a large water feature can lose up to two inches of water due to simple evaporation and splash-out. However, if you are losing four inches a day, you have a breach. Turn off the pump. If the water level stops dropping at a certain height, the leak is at that level. If the basin drains completely, the failure is in the floor of the liner or the bottom drain fitting.
“A retaining wall doesn’t fail because of the stone; it fails because of the water trapped behind it.” – Hardscape Engineering Axiom
When water escapes a liner, it saturates the surrounding soil, often killing nearby sod installs or causing irrigation lines to shift. The hydrostatic pressure from the saturated soil outside the basin can actually push inward, causing the liner to ‘bubble’ or float when the feature is emptied. This is why drainage around the basin is just as important as the liner inside it.
Liner Material Comparison: Why 45-Mil EPDM Wins
Not all rubberized liners are created equal. In professional hardscaping, we measure quality in ‘mils’ (thousandths of an inch). Here is how the materials break down:
| Material Type | Thickness (Mils) | Expected Lifespan | Pros/Cons |
|---|---|---|---|
| PVC (Polyvinyl Chloride) | 20-30 mil | 5-7 Years | Cheap; prone to UV cracking and cold-weather brittleness. |
| EPDM (Ethylene Propylene Diene Monomer) | 45-60 mil | 20-30 Years | Highly flexible; excellent UV resistance; fish-safe. |
| RPE (Reinforced Polyethylene) | 30-40 mil | 40+ Years | Extremely strong; lightweight; difficult to fold in tight corners. |
The Step-by-Step Remediation Process
Step one: Complete yard cleanup and basin evacuation. You cannot assess a leak through muck and algae. Pressure wash the basin, but keep the nozzle at least 12 inches away to avoid further damaging a fragile liner. Once dry, inspect every square inch for punctures or ‘crazing’ (fine cracks).
Step two: Sub-grade inspection. If the basin is leaking, the soil underneath is likely compromised. If you find soft spots, you must excavate and backfill with modified gravel (2A or 2B stone) and compact it. If the base isn’t solid, your new liner will stretch and tear the first time you fill it with 500 gallons of water (which weighs over 4,000 pounds).
Step three: Underlayment. Never put a rubberized liner directly on soil. Use a non-woven geotextile fabric. This protects the EPDM from sharp stones and provides a gas-venting layer for methane that can build up in organic soils. It is non-negotiable.
“Soil saturation levels exceeding 20% by volume can significantly reduce the load-bearing capacity of sub-grades, leading to catastrophic failure of overlying hardscape structures.” – Agricultural Extension Engineering Manual
How much modified gravel do I need for a patio base or basin support?
To calculate the base material, multiply the square footage by the depth (usually 4-6 inches for basins) and divide by 27 to get cubic yards. For a standard 10×10 feature, you are looking at roughly 2 tons of modified stone. Do not skip the plate compactor. A hand tamper is for amateurs. If the tamper doesn’t literally bounce off the ground, it isn’t compacted enough.
Why is my pond losing water so fast after a winter freeze?
Ice expansion is a primary killer of water features. When water freezes in the plumbing or behind stone veneers, it expands by 9%, exerting thousands of pounds of pressure. This often shears off the bulkhead fittings or tears the liner where it is pinched between heavy boulders. If you see a leak in the spring, check your plumbing connections first before assuming the basin floor is gone.
The Professional Checklist for Liner Installation
- Verify the liner is ‘Fish Safe’ (Standard roofing EPDM contains fire retardants and zinc strips that kill aquatic life).
- Over-excavate by 6 inches to allow for underlayment and stone cushioning.
- Use EPDM seam tape and primer for any joins; never use ‘liquid liner’ as a primary structural bond.
- Ensure the liner extends at least 12 inches beyond the water line to prevent capillary draw into the surrounding soil.
- Check 811/Dig Safe before any excavation to avoid hitting irrigation lines or power.
Fixing the leak is only half the battle. You must address the landscape around it. If the leak has turned your lawn into a bog, you will need to perform a sod install after the ground dries out. Re-grading the area to ensure surface water flows away from the basin is critical. If you don’t fix the soil grading first, every plant you put in the ground is just expensive compost. Water follows the path of least resistance. Make sure that path isn’t back into your sub-grade. It will rot. Don’t skip this.