
The Chemical Nightmare: Why Your Pea Soup Pond Isn’t Fixed by a Bottle
A homeowner called me in a panic last August after they completely torched their front lawn and sterilized their 2,000-gallon pond by applying massive doses of copper-based algaecide. They wanted a quick fix for green water. Instead, they got a biological dead zone. The grass was yellowing from chemical runoff, and the pond water looked like radioactive sludge because the massive algae die-off spiked the ammonia levels, nearly suffocating their koi. This is the hallmark of the ‘mow-and-blow’ mentality: treating symptoms rather than the underlying biological failure. Real landscaping and water management require understanding the nitrogen cycle, not just dumping chemicals into a hole in the ground.
The Science of Suspended Algae and UVC Radiation
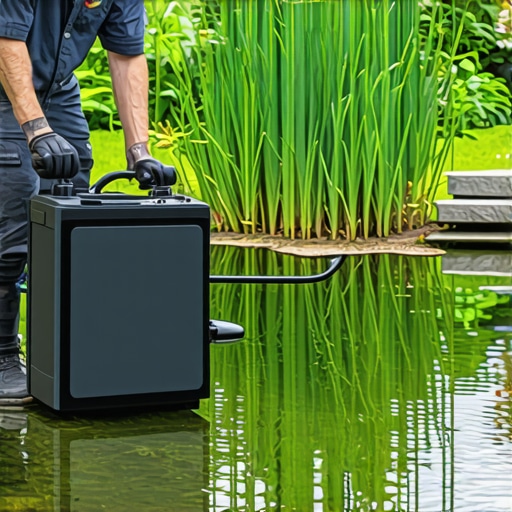
A UV clarifier eliminates single-cell algae by exposing suspended phytoplankton to ultraviolet C (UVC) radiation, which disrupts their DNA and prevents reproduction. To work effectively, the system requires a calibrated flow rate matched to the UV wattage to ensure sufficient lethal contact time within the quartz housing. This is not a filter in the traditional sense; it is a sterilization chamber. If your pond looks like pea soup, you have a high nitrate and phosphate load that is feeding Chlorella. A UV unit is the mechanical solution to this biological surplus.
“A UV sterilizer’s effectiveness is determined by the dosage of UVC light, measured in microwatt-seconds per square centimeter (µWs/cm²), and the clarity of the water entering the housing.” – Aquaculture Engineering Standards
The Forensic Autopsy: Why Your Pond Is Green
Your pond is green because you have a nutrient imbalance often caused by poor landscaping choices or a botched sod install nearby. When you lay new sod, the high-phosphorus starter fertilizer often leaches into the pond during the first few heavy irrigation cycles. This creates a feast for algae. Furthermore, if your yard cleanup routine is lazy, decomposing oak leaves and grass clippings settle at the bottom, creating a sludge layer that off-gasses ammonia. The algae are just responding to the food you’re giving them. I’ve seen $50,000 water features fail because the contractor didn’t account for the soil grading; the pond was at the bottom of a slope, acting as a collection basin for every chemical applied to the lawn. It was a toilet, not a pond. We had to install a French drain and a UV clarifier just to give the biology a fighting chance.
How much modified gravel do I need for a patio base?
To calculate the modified gravel (2A or CR617) for a patio base, multiply the total square footage by the depth of the base (usually 4-6 inches for pedestrian, 8-12 for vehicular) and divide by 324 to get cubic yards. Proper compaction of this base prevents the lateral shifting that can crush pond plumbing buried beneath the hardscape.
Selecting the Right UV Clarifier for the Job
Don’t buy the cheapest unit on the shelf. You need to calculate the GPH (Gallons Per Hour) of your pump and the total volume of your pond. If you push 2,000 GPH through a unit rated for 500 GPH, the water is moving too fast for the UVC light to penetrate the cell walls of the algae. It won’t work. Period. Use the table below to determine your needs.
| Pond Volume (Gallons) | Required UV Wattage | Max Flow Rate (GPH) | Target Application |
|---|---|---|---|
| 500 – 1,000 | 9 – 13 Watts | 500 | Small ornamental features |
| 1,000 – 2,500 | 18 – 25 Watts | 1,200 | Standard koi ponds |
| 3,000 – 5,000 | 40 – 55 Watts | 2,500 | Large ecosystems |
| 5,000+ | 110+ Watts (Multi-bulb) | 4,000+ | Commercial water features |
Step-by-Step Installation: The Professional Protocol
Installation is about hydraulic efficiency and safety. Don’t just toss the unit in the weeds. It needs to be accessible for the inevitable bulb change. Most ‘handymen’ skip the bypass loop. Don’t be that guy.
- Step 1: The Bypass Loop. Install a 3-way valve system. This allows you to divert water away from the UV unit for maintenance without shutting down your main biological filter or waterfall.
- Step 2: Position the Housing. Mount the UV clarifier horizontally on a pressure-treated 4×4 post or a concrete pad. Keeping it off the dirt prevents the housing from cracking during ground heave.
- Step 3: Plumbing Connections. Use PVC primer and heavy-duty cement. If you’re using flexible ‘kink-free’ tubing, use stainless steel hose clamps. Do not over-tighten; you’ll crack the plastic hosetails.
- Step 4: The Quartz Sleeve. Carefully slide the quartz sleeve into the housing. This is the glass tube that protects the bulb. If you touch it with your bare hands, the oils from your skin will create ‘hot spots’ that cause the glass to crack. Use gloves.
- Step 5: Electrical Safety. Plug the unit into a GFCI-protected outlet only. Install a ‘drip loop’ in the cord so water can’t travel down the wire into the socket.
Does a UV clarifier kill pond parasites?
A standard UV clarifier used for water clarity usually does not kill parasites like Ich or Costia because the flow rate is too high. To achieve sterilization levels that kill pathogens, you must reduce the flow rate by 50-70% to increase the UVC exposure time significantly.
The Contrarian Truth About String Algae
Here is what the big-box stores won’t tell you: a UV clarifier will do absolutely nothing for string algae (filamentous algae). String algae grows on rocks and liners. It doesn’t pass through the UV light. If you have clear water but long green hair growing on your waterfall, your UV is working, but your nitrate levels are still too high. You need more aquatic plants (like Anacharis or Pickerelweed) to outcompete the algae for food. Landscaping is a balance of biology, not just a collection of machines.
“Mechanical filtration removes the solids; biological filtration converts the toxins; UV radiation manages the microscopic population.” – International Association of Professionals in Pond Construction
Maintenance: The 12-Month Rule
A UV bulb might still be glowing blue after a year, but it is useless. The UVC output drops significantly after 8,000 to 9,000 hours of operation. I tell my crews to replace every bulb every spring, regardless of how they look. Furthermore, you must pull the quartz sleeve and clean it with white vinegar every three months. If calcium scale builds up on that glass, it acts as a shield for the algae. A dirty UV is just an expensive pipe. Check your seals. Replace the O-rings annually. Don’t wait for a leak to realize your maintenance is overdue. Keep your yard cleanup tight to prevent debris from clogging the intake, and your pond will stay crystal clear.
Step-by-Step UV Maintenance Checklist
- Unplug unit and wait 10 minutes for the bulb to cool.
- Close bypass valves to isolate the unit.
- Remove the transformer head and carefully pull the UV bulb.
- Unscrew the compression nut and slide out the quartz sleeve.
- Soak the sleeve in a 50/50 vinegar/water solution to remove mineral scale.
- Inspect the O-rings for cracks or dry rot; lubricate with silicone grease.
- Reassemble, check for leaks, then power on.