
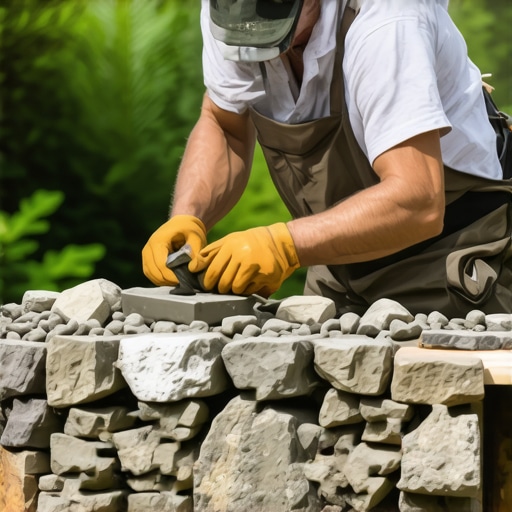
The Anatomy of a Failing Fieldstone Wall
A failing dry stack wall is a visual indicator of systemic engineering neglect, often manifesting as a bulging midsection, stone migration, or a complete collapse of the face. To fix a fieldstone wall, you must understand that the stones are not the problem; the unstable soil base and hydrostatic pressure are the culprits that force heavy granite or limestone to shift over time. If you see stones spilling onto your yard, your landscaping integrity is compromised.
I recently got called out to tear up a $30,000 patio and retaining wall system that was sinking because the previous contractor thought they could stack fieldstone directly on topsoil. Within two seasons, the freeze-thaw cycle turned that wall into a pile of expensive rubble. The homeowner was furious, and rightfully so. They had spent a fortune on sod install and irrigation systems, but because the wall’s foundation was non-existent, the water from the sprinklers saturated the backfill, increased the weight of the soil, and pushed the wall right over. I had to explain that a wall without a compacted gravel base is just a slow-motion landslide. We had to excavate three feet down just to find stable ground. It was a mess. Don’t be that guy. Do it right the first time.
“A retaining wall doesn’t fail because of the stone; it fails because of the water trapped behind it.” – Hardscape Engineering Axiom
Why Dry Stack Walls Collapse
Dry stack walls collapse primarily due to poor drainage, lack of batter, and inadequate hearting within the internal structure. When water cannot escape from behind the stones, it creates hydrostatic pressure that eventually exceeds the friction coefficient holding the stones together, leading to structural failure. You cannot just pile rocks. You are building a gravity-based engineering project. Most DIYers forget about the ‘hearting’—the small, angular stones packed into the center of the wall. Without these, the larger face stones have nothing to bite into. They just slide.
How much modified gravel do I need for a patio or wall base?
To calculate gravel needs, multiply the length of your trench by the width (usually 12-18 inches) and the depth (minimum 6 inches), then convert to cubic yards. For a standard 20-foot wall, you will typically need at least 1.5 to 2 tons of 3/4-inch minus crushed stone to ensure a stable, non-shifting foundation. Use a plate compactor. A hand tamper is not enough. You need at least 3,000 PSI of centrifugal force to lock those aggregates together. If the base moves, the wall dies.
| Feature | Dry Stack Fieldstone | Mortared Stone Wall |
|---|---|---|
| Flexibility | High (Moves with freeze-thaw) | Low (Cracks under movement) |
| Drainage | Self-Draining (via gaps) | Requires Weep Holes |
| Base Depth | 6-12 inches Gravel | Concrete Footing to Frost Line |
| Lifespan | 100+ Years (if built right) | 50 Years (before mortar fails) |
The Step-by-Step Reconstruction Process
Before you start your yard cleanup and wall rebuild, call 811. Utility lines often hide behind old walls. Once cleared, begin by stripping the old wall entirely. You cannot ‘patch’ a dry stack wall; you must rebuild from the ground up. Excavate a trench 12 inches deep and twice as wide as your thickest stone. Fill this with 6 inches of 3/4-inch modified gravel, compacting it in 2-inch lifts. This creates a capillary break that prevents frost heave from lifting your foundation. [image_placeholder_1]
Sorting your stone is the most ignored step. Separate your stones into three piles: large heavy ‘base’ stones, ‘tie-stones’ (long stones that go back into the hill), and ‘capstones’ (flat stones for the top). When you lay the first course, use your largest, ugliest rocks. These will be buried. Ensure they are level from front to back but slightly tilted toward the hill. This tilt is called batter. A professional wall should lean back 1 inch for every 1 foot of height. This uses gravity to pull the wall into the slope rather than letting the slope push it out.
“Dry-laid stone walls rely on gravity and friction; improper base compaction accounts for 90% of structural failures in residential hardscaping.” – ICPI Technical Manual
How do I stop my stone wall from leaning forward?
Stopping a wall from leaning requires proper battering and the installation of deadmen or tie-stones every 3 feet. These long stones extend deep into the soil bank, anchoring the face stones to the earth and preventing the wall from ‘bellying’ out under the weight of wet soil. If your wall is over 3 feet tall, you must also install a 4-inch perforated drainage pipe (French drain) behind the first course of stone, wrapped in non-woven geotextile fabric. This pipe directs water away before it can build up pressure. If you are doing a sod install right up to the wall, ensure the grade slopes away from the stone to prevent saturation.
Crucial Material Checklist
- 3/4-inch Crushed Stone: For the base and the 12-inch drainage column behind the wall.
- Non-Woven Geotextile: To separate the soil from the stone drainage layer.
- String Line and Stakes: To maintain a consistent batter and straight lines.
- Deadmen Stones: Large, long stones used to anchor the wall into the hillside.
- Plate Compactor: Do not use a hand tamper for the base layer.
As you stack, remember the rule: one over two, and two over one. Never allow a vertical seam to run through more than two courses. Vertical seams are crack lines. Use your ‘hearting’ stones—small, sharp, angular bits of rock—to fill every single void between the large stones. Do not use dirt. Dirt washes out and creates voids. Use stone. The interior of your wall should be as solid as the face. It’s a puzzle where every piece must be tight. If a stone wobbles, shim it with a small flat shard. If it still wobbles, find a different stone. No excuses.