
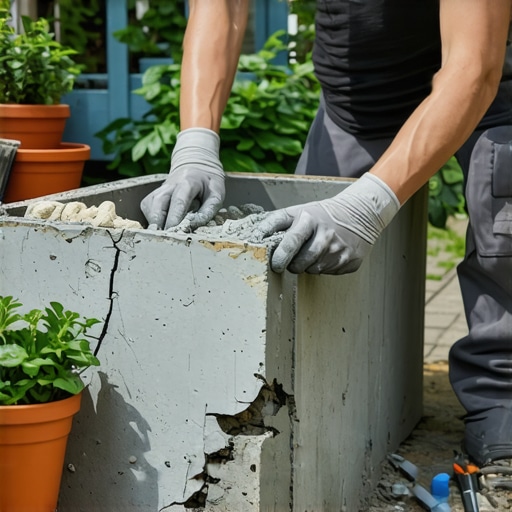
The Forensic Autopsy: Why Your Concrete Planter Is Failing
I recently got called out to tear up a $30,000 patio that was sinking because the previous contractor failed to account for hydrostatic pressure, and right next to it sat a massive, custom-poured concrete planter box split clean down the side. To repair a cracked concrete planter box, you must first identify if the failure is structural or superficial, then mechanically widen the crack, inject a high-strength epoxy or polyurethane resin, and fundamentally fix the internal drainage to prevent future freeze-thaw expansion. It is not enough to slap some mortar on the outside; the fix must address the tensile stress that caused the split.
When I looked at that split planter, the homeowner thought it was just ‘settling.’ It wasn’t. The installer had plugged the weep holes with decorative river rock that eventually silted up with soil fines. When the winter rains hit, that box became a five-ton bucket of saturated mud. Water is incompressible. When it freezes, it expands by roughly 9% in volume. That expansion exerts thousands of pounds of pressure per square inch against the concrete walls. If there is no internal waterproofing and no way for water to escape, the concrete will fail every single time. It is basic physics, not bad luck. Most ‘mow-and-blow’ crews will tell you to just caulk it. That is a lie that will cost you the entire structure in two seasons.
“A retaining wall doesn’t fail because of the stone; it fails because of the water trapped behind it.” – Hardscape Engineering Axiom
Identifying the Type of Concrete Failure
Concrete planter cracks generally fall into two categories: hairline shrinkage cracks and structural displacement cracks, and you must diagnose this before buying materials. Shrinkage cracks are usually less than 1/16th of an inch and occur during the initial curing phase, whereas structural cracks are wider, often jagged, and indicate that the concrete’s tensile strength has been exceeded by external forces or internal rebar oxidation. If the crack is wider at the top than the bottom, your base has settled. If it is uniform, it is likely pressure-related.
| Crack Symptom | Primary Cause | Repair Method | Long-Term Risk |
|---|---|---|---|
| Hairline (<1/16″) | Rapid Curing/Evaporation | Silane-Siloxane Sealer | Cosmetic Only |
| Vertical Split (>1/8″) | Hydrostatic Pressure | Epoxy Injection | Wall Blowout |
| Horizontal Shearing | Rebar Rust (Spalling) | Mechanical Excavation | Total Structural Failure |
| Diagonal Cracking | Differential Settlement | Underpinning + Flexible Sealant | Ongoing Movement |
The Mechanical Repair Process
To fix a structural crack, you have to get aggressive. Landscaping isn’t just about plants; it is about managing masonry. I tell my crew: if you don’t see the aggregate, you aren’t deep enough. You need to use a 4.5-inch angle grinder with a diamond tuckpoint blade to ‘V-groove’ the crack. This creates more surface area for the bonding agent. Do not skip this. A surface-level patch has zero structural integrity and will pop out the moment the temperature shifts.
How much modified gravel do I need for a planter base?
For a standard 4×4 concrete planter, you need a minimum of 6 inches of compacted #57 modified gravel to ensure proper drainage and prevent the soil from heaving the box. This base acts as a capillary break, preventing moisture from wicking up into the concrete from the subgrade, which is a leading cause of efflorescence and structural weakening in sod install environments.
- Step 1: Excavation: Remove all soil from the planter. You cannot fix a crack from the outside only.
- Step 2: Cleaning: Use a wire brush and compressed air. Any dust remaining will act as a bond-breaker for your epoxy.
- Step 3: Port Installation: For deep cracks, install injection ports every 6 inches.
- Step 4: Sealing: Cap the surface of the crack with a fast-setting epoxy paste.
- Step 5: Injection: Pump high-modulus structural epoxy into the ports until it oozes from the next port up.
- Step 6: Internal Waterproofing: Apply a crystalline waterproofing membrane (like Xypex) or a heavy-duty bituminous coating to the interior walls.
Integrating Irrigation and Proper Drainage
After the structural repair is cured, you have to address the root cause: water management. Many homeowners make the mistake of running their irrigation lines directly into a concrete planter without a sleeved entry point. If your irrigation system leaks inside the planter, the concrete stays perpetually saturated. This leads to alkali-silica reaction (ASR), which turns the concrete into a jelly-like substance over decades. You need perforated PVC wrapped in geotextile fabric at the bottom of that planter, tied into a dedicated drain line that exits the box. Don’t rely on simple holes drilled in the bottom; they clog with roots and yard cleanup debris.
“Soil saturation significantly increases the lateral earth pressure on any vertical structure; without a functioning hydrostatic relief system, structural failure is inevitable.” – USDA Soil Engineering Handbook
Can I use regular mortar to fix a structural crack?
No, regular mortar has high compressive strength but almost no tensile or flexural strength, meaning it will crack again the first time the planter’s soil load shifts. For any crack wider than a dime, you must use a two-part structural epoxy or a fiber-reinforced repair polymer modified concrete to ensure the patch moves with the structure rather than against it.
The Critical Role of Yard Cleanup and Maintenance
Maintenance is the difference between a 30-year planter and a 3-year headache. During your seasonal yard cleanup, you must inspect the weep holes of your concrete boxes. Use a piece of rebar or a high-pressure hose to clear any obstructions. If you see white, chalky powder on the outside of the box, that is efflorescence. It means water is moving through the concrete and leaching out salts. It is a warning sign. It means your interior waterproof liner has failed. Fix it now, or you’ll be grinding out cracks again by next spring. If you are doing a sod install around the planter, ensure the grade slopes away from the base at a 2% minimum. Never let water pond at the foot of your concrete. It will rot. Deep, infrequent watering is the key. Direct your irrigation to the root zone, not the concrete walls. Every inch of water that hits the wall is a potential crack in the making. Keep it dry, keep it drained, and it will last.