
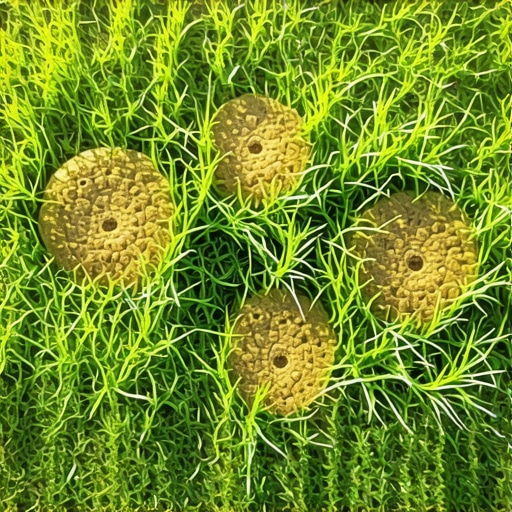
The Anatomy of a Dying Lawn: Recognizing Early Fungal Indicators
Identifying 2026 fungus circles requires a clinical eye for discolored turf rings, mycelium growth, and leaf blade lesions that appear when night temperatures stay above 65 degrees. These symptoms indicate a pathogenic invasion of the root system or crown, typically fueled by excessive nitrogen and poor drainage logic.
A homeowner called me in a panic after they completely torched their front lawn by applying a high-nitrogen fertilizer during a humid July heatwave. They thought they were helping the grass stay green. Instead, they were providing a high-octane fuel source for Rhizoctonia solani. Within forty-eight hours, their thirty thousand dollar landscaping investment looked like a series of copper-colored crop circles. The salt index of the fertilizer had already stressed the root zones, and the surge of nitrogen softened the plant cell walls, allowing the fungus to pierce the tissue with surgical ease. I spent three hours explaining that you cannot fix a chemical burn and a fungal outbreak with more chemicals. We had to perform a total soil audit to save what was left of the rhizosphere.
Brown Patch vs. Summer Patch: A Microbiological Distinction
Distinguishing between Brown Patch and Summer Patch involves measuring the soil temperature at a two-inch depth and inspecting the root architecture for dark, necrotic lesions. While both appear as circular voids, Brown Patch affects the leaf blades first, whereas Summer Patch destroys the root cortex, making the grass pull up easily like a cheap carpet.
“Brown patch (Rhizoctonia solani) is most severe when night temperatures are above 65°F and leaves remain wet for more than 10 hours.” – Penn State Center for Turfgrass Science
The forensic difference is in the details. Brown Patch often leaves a ‘smoke ring’ of gray, fuzzy mycelium around the edges of the circle in the early morning dew. If you don’t see the fuzz, grab a soil probe. If the roots are black and shriveled, you are dealing with a soil-borne pathogen that has already compromised your irrigation efficiency. This is usually the result of soil compaction. When your soil reaches a bulk density that prevents oxygen exchange, the beneficial microbes die off, and the pathogens take over. It is basic biology. If the soil cannot breathe, the plant cannot fight.
| Disease Type | Visual Symptom | Primary Trigger | Soil pH Target |
|---|---|---|---|
| Brown Patch | Smoke rings, tan lesions | High Humidity / High Nitrogen | 6.2 to 6.8 |
| Summer Patch | Yellow/Bronze rings | Soil Heat / Compaction | 5.5 to 6.0 |
| Pythium Blight | Greasy, matted turf | Poor Drainage / Standing Water | 6.5 to 7.0 |
Why Your Irrigation Schedule Is Feeding the Pathogens
To stop fungal spread, you must calibrate your irrigation system to deliver exactly one inch of water per week in a single, deep application rather than daily shallow cycles. Watering at night creates a micro-climate of leaf wetness that acts as an incubator for fungal spores to germinate and spread across the lawn.
How much water does a summer lawn actually need?
Most lawns require precisely one inch of water per week, ideally delivered between 4:00 AM and 8:00 AM. This timing allows the sun to dry the leaf blades quickly while ensuring the water reaches the six-inch root depth. Constant shallow watering keeps the surface wet and the roots lazy. Lazy roots stay in the top inch of soil where they are boiled by the sun and eaten by fungi. You need to force those roots to chase moisture deep into the subsoil profile. That is how you build a resilient turf system.
“The most important factor in turfgrass disease management is the duration of leaf wetness.” – Texas A&M Agrilife Extension
The Remediation Protocol: Beyond the Fungicide
Remediating fungal circles involves mechanical core aeration to reduce hydrostatic pressure in the soil and top-dressing with high-quality compost to reintroduce beneficial biology. Simply spraying a fungicide is a temporary patch that fails to address the anaerobic conditions that allowed the disease to manifest in the first place.
- Conduct a soil test to check for phosphorus and potassium deficiencies.
- Core aerate to a depth of 3 inches to break up the thatch layer.
- Apply a light layer of calcined clay or sand to improve drainage in low spots.
- Reduce nitrogen applications until the fungus is dormant.
- Sharpen mower blades to prevent jagged tears in the grass tissue.
If you are mowing with a dull blade, you are essentially hacking the grass with a blunt instrument. Those jagged edges are open sores. A clean cut seals quickly. A ragged tear stays open for hours, providing a perfect entry point for spores. Your yard cleanup routine must include a blade check every ten hours of engine time. No exceptions.
Sod Install vs. Recovery: When is the Yard Beyond Saving?
Deciding on a sod install versus recovery depends on the percentage of crown survival; if more than 50% of the grass crowns in a circle are necrotic and shriveled, the area is biologically dead. In these cases, a full yard cleanup followed by soil excavation and new sod is the only way to restore the structural integrity of the landscape.
What is the best time for a sod install after fungus?
Wait until the soil temperature drops below 70 degrees and you have corrected the underlying drainage issues. Installing new sod over fungus-infested, compacted clay is just buying expensive compost. You must excavate at least two inches of the old, contaminated soil and replace it with a 70/30 sand-compost mix before laying new rolls. This ensures the new root system has a clean, aerobic environment to colonize. Don’t skip the grading phase. If the water doesn’t move off the surface, the new sod will rot just as fast as the old grass did. Professional landscaping is about managing water, not just picking pretty plants.