
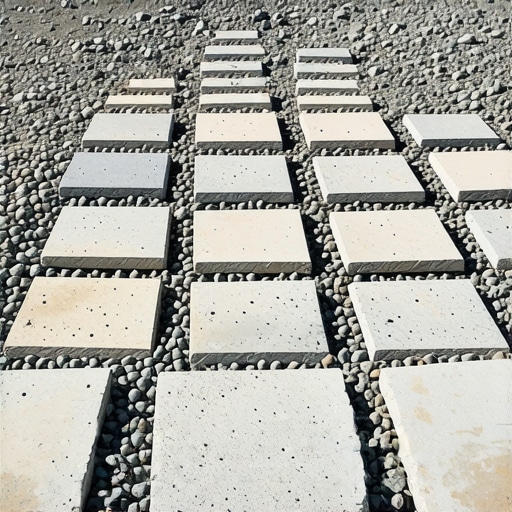
The Hardscape Autopsy: Why Most Paths Fail by Year Three
I recently got called out to tear up a $30,000 patio and walkway that was sinking because the previous contractor thought 2 inches of play sand was a sufficient base. It was a disaster. The homeowner was literally tripping over flagstones that had tilted like sinking ships. This is what happens when you treat hardscaping like a weekend craft project instead of a civil engineering task. If you do not understand the relationship between soil compaction, hydrostatic pressure, and the angular interlocking properties of crushed limestone, you are just throwing money into a hole in the ground. For 2026, the standard for leveling stepping stones has moved beyond simple aesthetics to a focus on long-term structural stability and drainage efficiency. You must treat the ground beneath the stone with more respect than the stone itself.
How to Level Stepping Stones with Crushed Limestone for Maximum Stability
To level 2026 stepping stones effectively, you must excavate to a minimum depth of 6 inches, install a geotextile fabric, and backfill with 4 inches of compacted #57 crushed limestone followed by a 1-inch leveling bed of limestone screenings. This layered approach creates a load-bearing foundation that resists frost heave and prevents stone migration.
“A retaining wall or stone path doesn’t fail because of the stone; it fails because of the water trapped behind or beneath it.” – Hardscape Engineering Axiom
The Physics of Crushed Limestone vs. Rounded Stone
Why do I insist on crushed limestone over pea gravel or sand? It comes down to the Angle of Repose and mechanical interlocking. Crushed limestone is angular. When you run a plate compactor over it, those sharp edges lock together like a jigsaw puzzle. Pea gravel is rounded; it acts like ball bearings. If you put a heavy flagstone on pea gravel, it will shift every time you step on it. Sand is even worse because it washes away during heavy rain. We use limestone because it provides a rigid base while still allowing for vertical drainage. This is critical for preventing the puddling that leads to ice lenses in the winter. If you live in a climate with freeze-thaw cycles, sand is your enemy. Limestone is your insurance policy.
Phase 1: Site Preparation and Yard Cleanup
Before you even touch a bag of stone, you need a thorough yard cleanup. This isn’t just about raking leaves. You need to strip the organic layer. Grass, roots, and topsoil are compressible. If you build on top of them, they will rot, create air pockets, and your path will settle unevenly. I tell my crew: if I see a single blade of grass under that geotextile, you’re doing it over.
How much crushed limestone do I need for a patio base?
To calculate the tonnage required, multiply your total square footage by the desired depth in feet, then multiply by 0.05 to account for a standard 100-pound per cubic foot density. For a path that is 50 feet long and 3 feet wide with a 4-inch base, you are looking at roughly 2.5 tons of stone. Don’t eyeball it. Order the extra half-ton. You’ll need it for the low spots in the subgrade.
| Material Type | Compaction Rating | Drainage Capability | Recommended Use |
|---|---|---|---|
| #57 Crushed Limestone | Excellent | High (Open Graded) | Structural Base Layer |
| Limestone Screenings | Good | Moderate | Final Leveling Bed |
| Play Sand | Poor | Low | Avoid for Heavy Stone |
| Pea Gravel | None | High | Decorative Infill Only |
Phase 2: Soil Grading and Subgrade Compaction
The biggest mistake I see in DIY landscaping is ignoring the subgrade. Once you’ve excavated, you must grade the soil to slope away from any structures at a 2% minimum pitch. That is a 1/4 inch drop for every foot of run. Use a transit level; your eyes will lie to you. After grading, you must compact the raw earth. I don’t care how hard the ground feels. Hit it with a vibratory rammer. You are looking for a 95% Proctor density. If the soil is heavy clay, common in many regions, you might need to incorporate a soil stabilizer or a thicker lift of stone to prevent the clay from pumping up into your clean limestone. [image placeholder]
Phase 3: The Geotextile Barrier
Never skip the fabric. A non-woven geotextile acts as a separator. It keeps your expensive crushed limestone from sinking into the native soil while allowing water to pass through. Without it, the soil and stone will eventually mix, a process called “fines migration,” and your path will lose its structural integrity. It will rot from the bottom up. Lay the fabric flat, overlap your seams by 12 inches, and pin it down. This is the barrier between a professional job and a hack job.
How to level uneven garden path stones?
To fix stones that are already wobbly, you must lift the stone, remove the failed base material (usually sand or dirt), and replace it with a 2-inch lift of limestone screenings. Wet the screenings slightly, tamp them until they are rock hard, and then reset the stone using a dead-blow rubber mallet to ensure full contact with the base. Don’t just shim the corners with small rocks. That creates pressure points that will crack the stone. You need 100% surface contact between the stone and the leveling bed.
Integrating Irrigation and Sod Install
When you are running a new path, you have to account for your irrigation system. This is where most people screw up. They lay the stones right over the lateral lines. If a pipe bursts under a compacted limestone base, you’re in for a nightmare of a repair.
“Irrigation efficiency is lost the moment a hardscape layout ignores the spray patterns of the existing rotors.” – Irrigation Association Standards
If your path intersects a zone, you need to relocate the heads or sleeve the pipes under the path using PVC conduit. Once the stones are set and leveled, your sod install should be the final step. Do not just butt the sod up to the stone. Cut a clean edge and ensure the sod is slightly higher than the stone to allow for the inevitable 1/2 inch of settling of the grass blades. This prevents the stone from being swallowed by the lawn over time.
- Step 1: Mark the path with marking paint and check for 811 utility clearances.
- Step 2: Excavate 6-8 inches deep, removing all organic matter and roots.
- Step 3: Compact the subgrade soil using a mechanical plate compactor.
- Step 4: Install non-woven geotextile fabric across the entire trench.
- Step 5: Add 4 inches of #57 crushed limestone in 2-inch lifts, compacting each lift.
- Step 6: Add 1 inch of limestone screenings as the final leveling bed.
- Step 7: Use a straight-edge 2×4 to screed the screenings perfectly flat.
- Step 8: Set the stepping stones, leaving 2-4 inches of space for infill or grass.
- Step 9: Check each stone for wobbles; if it moves, pull it and add more screenings.
- Step 10: Fill the gaps with decorative stone or prepare for sod install.
Maintaining the 2026 Path
A path built this way is low maintenance, but it isn’t “no maintenance.” Over time, organic fines (dust and decomposed leaves) will settle into the gaps. If you don’t blow them out periodically, weeds will find a home. Don’t use harsh chemicals that will leach into the soil and change the pH, especially since limestone is already alkaline. A simple vinegar solution or a propane torch is better for managing weeds without ruining the soil microbiology. If you see a stone start to tilt, address it immediately. It usually means a drainage issue has developed nearby, possibly from a clogged gutter or a redirected irrigation head. Fix the water, and you fix the path. Don’t be the person who ignores a small dip until it becomes a trench. Take pride in the engineering beneath your feet. It’s the only way to ensure your landscaping survives the next decade.