March 13, 2026 | Anna Lee

Fix 2026 Irrigation Waste with 4 Smart Sensor Hacks

Fix 2026 Irrigation Waste with 4 Smart Sensor Hacks

The Forensic Autopsy of a $15,000 Drowning Landscape

I recently walked onto a property where the homeowner was literally watching their investment melt into the municipal sewer system. The symptom was a ‘sponge lawn’—that sickening, anaerobic squish you feel when the soil is so saturated the oxygen has been completely displaced. They had a $40,000 hardscape project, a beautiful paver patio, that was beginning to heave because the ‘smart’ irrigation system they bought from a big-box store was dumping three inches of water a week on a clay-heavy site that only needed one. This wasn’t just a waste of water; it was a structural failure in the making. Irrigation waste in 2026 is solved by transitioning from schedule-based timers to sensor-integrated feedback loops that measure real-time soil moisture and flow rates to prevent over-saturation and catastrophic leaks. Most systems are set to ‘dumb’ modes that ignore humidity, soil saturation, and local wind speeds, leading to 50% water loss through evaporation and runoff.

“A retaining wall doesn’t fail because of the stone; it fails because of the water trapped behind it.” – Hardscape Engineering Axiom

Why Your Current Irrigation Timer is an Engineering Liability

Most homeowners treat irrigation like a ‘set it and forget it’ appliance. This is a mistake. Traditional timers operate on a linear clock, ignoring the actual biological needs of the turf or the physics of the soil. When you apply water faster than the infiltration rate of the soil, you create runoff. That runoff carries nitrogen and phosphorus into the storm drains, starving your plants and polluting the local watershed. I’ve seen 20-year-old oaks die of root rot because a ‘mow-and-blow’ hack bumped the timer up to 30 minutes a zone during a drought and never turned it back down. We are moving into an era of precision horticulture. You need to manage your yard’s hydro-zones with the same rigor a civil engineer manages a dam.

Hack 1: Deploying TDR Soil Moisture Sensors

Soil moisture sensors using Time Domain Reflectometry (TDR) measure the dielectric constant of the soil to determine volumetric water content, allowing the irrigation controller to bypass scheduled cycles if the root zone is already at field capacity. This isn’t the cheap, two-pronged probe you see in a ceramic pot. We are talking about buried sensors that send an electromagnetic pulse into the soil matrix. They measure how fast that pulse returns, which tells us exactly how much water is held between the soil particles. If your soil is at 25% moisture and your turf’s wilting point is 15%, the system shouldn’t kick on. Period. It saves the pump, saves the water, and keeps the roots searching deep for moisture rather than staying lazy at the surface. Deep roots are the only defense against a July heatwave.

How deep should soil moisture sensors be buried?

For standard turfgrass like Tall Fescue or Kentucky Bluegrass, sensors should be placed 4 to 6 inches deep within the active root zone to provide accurate data. For shrubs and trees, secondary sensors at 12 to 18 inches are necessary to monitor deep-soil hydration levels and prevent anaerobic conditions.

Hack 2: Ultrasonic Flow Sensors and Automatic Shut-offs

Ultrasonic flow sensors detect minute changes in water velocity within the lateral lines, identifying leaks or broken sprinkler heads in real-time and triggering an emergency master valve shut-off to prevent property damage. I once saw a lateral line burst under a driveway. It ran for six hours before the homeowner noticed the geyser. It undermined the entire sub-base of the driveway, leading to a $12,000 excavation and repave. An ultrasonic flow meter catches that in seconds. It knows the difference between a high-flow zone and a catastrophic rupture. If the GPM (gallons per minute) exceeds the programmed threshold, the system kills the water at the source. It is the cheapest insurance policy you will ever buy for your landscaping.

Sensor TypePrimary FunctionWater Savings (Est.)Primary Benefit
TDR Moisture SensorMeasures Volumetric Water Content30-50%Prevents anaerobic root rot
Ultrasonic Flow MeterMonitors GPM and detects leaksVaries (High Impact)Prevents structural/foundation damage
ET Weather StationCalculates Evapotranspiration20-40%Adjusts for wind/humidity/solar radiation
Pressure RegulatorMaintains optimal PSI (30-45)10-15%Eliminates misting and wind drift

Hack 3: Hyper-Local Evapotranspiration (ET) Data

Evapotranspiration (ET) sensors calculate the total amount of water lost through soil evaporation and plant transpiration, allowing the controller to replace only the specific amount of moisture lost in the previous 24 hours. Most ‘smart’ controllers pull data from a weather station at the local airport. That’s useless if you live ten miles away on a hill while the airport is in a valley. A local ET sensor on your fence post measures solar radiation, wind speed, and temperature. It calculates the ‘water deficit.’ If your yard lost 0.15 inches of water today, the system puts back 0.15 inches. No more, no less. This precision prevents the salt buildup in the soil that occurs when you over-irrigate with treated municipal water.

“Irrigation scheduling should be based on the water-holding capacity of the soil and the water requirements of the plant species, not a calendar.” – Penn State Agricultural Extension

Hack 4: Pressure Regulated Sprinkler Heads (PRS)

Pressure regulated sprinkler heads maintain a constant 30 to 45 PSI at the nozzle, preventing the ‘misting’ effect where water atomizes into a fine fog and blows away before hitting the ground. If your heads are screaming and throwing a fine mist, you’re losing 30% of your water to the wind. High pressure also wears out the internal seals of the heads. By installing PRS heads, you ensure that every drop is heavy enough to fall into the canopy. It also ensures uniform distribution. Without pressure regulation, the head closest to the valve gets 60 PSI while the last head gets 20 PSI. The result is a yard with green spots and brown spots. It’s not a ‘disease’ in your grass; it’s a failure of hydraulics.

The 2026 Irrigation Efficiency Checklist

  • Check the static pressure at the hose bib (Goal: 50-70 PSI).
  • Inspect every nozzle for ‘fingering’ or clogged orifices.
  • Verify that the rain sensor is not obstructed by overhanging tree limbs.
  • Ensure 811 has marked all lines before any sod install or trenching.
  • Calibrate the controller for your specific soil texture (Sand, Silt, or Clay).
  • Test the master valve for ‘weeping’ or slow leaks.

How do I know if my irrigation system is wasting water?

Look for ‘misting’ at the heads, water running over the curb into the street, or mushrooms growing in the lawn. These are diagnostic signs of high pressure and over-saturation. Performing a ‘catch can’ test to measure the Uniformity Coefficient is the professional way to audit your actual delivery versus the manufacturer’s specs.

Remediation: The Step-by-Step Fix

First, kill the power to your old clock. You can’t fix a 1990s mindset with a 2026 problem. Second, install a master valve. If you don’t have one, your main line is always under pressure, waiting to flood your basement. Third, retrofit your zones with pressure-regulating stems. Fourth, bury your TDR sensors at the midpoint of your deepest root zone. Do not skip this. If you put them too shallow, they’ll dry out in ten minutes and trigger the water. If you put them too deep, they’ll stay wet while the grass dies. Aim for the 6-inch mark for most sod installs. Finally, calibrate your flow zones. Run each zone for two minutes and record the GPM. Program these into your controller as the ‘normal’ state. Anything 15% above that is a leak. Anything 15% below is a clog. Monitor the data. Landscaping is a game of inches and gallons. If you aren’t measuring, you’re just guessing. And guessing is expensive.

March 12, 2026 | Jane Doe

4 Simple Valve Fixes for Low 2026 Sprinkler Pressure

4 Simple Valve Fixes for Low 2026 Sprinkler Pressure

Understanding the Mechanics of Irrigation Pressure Loss

Low sprinkler pressure is rarely a mystery of the city water supply; it is usually a failure of hydraulic management within the valve manifold. Irrigation pressure loss occurs when mechanical obstructions or diaphragm failures restrict the flow rate (GPM), preventing the sprinkler heads from reaching their intended PSI operating range. Resolving these issues is critical for maintaining a high-end landscaping project or a fresh sod install.

The Apprentice Lesson: Infrastructure Before Aesthetics

I always drill into my new crew members: if you don’t fix the soil grading and the irrigation infrastructure first, every plant you put in the ground is just expensive compost. I remember a kid named Miller who thought he could skip the pressure test on a 12-zone yard cleanup. He laid $8,000 worth of premium tall fescue sod before checking the valves. Two weeks later, the south-facing slope was a sea of brown straw. Why? A single 1-inch valve was only opening 30% of the way because of a grain of sand in the bleed port. He had to hand-water for three days while we excavated the manifold. It’s a mistake you only make once. Infrastructure isn’t pretty, but it’s the only thing that keeps the pretty things alive.

“A retaining wall doesn’t fail because of the stone; it fails because of the water trapped behind it.” – Hardscape Engineering Axiom

1. Cleaning the Valve Diaphragm and Bleed Port

Troubleshooting the diaphragm involves disassembling the valve bonnet to remove sediment and calcification that prevents the internal rubber from seating or lifting correctly. This hydraulic restriction is the primary cause of low dynamic pressure in residential irrigation systems. It requires zero new parts—just a clean rag and a steady hand.

When you pull the top off a Rain Bird or Hunter valve, you’re looking at a piece of EPDM rubber. Over time, especially in areas with hard water, minerals build up on the edges. If that rubber doesn’t lift completely, you’re trying to force 15 GPM through a gap the size of a thumbnail. It creates massive friction loss. Check the porting holes. These tiny holes regulate the pressure on top of the diaphragm. If one is clogged with a bit of PVC glue from the original sod install, the valve won’t open fully. Use a thin wire to clear it. Don’t use a drill bit. You’ll ruin the seal. It’s precise work.

2. Adjusting the Flow Control Stem

The flow control stem is a manual override that limits the travel distance of the valve diaphragm, and it is often inadvertently turned down during routine yard cleanup or maintenance. Adjusting this component restores the internal orifice size, allowing the maximum volume of water to pass through the manifold to the lateral lines.

Many homeowners don’t even know that handle on top of the valve exists. It’s designed to prevent “misting” by throttling pressure, but if it gets bumped, your rotors will barely pop up. Turn it counter-clockwise until it stops. Then, back it off a quarter turn. This ensures the plunger isn’t binding. If you’ve recently had a landscaping crew out for a yard cleanup, they might have hit the valve box with a power rake or a mower. Always check the physical settings before you start digging up pipes. It’s a two-minute fix that saves a $200 service call.

How do I know if my irrigation valve is bad?

You can diagnose a failing irrigation valve by checking for weeping heads when the system is off or measuring the voltage at the solenoid using a multimeter. If the valve fails to open despite receiving 24VAC, the solenoid plunger or the internal diaphragm is likely seized. Physical cracks in the valve body also indicate replacement is necessary.

3. Inspecting the Solenoid for Debris and Continuity

The solenoid acts as the electromagnetic trigger for the valve, and any internal friction or electrical resistance will prevent the valve from fully engaging the hydraulic bypass. Testing for continuity and cleaning the plunger housing ensures the valve receives the signal to open to its full rated capacity.

Remove the solenoid by turning it counter-clockwise. Look at the plunger. It should move freely against the spring. If it’s sticky, it’s covered in biofilm or silt. Wipe it down. While you’re there, check the wires. Wire nuts in irrigation boxes are notorious for corrosion. If the solenoid isn’t pulling enough amperage, the magnetic field isn’t strong enough to lift the plunger against the static water pressure. This leads to a “half-open” state. Use a waterproof connector. Tape doesn’t count. It will rot.

4. Clearing Obstructions in the Valve Orifice

An orifice obstruction occurs when debris, such as PVC shavings or gravel, becomes lodged in the valve seat, creating a localized pressure drop. This is common after a new irrigation repair or a sod install where the mainline was opened and not properly flushed before the valves were energized.

If you’ve cleaned the diaphragm and the pressure is still low, you have a physical block. I’ve found everything from small pebbles to bits of purple primer stuck in the valve seat. You have to flush the mainline. Remove the valve guts, turn the water on slowly, and let it blow the debris out of the box. Wear boots. You’re going to get wet. This is why I tell my guys to flush every line before the final nozzle install. One tiny rock can kill an entire zone’s distribution uniformity. It’s about hydrodynamics, not just plumbing.

Pipe Size (Schedule 40 PVC)Flow Rate (GPM)PSI Loss per 100ft
3/4 Inch8 GPM3.91 PSI
1 Inch12 GPM2.20 PSI
1.25 Inch20 GPM1.75 PSI

“Irrigation efficiency is not a suggestion; it is a mathematical requirement for plant survival.” – Texas A&M AgriLife Extension

How much pressure should my sprinkler system have?

Most residential sprinkler systems require a working pressure of 30 to 50 PSI at the nozzle to achieve proper head-to-head coverage. If the pressure exceeds 60 PSI, you risk misting and evaporation loss, which necessitates the use of pressure-regulating valves or PRS-dial rotors.

Irrigation Maintenance Checklist

  • Test static pressure at the hose bib before every season.
  • Clean internal filters on all rotors and spray heads.
  • Inspect valve box for standing water or leaks.
  • Check solenoid wiring for oxidation or loose connections.
  • Verify distribution uniformity to prevent hydrophobic soil spots.

Precision matters. A lawn doesn’t just need water; it needs the correct volume at the correct pressure. If your valves are gunked up, your sod install is a ticking time bomb. Don’t be the homeowner who spends $5,000 on landscaping but won’t spend 20 minutes cleaning a $15 valve diaphragm. Fix the pressure, and the grass will take care of itself. Forget the fluff. Focus on the hydraulics. That is how you maintain a professional-grade property in 2026.

March 12, 2026 | Emily Clark

3 Warrenton VA Tree and Shrub Planting Fixes for Clay Soil in 2026

3 Warrenton VA Tree and Shrub Planting Fixes for Clay Soil in 2026

The shovel strikes the earth and emits a dull, metallic thud. It is not the sound of shifting sand or rich loam. It is the sound of Fauquier County clay. In the humid heat of a Virginia afternoon, this soil feels like sun-baked brick. When the rains finally arrive, it transforms into a thick, orange paste that clings to your boots with a weight that feels personal. For anyone attempting Tree and Shrub Planting Warrenton VA, this soil is the primary antagonist in a very long story. Most homeowners expect a simple dig-and-drop process. They are met with a geological reality that defies easy gardening. Editor’s Take: Success in 2026 requires abandoning deep burial in favor of raised installation and strategic drainage to prevent root rot in Northern Virginia’s dense substrate.

3 Warrenton VA Tree and Shrub Planting Fixes for Clay Soil in 2026

The psychology of planting here is often rooted in a desire for permanence. We want our oaks and azaleas to outlast us. Yet, the very ground we entrust them to is often their greatest threat. Clay is not inherently evil. It is rich in minerals and holds moisture with incredible tenacity. The problem lies in the structure. The microscopic plates of clay stack so tightly that oxygen—the very thing roots crave—cannot penetrate. When you consider sustainable yard care, you have to think about air as much as water. The roots are suffocating. They are trying to breathe through a wet wool blanket. This is why so many DIY projects fail within the first two seasons. The effort is there, but the physics are wrong.

Consider the bathtub effect. It is the most common failure in local horticulture. A gardener digs a deep, beautiful hole in the clay. They fill that hole with expensive, loose potting soil. They place the tree. For a few weeks, it looks magnificent. Then, the storm hits. The loose soil in the hole acts like a sponge, but the surrounding clay acts like a porcelain tub. The water has nowhere to go. It sits. The roots drown. It is a slow, quiet death that many mistake for disease or lack of water. This misunderstanding drives many to seek professional Landscaping services in Warrenton VA just to diagnose why their expensive privacy screen turned brown by August. It’s not about the plant; it’s about the hydraulic trap you’ve unintentionally built.

Why Your Shovel is Your Worst Enemy

Stop digging down. Start thinking up. The first major fix for 2026 is the ‘One-Third Rule.’ You plant the root ball so that the top third sits above the natural grade of the ground. You then build a gentle mound of soil and mulch around it. This creates a natural drainage ramp. It ensures the most sensitive part of the root system stays above the water table. This shift in perspective is what separates a thriving garden from a graveyard of saplings. It feels counterintuitive. Our instincts tell us to bury things deep for stability. In clay, depth is a death sentence. This approach is a cornerstone of modern local drainage solutions. If you look at the best estates in the area, you’ll notice that trees often sit on slight rises. That isn’t just for aesthetics. It is survival.

The Mechanical Solution to Soil Compaction

The second fix involves mechanical intervention. Clay needs to be shattered, not just moved. When we look at Hardscaping contractors Warrenton VA, we see them using heavy equipment to grade land, but for planting, a simple garden fork is often better than a spade. Instead of smooth, glazed walls in your planting hole, you want jagged, rough edges. This allows roots to find purchase in the surrounding soil. If the walls are smooth, the roots will simply circle inside the hole like they are still in a plastic pot. This is where Warrenton VA landscape design becomes an art of texture. You are creating a transition zone. You are making the native soil more hospitable without creating a container environment.

Building the Upward Garden

The third fix is the integration of organic matter as a top-dress rather than a buried amendment. People love to mix compost deep into the hole. Don’t. Over time, that organic matter decomposes, the soil settles, and the tree sinks even deeper into the clay bathtub. Instead, use high-quality Mulching services Warrenton VA to apply a thick layer of shredded hardwood or leaf mold on top. Let the worms do the work. They will pull that nutrition down into the clay, creating natural micro-channels for air and water. It is a slower process, but it respects the natural biology of the Piedmont region. This long-term view is essential for anyone serious about winter plant protection and year-round garden health.

What About the Rest of the Yard?

While we focus on trees, the surrounding turf often suffers from the same compaction issues. Lawn care services Warrenton VA frequently recommend aeration to break the clay’s grip on your grass. It is the same principle: air must reach the roots. If the ground is too hard for a tree, it is certainly too hard for delicate fescue. Sometimes, the soil is so poor that Sod installation Warrenton VA is the only way to establish a base, but even then, the ground underneath must be prepped. You cannot lay beauty over a dead foundation. For those with significant slope issues, Retaining wall builders Warrenton VA can create terraced beds that provide the depth of soil needed without the drainage headaches of flat ground. It is about working with the topography, not against it. Patio installation Warrenton VA projects also offer an opportunity to install hidden drainage pipes that can whisk excess water away from your prize specimens.

Frequently Asked Questions

Can I add sand to my clay to improve drainage? No. Adding sand to clay in Virginia often results in a substance resembling low-grade concrete. Stick to organic compost and wood chips. When is the best time for Tree and Shrub Planting Warrenton VA? Fall is king. It allows the roots to establish in the cool, moist clay without the stress of the summer sun. Why do my newly planted shrubs look wilted even when the soil is wet? They are likely drowning. The water is trapped in the planting hole, and the roots are rotting, which prevents them from taking up moisture. It’s a cruel irony.

Gardening in Warrenton is a marathon. It requires patience and a willingness to get your hands dirty in the most literal sense. By following these three fixes—mounding your plants, shattering the hole walls, and mulching from the top down—you give your greenery a fighting chance against the heavy hand of Virginia clay. Ready to transform your property? Contact us today for a consultation on your next project.

March 12, 2026 | Emily Clark

7 Low-Cost Ways to Speed Up 2026 Sod Rooting [Tested]

7 Low-Cost Ways to Speed Up 2026 Sod Rooting [Tested]

The Blueprint for Rooting Success in 2026

Eighty percent of a successful sod install is completed before the first pallet arrives on the trailer. If you are waiting until the grass is on the ground to think about rooting, you have already failed. In my 20 years of managing turf, I have seen thousands of dollars of landscaping investment turn into expensive brown compost because the installer treated sod like carpet rather than a living, breathing biological system. Real success requires understanding the hydrostatic pressure of the soil and the microbial activity in the rhizosphere. Don’t skip the prep.

The Chemical Nightmare: A Cautionary Tale

I remember a homeowner in 2023 who called me in a total panic. He had just spent $5,000 on high-end fescue sod and, wanting to give it a ‘boost,’ applied a massive dose of 46-0-0 urea fertilizer in 90-degree heat. He didn’t just burn the blades; he torched the soil biology. By the time I got there, the soil was sterile and the roots were shriveled like old wire. We had to excavate three inches of topsoil and start from scratch. Cheap chemicals without a soil test are a death sentence for your yard.

1. The Precision Yard Cleanup and Grading

Answer Capsule: To speed up 2026 sod rooting, you must perform a mechanical yard cleanup that removes all organic duff and thatch. This ensures 100% soil-to-sod contact, allowing the adventitious roots to penetrate the native soil immediately without an anaerobic barrier of decaying old grass.

You cannot just mow the old grass short and throw sod over it. It will rot. You need to strip the area down to the bare mineral soil. I use a power rake or a sod cutter for this. If you leave even a half-inch of old organic matter, you create a physical barrier that prevents irrigation from reaching the subsoil effectively. The soil must be graded to a 1% slope away from foundations to prevent pooling. Water is a tool, but too much in the wrong spot is a solvent that dissolves your investment.

2. Soil pH Calibration: The 6.5 Rule

Answer Capsule: Optimizing sod install rooting requires a soil pH between 6.2 and 7.0 to ensure nutrient bioavailability. If your soil is too acidic, the phosphorus—the primary driver of root elongation—becomes chemically locked and unavailable to the new grass blades.

“The primary cause of sod failure is the ‘perched water table’ effect created by mismatched soil textures between the farm-grown sod and the installation site.” – Texas A&M Agrilife Extension

Most DIYers ignore the chemistry. I don’t. If your soil is at a 5.5 pH, you can throw all the fertilizer you want at it, and the roots will still starve. Use pelletized lime to raise pH or elemental sulfur to lower it. This is a low-cost step that pays dividends in days, not months. You are building a biological engine; the soil is your fuel.

3. The “Deep-Cycle” Irrigation Protocol

Answer Capsule: Effective irrigation for new sod involves deep, infrequent watering after the first 72 hours. While the first three days require constant moisture, you must quickly transition to forcing roots to chase water deeper into the soil profile by letting the surface dry slightly.

The internet tells you to water every day for a month. The internet is wrong. If the surface is always wet, the roots have no reason to grow down. They stay in the top half-inch of the sod mat. This makes the lawn weak. By day four, start backing off. Let the soil get firm. Force those roots to hunt for moisture at the four-inch mark. This is how you build a drought-resistant lawn by 2026. Use a tuna can to measure; you want one inch of water per week, delivered in two heavy sessions.

How often should I water new sod in the first 14 days?

In the first 3 days, water 3 times daily for 10-15 minutes to keep the mat saturated. From days 4 to 7, move to once daily. From day 8 onward, water every other day, increasing the duration to drive moisture deeper into the ground.

4. Mechanical Aeration of the Sub-Base

Answer Capsule: Before a sod install, you must address soil compaction by core aerating the bare ground. This reduces bulk density and allows oxygen and water to reach the root zone, which is essential for the metabolic processes of root initiation.

MethodCostRooting Speed IncreaseLong-Term Benefit
Surface RakingLow5-10%Minimal
Core AerationMedium30-40%High (Compaction Relief)
Tilling (6 inches)High50%+Maximum (Soil Structure)

If your soil is hard as concrete, those tender new roots will just hit a wall and grow sideways. I’ve seen it a thousand times. We call it ‘J-rooting.’ You want the soil to have a PSI of less than 200. If you can’t push a screwdriver six inches into the ground with one hand, your sod will struggle. Rent an aerator. It’s cheap insurance.

5. The Carbon-Based Starter Hack

Answer Capsule: Instead of high-nitrogen synthetic fertilizers, use a carbon-based starter with humic acid. This stimulates mycorrhizal fungi, which form a symbiotic relationship with the sod roots, effectively tripling the root surface area for nutrient uptake.

Synthetics are like caffeine; they give a quick buzz but no substance. Humates and sea kelp extracts are the real secret. They contain natural auxins and cytokinins—hormones that literally tell the plant to ‘grow roots now.’ You can find these at professional turf shops for less than $30 a bag. It’s the best money you’ll spend on your landscaping this year.

6. Rolled and Tamped Integrity

Answer Capsule: Using a sod roller filled one-third with water eliminates air pockets between the sod and the soil. Air is the enemy of rooting; an air pocket acts as a thermal barrier that desiccates the roots before they can strike the ground.

I see guys walking on sod to ‘set’ it. That’s bush league. You get uneven pressure and divots. Use a proper roller. The goal is to make the sod and the earth one single unit. You want to see the edges of the sod seams ‘knit’ together under the weight. No air. No gaps. Just contact. It’s physics, not magic.

“A retaining wall doesn’t fail because of the stone; it fails because of the water trapped behind it; similarly, sod doesn’t fail because of the grass, but the lack of pore space in the soil beneath.” – Hardscape Engineering Axiom

What is the best fertilizer for 2026 sod installs?

The best fertilizer is a slow-release phosphorus-heavy blend, such as an 18-24-12, combined with a bio-stimulant. Avoid high-nitrogen ‘winterizers’ or weed-and-feed products, as these can chemically burn new, non-established root tips.

7. The 1/4 Inch Sand Top-Dressing

Answer Capsule: Applying a thin layer of masonry sand over the seams of new sod helps regulate temperature and retain moisture at the most vulnerable points. This prevents the edges from shrinking and browning during the critical first 10 days of the sod install.

The seams are the first place sod dies. They dry out from the side. By brushing a little sand into those gaps, you create a moisture seal. It also helps level out any minor bumps in your grade. It’s a professional trick that costs almost nothing but makes the lawn look like a golf course in weeks.

Pre-Sod Installation Checklist

  • Conduct a 6-inch depth soil test for pH and NPK levels.
  • Kill all existing vegetation with a non-selective herbicide 14 days prior.
  • Remove all debris and rocks larger than 1 inch.
  • Regrade the surface to ensure positive drainage.
  • Flag all irrigation heads and utility lines (Call 811).
  • Apply a humic-acid based soil conditioner.

Rooting is a race against time. The moment that sod is cut at the farm, its clock is ticking. Your job is to make the transition to its new home as seamless as possible. Follow the science, ignore the hacks, and get your hands in the dirt. 2026 is the year of the deep root.

March 11, 2026 | Jane Doe

Fix 2026 Sprinkler Coverage with 3 Simple Head Adjustments

Fix 2026 Sprinkler Coverage with 3 Simple Head Adjustments

The Irrigation Autopsy: Why Your Green Grass is a Lie

To fix 2026 sprinkler coverage, you must address dynamic water pressure, arc alignment, and nozzle flow rates to ensure 100% head-to-head overlap. Achieving uniform distribution prevents localized dry spots and fungal outbreaks caused by over-compensating for poor coverage with excess water. I recently performed a forensic audit on a $15,000 sod install in a high-end development. The homeowner was furious; the grass was yellowing in 10-foot circles. The previous contractor had used high-pressure spray heads on a 25-foot spacing. The wind was shearing the mist before it even hit the ground. The soil was bone dry three inches down. It was a textbook failure of engineering. Most ‘pros’ think if the ground is wet, the job is done. They’re wrong. Landscaping is physics. If your coefficient of uniformity is below 70%, you aren’t irrigating; you’re just making mud.

Adjustment 1: Optimizing the Arc and Radius for Head-to-Head Coverage

Adjusting the arc and radius involves using a flat-head screwdriver or a rotor tool to ensure the water throw from one head reaches the base of the next, preventing ‘doughnut’ patterns. This head-to-head coverage is the industry standard for preventing dry gaps in turf.

“A landscape irrigation system is only as efficient as its weakest emitter; non-uniformity is the primary cause of plant stress and water waste in urban environments.” – Irrigation Association Technical Manual

Look at your rotors. If the stream is hitting the fence or the driveway, you’re throwing money away. Most rotors have a radius reduction screw. Don’t just crank it down. Cranking the screw breaks the stream, creating a mist that evaporates before it hits the root zone. You want large, heavy droplets. If you have a 30-foot gap between heads, those heads better be throwing exactly 30 feet. Not 28. Not 32. Precision matters.

How do I adjust a Hunter or Rain Bird rotor arc?

To adjust the arc, insert the plastic key into the adjustment socket and turn toward the plus or minus symbol to increase or decrease the rotation angle. Always set the fixed left stop first by physically turning the entire head housing on the riser before fine-tuning the right-side oscillation.

Adjustment 2: Swapping Standard Nozzles for High-Efficiency Rotary Nozzles

Replacing standard spray nozzles with high-efficiency rotary nozzles (like MP Rotators) reduces the application rate, allowing water to soak into heavy clay soils without surface runoff or wind-drift. These nozzles deliver multiple streams of water at a slower, more deliberate pace. Most ‘mow-and-blow’ crews love standard sprays because they are cheap. But standard sprays have a high precipitation rate. They dump water faster than the soil can absorb it. In five minutes, you have a puddle on the sidewalk and a dry root zone. Rotary nozzles solve this. They have ‘matched precipitation,’ meaning a 90-degree head and a 360-degree head deliver the same amount of water per square inch. This is basic agronomy. Stop drowning your sod and start feeding the roots.

Nozzle TypePrecipitation Rate (in/hr)Wind ResistanceSoil Suitability
Standard Spray1.5 – 2.0Poor (Mists)Sandy/Fast Draining
Rotary Nozzle0.4 – 0.6Excellent (Heavy Droplets)Clay/Loam/Slopes
Impact Sprinkler0.2 – 0.5FairLarge Acreage

Adjustment 3: Correcting Head Height and Plumb to Eliminate Spray Obstruction

Correcting head height involves excavating the perimeter of the sprinkler and using a swing pipe or ‘funny pipe’ to ensure the head sits flush with the soil grade and is perfectly perpendicular to the horizon. A tilted head creates an uneven spray pattern that over-saturates one side while leaving the other side parched. Over time, heads sink. Or, lazy contractors install them too low to avoid mower blades. If a head is buried in the thatch, the grass blades deflect the water. You get a wet ring around the head and nothing ten feet out. Dig it up. Reset it. Use a level. If it’s not plumb, it’s not right. This is where your yard cleanup and landscaping prep pay off. You can’t have a 2026-ready lawn if your hardware is stuck in 1998.

Why is my sprinkler head leaking from the bottom?

A leak at the base usually indicates a cracked lateral line or a failed wiper seal within the head assembly caused by grit and debris. If the leak persists when the zone is off, you likely have a weeping valve that requires a diaphragm replacement to prevent water waste and soil oversaturation.

The 2026 Sprinkler Performance Checklist

  • Check for Clogs: Remove nozzles and flush the lines to clear construction debris or mineral buildup.
  • Straighten the Risers: Ensure every head is at a 90-degree angle to the soil surface.
  • The Catch Can Test: Place tuna cans around the yard; run the zone for 15 minutes; measure the depth to find ‘dead zones.’
  • Inspect Wiper Seals: If water leaks from the top of the head during operation, the seal is shot. Replace the head.
  • Adjust the Controller: Match your run times to the specific nozzle type (rotaries need 2-3x longer than sprays).

“Hydrostatic pressure must be managed through proper nozzle selection to prevent soil erosion and ensure deep-root penetration in turfgrass.” – ASABE Standards for Landscape Irrigation

Managing the Micro-Climate and Soil Type

If you are dealing with heavy clay, you cannot run your sprinklers for 30 minutes straight. You’ll get runoff. Use the ‘cycle and soak’ method. Run the zone for 10 minutes, let it sit for an hour, then run it again. This forces the water deeper into the profile. For new sod install projects, this is the difference between a lawn that survives July and one that turns into expensive compost. Water isn’t a suggestion for plants; it’s the hydraulic fluid for their entire biology. Get the coverage right. Don’t skip the details. Your lawn will thank you.

March 11, 2026 | Michael Smith

5 Mowing Fixes for a Greener Warrenton VA Lawn [2026]

5 Mowing Fixes for a Greener Warrenton VA Lawn [2026]

The humidity in Fauquier County doesn’t just sit on your skin; it settles into the soil, turning the clay beneath your feet into a stubborn, oxygen-starved slab. It is Saturday morning. The air smells of damp earth and wild onion. You look out at a patch of tall fescue that seems to have grown an inch since yesterday. Most homeowners approach this with a sense of duty, a mindless chore involving a pull-string and a few gallons of gasoline. They are doing it wrong. Proper lawncare warrenton va isn’t about making the grass shorter. It is about managing a living, breathing ecosystem that faces some of the harshest transition zone pressures in the Mid-Atlantic. Editor’s Take: The secret to a resilient lawn isn’t found in a bag of fertilizer, but in the mechanical integrity of your mower and the height of your blade. Stop cutting for aesthetics and start cutting for survival.

5 Mowing Fixes for a Greener Warrenton VA Lawn [2026]

The Piedmont region is a fickle beast. We deal with soil that’s more brick than dirt. When you engage in mowing warrenton va, you are not just trimming; you are performing surgery on a plant that is likely stressed by heat and compaction. The first fix involves the 1/3rd rule. Never take off more than one-third of the grass blade in a single pass. It sounds simple. It is remarkably difficult for those who wait two weeks between mows. When you scalp the grass, you expose the crown. The sun bakes it. The moisture evaporates. The grass dies. We see it every July near the bypass. Brown patches that look like disease are often just the result of a blade set too low by a hurried homeowner. To maintain health, you might look into residential maintenance programs that respect these biological limits.

The Ghost of the Piedmont Clay

Soil here is a character in its own right. It’s heavy. It holds water too long in the spring and becomes a scorched pavement by August. This affects how your grass grows and, subsequently, how you should cut it. Dense clay means roots struggle for depth. If you cut your grass short, those shallow roots have no protection. They cook. By keeping your deck height at 3.5 to 4 inches, you create a canopy. This shade keeps the soil temperature ten degrees cooler. It’s the difference between a lawn that stays green through a dry spell and one that goes dormant and ugly. Local experts often suggest soil testing to understand exactly what that clay is missing before the growing season hits its peak. It isn’t just dirt; it’s a foundation.

When One Third Becomes Too Much

Life happens. You miss a week because of rain or a trip to the coast. You come back to a jungle. The instinct is to drop the deck and hack it back to normal height in one go. Resist this. It’s a shock the plant won’t recover from quickly. Instead, mow it twice. Take off the top inch, wait two days, then mow again. This staggered approach prevents the yellowing effect common with overgrown yards. It’s about patience. Most people lack it. They want the result now, but nature operates on a different clock. Proper seasonal aeration can help the grass recover from these stresses by allowing more air to reach the root zone after a heavy season of foot traffic and mowing equipment.

[IMAGE_PLACEHOLDER]

Steel Against the Virginia Heat

A dull blade doesn’t cut grass; it tears it. Look at the tips of your grass blades a day after you mow. Are they clean and straight? Or are they white and ragged? A ragged edge is a wound. It’s an entry point for fungus. In our humid climate, a dull blade is an invitation for brown patch and leaf spot. You should sharpen your blades every 25 hours of use. For the average Warrenton lot, that’s twice a season. If you hit a stray rock or a thick root from that old oak in the front yard, sharpen them immediately. Sharp steel makes the plant’s recovery almost instant. If you find the technical side of equipment upkeep too much, professional weed control and maintenance crews ensure their equipment is always at peak performance, saving your grass from the trauma of a blunt edge.

The Neighborhood Envy Standard

We often compare our yards to the golf courses or the perfectly manicured estates near the horse country. The reality is that those lawns have a different budget and a different species of grass altogether. For us, the goal is functional beauty. This means accepting a few clover leaves or the occasional dandelion as part of a healthy, diverse micro-environment. However, the biggest shift in perspective comes from mulching. Stop bagging your clippings. Those clippings are free nitrogen. They are moisture. They are the organic matter that our clay so desperately needs. When you mulch, you are returning nutrients directly to the soil. It is the most sustainable thing you can do for your property. For those looking for a complete overhaul of their outdoor space, investing in professional landscaping can bridge the gap between a simple yard and a managed estate. A study by the Virginia Cooperative Extension highlights that proper mowing height is the single most important factor in weed suppression, proving that the height of your deck is your best defense against crabgrass.

Common Questions About Fauquier Turf

How often should I really be mowing? Frequency is dictated by growth, not the calendar. In May, it might be every five days. In August, it might be every twelve. Follow the grass, not the clock.

Is it better to mow when it’s dry? Always. Mowing wet grass leads to clumping, uneven cuts, and can spread fungal spores across the entire property. Wait for the dew to lift.

Why is my grass turning yellow even though I water it? You might be overwatering, or you might be cutting it too short. Short grass can’t photosynthesize well enough to stay vibrant, regardless of how much water you give it.

The sun sets over the ridge. The smell of freshly cut fescue lingers. A good lawn isn’t a miracle; it’s the result of consistent, intelligent choices made week after week. It starts with a sharp blade and a high deck. The rest is just weather. If you’re ready to transform your outdoor space into something truly remarkable, reach out to the pros who understand the local dirt.

March 11, 2026 | Anna Lee

5 Soil Compaction Tests to Run Before Your 2026 Sod Install

5 Soil Compaction Tests to Run Before Your 2026 Sod Install

Why Your 2026 Sod Project Fails Before the First Roll is Laid

I always drill into my new crew members: if you don’t fix the soil grading and compaction first, every plant you put in the ground is just expensive compost. Last season, I watched a neighbor spend six grand on premium fescue sod only to have it turn into a crisp, brown carpet by July. They blamed the grower. They blamed the heat. I took a 12-inch screwdriver out of my truck and couldn’t push it half an inch into their dirt. That yard wasn’t soil; it was an 8,000-square-foot brick. Before you even think about a sod install or a major yard cleanup for 2026, you need to understand the physics of the ground beneath your boots. Compaction is the silent killer of landscaping, and most homeowners don’t realize they have a problem until the irrigation bill hits $400 and the grass is still dying of thirst.

What is Soil Compaction and Why Does it Kill Turf?

Soil compaction is the physical compression of soil particles, which eliminates the macropores and micropores necessary for oxygen and water movement. For a sod install, high bulk density creates a physical barrier that prevents root penetration, leading to shallow rooting, nutrient deficiencies, and localized dry spots despite heavy watering.

“Soil compaction is the most common cause of plant failure in the urban landscape because it restricts the flow of air and water to the root zone.” – Texas A&M AgriLife Extension

When you compress soil, you’re essentially suffocating the microbiology. Without pore space, there is no gas exchange. Carbon dioxide builds up, oxygen is depleted, and the roots literally drown in a dry hole. It’s a paradox: the soil is so tight that water can’t get in, but the little water that does get in can’t drain away, leading to root rot. If you are planning a 2026 project, you have eighteen months to fix this. Don’t waste them.

Test 1: The Standard Screwdriver Resistance Test

The screwdriver test provides an immediate, sensory-based assessment of soil resistance by measuring how much manual force is required to penetrate the upper 6 to 12 inches of the soil profile. If a standard 10-inch screwdriver cannot be pushed fully into the ground with moderate hand pressure, your bulk density is too high for sod.

Wait for a day after a light rain so the soil is moist but not saturated. Take a heavy-duty screwdriver and try to push it into the ground in ten different spots across your yard. If you hit a “wall” within the first three inches, your new sod’s roots will never establish. They will simply mat across the surface, making the grass susceptible to even the slightest drought. This test is the quickest way to determine if your yard cleanup needs to include a heavy-duty aeration or full tilling. It is crude, but it works. If you can’t get to 6 inches, stop the project and call a professional with a core aerator.

Test 2: The Infiltration (Perc) Rate Analysis

The infiltration test measures the hydraulic conductivity of your soil by timing how long it takes for a specific volume of water to disappear into a pre-dug hole. Healthy landscaping soil should drain at a rate of 1 to 2 inches per hour; anything less indicates subsurface compaction that will lead to irrigation runoff and ponding.

To run this, dig a hole 12 inches deep and 12 inches wide. Fill it with water and let it drain completely to saturate the surrounding soil. This is critical. Then, fill it again and place a ruler in the hole. Record how many inches the water level drops every hour. If it takes six hours to drop an inch, you have a drainage crisis. This often happens in new builds where heavy machinery has smeared the clay, creating a waterproof seal. No amount of irrigation tweaking will fix a yard that won’t take a drink.

How deep do grass roots grow in compacted soil?

In severely compacted soil, grass roots are often restricted to the top 1 to 2 inches of the soil profile. In contrast, roots in well-aerated, loose soil can reach depths of 6 to 10 inches, allowing the plant to access deep water reserves and withstand 2026 summer heat waves without irrigation stress.

Test 3: Bulk Density Core Sampling

Bulk density is a scientific measurement of the weight of dry soil per unit of volume, used by agronomists to quantify the level of compaction. For silt loam or clay soils, a bulk density exceeding 1.47 g/cm³ begins to physically restrict root growth, while levels above 1.60 g/cm³ can stop it entirely.

Soil TypeIdeal Bulk Density (g/cm³)Root Restriction Level (g/cm³)
Sand< 1.60> 1.80
Silt< 1.40> 1.65
Clay< 1.10> 1.47

You can do this at home with a soup can and a kitchen scale, but it’s better to send a sample to a lab. You take a known volume of soil, dry it in an oven at a low temp until all moisture is gone, and then weigh it. High density means there is no room for air. If your 2026 sod install is going over clay, you are likely sitting at that 1.50 mark. You’ll need to incorporate organic matter like compost to break that density down before the first pallet of grass arrives.

Test 4: The Visual Core Inspection

Visual core inspection involves removing a 6-to-12-inch deep soil plug to examine the structure, color, and rooting patterns of existing vegetation. This allows you to identify plow pans, horizontal plating, or construction debris that may be buried beneath the surface, preventing successful landscaping establishment.

Use a soil probe or a sharp spade to cut a clean slice of earth. Look at the layers. Do you see horizontal plates? That’s compaction from heavy traffic. Do you see a grey, smelly layer? That’s anaerobic soil where water is trapped and rotting the organic matter. I often find buried plywood or chunks of concrete from the home’s construction. No irrigation system can fix a buried slab of drywall. This is part of a thorough yard cleanup—getting the garbage out of the root zone before the 2026 season starts.

Will new sod fix a hard yard?

No, laying new sod over hard, compacted soil is a recipe for failure. The sod will initially look good because of the peat-based soil it was grown in, but within months, the roots will hit the compacted layer and stop, leading to a “matted” root system that cannot support the grass during dormancy or drought.

Test 5: Penetrometer PSI Verification

Penetrometers are specialized tools that measure the pounds per square inch (PSI) of pressure required to break the soil surface. In hardscape engineering and turf management, a reading over 300 PSI indicates a “root-limiting” environment where the soil is too dense for the delicate vascular system of the grass to expand.

“A bulk density of 1.6 g/cm³ or higher in silt loam soils will severely restrict root penetration, regardless of nutrient levels.” – NRCS Soil Quality Institute

If you’re serious about your 2026 sod install, rent a penetrometer. Walk the yard. If the needle jumps into the red zone (over 300 PSI) within the first four inches, you must intervene. You either need to perform deep-tine aeration or, in extreme cases, a full excavation and soil amendment. I’ve seen 400 PSI on yards where the owners thought they just needed more fertilizer. You can’t fertilize your way out of a physics problem.

Your 2026 Preparation Checklist

  • Call 811: Always mark your utility lines before doing any deep soil testing or aeration.
  • Check Soil pH: Compaction often goes hand-in-hand with poor chemistry; aim for 6.0 to 7.0.
  • Mechanical Aeration: Pull 3-inch cores, at least 20-30 holes per square foot, to relieve pressure.
  • Top-Dress with Compost: Fill those aeration holes with organic matter to prevent them from collapsing.
  • Audit the Irrigation: Ensure your irrigation heads provide even coverage; dry spots accelerate soil hardening.

Landscaping isn’t about the green stuff you see on top; it’s about the brown stuff you don’t see underneath. If you treat your soil like a living organism rather than a trash dump, your 2026 sod install will thrive for a decade. If you ignore these tests, you’re just throwing money into the wind. It will rot. Don’t skip the prep. Do the work now, or pay for it later when the grass dies in July. Real landscaping starts with a shovel and a plan, not a credit card and a nursery delivery.

March 11, 2026 | Emily Clark

3 Quick Soil Tests to Save Your 2026 Sod Install From Rot

3 Quick Soil Tests to Save Your 2026 Sod Install From Rot

The Biological Reality of a High-Performance Lawn

Most homeowners view sod as a finished product, a green carpet to be unrolled and instantly enjoyed. In the professional world of high-end landscaping, we view sod as a vulnerable biological transplant that requires a precise subterranean environment to survive the first 21 days of root initiation. If your soil chemistry is off or your drainage is compromised, that $15,000 investment will transform into a rotting, anaerobic mat of organic decay before the first mow. You cannot fix bad soil once the grass is on top of it. You have to do the work now. It is about engineering a root zone that facilitates gas exchange and nutrient uptake, not just buying the greenest pallet at the nursery.

The Apprentice Lesson: Why Grading and Soil Science Come First

I always drill into my new crew members: if you don’t fix the soil grading and chemistry first, every plant or piece of turf you put in the ground is just expensive compost. Last season, I had a junior foreman who thought he could skip the compaction test on a 5,000-square-foot install because the dirt ‘looked’ dry. We laid the sod, and the first heavy rain turned the yard into a literal marsh because the sub-base was essentially a clay bowl. We had to rip it all up, regrade the entire lot, and start over on my dime. It was a $9,000 lesson in why we never trust our eyes when we should be using a penetrometer and a transit level. Soil doesn’t lie, but it will definitely hide its flaws until the bill is paid.

The Ribbon Test: Identifying Soil Texture and Silt Ratios

The Ribbon Test determines your soil’s physical composition—sand, silt, or clay—by measuring how well a moistened soil sample holds its shape under pressure. Identifying these soil textures is critical for sod installation because it dictates your irrigation frequency and the cation exchange capacity (CEC) of your yard. To perform this, take a handful of soil, moisten it slightly, and roll it into a cigar shape. Squeeze it between your thumb and forefinger to create a ‘ribbon.’ If the ribbon breaks before it reaches one inch, you have sandy soil which requires more frequent irrigation. If it stretches beyond two inches without breaking, you are dealing with heavy clay, a recipe for root rot and fungal pathogens if not amended with expanded shale or coarse sand. Clay particles are microscopic and flat; they stack like wet playing cards, cutting off oxygen to the roots. You need pore space. Without it, the roots suffocate.

How do I know if my soil has too much clay for sod?

If your soil forms a shiny, unbreakable ribbon longer than two inches and feels sticky rather than gritty, your clay content is too high for a standard sod install. This soil compaction issue prevents deep root penetration, forcing the grass to rely on surface moisture, which makes it highly susceptible to drought stress and pythium blight. You must mechanicaly aerate or incorporate organic matter to break those ionic bonds between clay particles.

“Soil texture is the single most important physical property of the soil. It knows no substitute; it governs the water-holding capacity and the aeration of the root zone.” – USDA Natural Resources Conservation Service

The Percolation (Perc) Test: Predicting Sub-Surface Drainage Rates

The Percolation Test measures the rate at which water moves through your soil profile, identifying potential drainage failures before the sod is laid. To execute a perc test, dig a hole 12 inches deep and 12 inches wide, fill it with water, and let it drain completely to saturate the surrounding pedology. Fill it a second time and measure how many inches the water level drops per hour. A drop of 1 to 3 inches per hour is the professional ‘goldilocks’ zone. Anything less than one inch indicates poor drainage and hydrostatic pressure buildup, which will rot sod roots in less than a week. If it drains too fast, your irrigation system won’t be able to keep up with the evapotranspiration rates. We call this ‘droughty’ soil. You fix slow drainage with French drains or sub-surface tiling; you fix fast drainage with compost tilling.

What is a good drainage rate for new grass?

For a successful sod installation, your soil should drain at a rate of 2 inches per hour. This ensures that the capillary action of the soil pulls water down into the root zone while allowing excess moisture to exit, preventing anaerobic conditions that invite grub infestations and rhizoctonia solani (brown patch). Monitoring drainage is the only way to ensure yard cleanup efforts actually result in a long-term landscaping success.

The pH and Nutrient Slurry: Balancing Soil Chemistry

A pH and Nutrient Slurry test identifies the chemical availability of Nitrogen, Phosphorus, and Potassium (NPK) to ensure the sod can actually ‘eat’ the fertilizer you apply. Most turfgrass species, including Bermuda and St. Augustine, thrive in a pH range of 6.0 to 7.0. If your soil is too acidic (below 5.5), nutrients like phosphorus become chemically locked and unavailable to the plant, regardless of how much starter fertilizer you dump on it. You are literally flushing money down the irrigation lines. Use a digital pH meter and a distilled water slurry to get an accurate reading. If you are low, you need dolomitic lime; if you are too high (alkaline), you need elemental sulfur. Do this now so the chemistry has months to stabilize before the 2026 growing season begins. It is a slow process.

Soil TypeDrainage RateRequired AmendmentRisk Factor
Heavy Clay<0.5″ / hourExpanded Shale / GypsumRoot Rot / Fungus
Sandy Loam2.0″ – 4.0″ / hourOrganic CompostNutrient Leaching
Silts1.0″ – 2.0″ / hourAeration / Sand MixCompaction Cap

“A lawn is only as healthy as the soil biology beneath it. Without proper pH balance, microbial activity ceases, leading to excessive thatch buildup and plant stress.” – Penn State Agricultural Extension

The Pre-Sod Yard Cleanup Checklist

Before you even think about ordering a single pallet for your landscaping project, you must clear the site deck. This isn’t just raking leaves; it’s a structural yard cleanup. Use this checklist to ensure your 2026 sod install has a fighting chance:

  • Kill Existing Vegetation: Use a non-selective herbicide 14 days prior to any grading.
  • Remove Large Debris: Any rock or wood chunk larger than 2 inches will create an air pocket that kills sod roots.
  • Mechanical Aeration: Relieve compaction from construction equipment or foot traffic.
  • Final Grade: Ensure a 2% slope away from the home foundation to prevent hydrostatic pressure issues.
  • Irrigation Audit: Pressure-test every irrigation head to ensure 100% head-to-head coverage.

Hydrostatic Pressure and the Engineering of the Yard

Landscaping is civil engineering with a green coat of paint. If you have a retaining wall near your sod install, you must account for hydrostatic pressure. Water trapped behind a wall or under a sod layer will eventually find its way out, usually by heaving your hardscaping or turning your lawn into a bog. I’ve seen $40,000 patios buckle because the sod install next to it didn’t have a French drain to catch the surface runoff. It’s all connected. Your irrigation timing must be calibrated to the infiltration rate of your specific soil texture. Don’t be the guy who waters for 30 minutes when his soil can only absorb 10. You’re just creating a fungal nursery. Deep, infrequent watering forces roots to chase the moisture down, creating a resilient, drought-tolerant lawn. Shallow, daily watering creates a weak, lazy root system that will die the first time the temperature hits 95 degrees. Stop being a ‘mow-and-blow’ amateur and start being a land manager. The soil is your engine. Keep it tuned.

March 10, 2026 | Michael Smith

Stop 2026 Irrigation Runoff with 4 Easy Valve Pressure Fixes

Stop 2026 Irrigation Runoff with 4 Easy Valve Pressure Fixes

The Hard Truth About Your Irrigation Pressure

I always drill into my new crew members: if you don’t fix the soil grading first, and the valve pressure second, every plant you put in the ground is just expensive compost. I’ve spent twenty years watching homeowners throw thousands of dollars at new sod installs only to watch the water roll off the surface like rain off a tin roof. Most of the time, the culprit isn’t the soil alone—it is high-velocity water. When your irrigation system operates at 70 or 80 PSI, the water doesn’t soak; it hits the ground with enough force to compact the surface, creating a localized hardpan that rejects every drop. You aren’t watering your lawn. You are power-washing it. If your sprinklers look like a fine mist or a fog, you are losing 35% of your water to evaporation before it even hits the grass blades.

Why Irrigation Runoff Destroys Your Sod Investment

Irrigation runoff occurs when the application rate of your sprinkler system exceeds the infiltration rate of your soil, typically caused by excessive nozzle pressure and poor valve regulation. To stop runoff, you must align the system’s hydraulic output with the soil’s physical capacity to absorb moisture through pressure stabilization. It is a matter of physics. If your soil can only handle 0.5 inches of water per hour, but your high-pressure nozzles are dumping 1.2 inches, the math simply doesn’t work. The excess water follows the path of least resistance, usually down your driveway and into the storm drain, taking your expensive nitrogen-based fertilizers with it. This is not just a waste of money; it is a violation of basic civil engineering principles regarding site drainage.

“A retaining wall doesn’t fail because of the stone; it fails because of the water trapped behind it.” – Hardscape Engineering Axiom

How much pressure should an irrigation system have?

For most residential systems using standard spray heads, the sweet spot is 30 PSI. If you are running high-efficiency rotary nozzles, you want closer to 40 or 45 PSI. Anything over 50 PSI begins to shear the water into microscopic droplets that drift away in the slightest breeze. This is called ‘misting’ or ‘fogging.’ It is the enemy of a deep-rooted landscape. We use a pitot tube and a pressure gauge to test every zone. If the gauge reads 60 PSI at the head, we know we have a problem at the valve. High pressure also wears out the internal seals and the plastic gears in rotor heads. It shortens the life of your entire system. Fix the pressure, and you fix the longevity of the hardware.

The Engineering of Water Velocity: PSI vs. GPM

Understanding the difference between Pressure (PSI) and Flow (GPM) is what separates a professional landscaper from a guy with a shovel. Pressure is the force; flow is the volume. When pressure is too high, the velocity of the water inside the lateral lines increases. This leads to ‘water hammer,’ which can literally blow the solenoids off your valves or crack the PVC fittings underground. We follow the ‘5-feet-per-second’ rule. Water should never travel faster than that through your pipes. If it does, the friction loss is astronomical and the surge pressure will eventually cause a catastrophic failure. Stop thinking about how much water you can spray and start thinking about how much the soil can hold. It is about soil saturation, not surface wetting.

Pressure Level (PSI)Water BehaviorImpact on Sod/Soil
20 – 25 PSILow Flow / DroopingPoor coverage; brown spots.
30 – 45 PSIOptimal Droplet SizeMaximum infiltration; healthy roots.
55 – 70 PSIMisting / FoggingHigh runoff; wind drift; waste.
80+ PSIAerosolizationStructural damage; severe erosion.

Fix 1: Installing a Master Valve Pressure Regulator

The most effective way to handle high municipal water pressure is at the source. A brass master pressure regulator installed right after your backflow preventer can knock down a 100 PSI street supply to a manageable 65 PSI for the entire manifold. This protects your main lines and every valve in the box. I prefer the heavy-duty Zurn or Wilkins models. They are expensive, but they don’t fail. Cheap plastic regulators are for amateurs. A master regulator ensures that even if the city spikes the pressure at 3 AM, your system won’t explode. It provides a baseline of safety for the entire property’s plumbing.

Fix 2: Using Pressure-Regulated Valves (PRS)

Sometimes the master regulator isn’t enough because different zones have different needs. Your drip zones for the foundation shrubs need 25 PSI, while your lawn rotors need 45 PSI. This is where individual valve pressure regulation comes into play. Modern valves like the Rain Bird PGA or Hunter ICV series allow you to thread a pressure-regulating module (like the Accu-Sync) directly onto the valve. This allows you to dial in the exact PSI for that specific zone. This is critical for yard cleanup projects where you are trying to rehabilitate a stressed landscape. You can lower the pressure for the flower beds while keeping the lawn zones robust. It gives you surgical control over the hydraulics.

“Excessive water pressure is the primary cause of component failure and water waste in residential irrigation systems.” – The Irrigation Association Handbook

Why is water running off my new sod?

New sod has a shallow root system and the soil beneath it is often compacted from the heavy machinery used during landscaping. If you apply water too fast, it can’t penetrate the thatch and the soil interface. The water builds up at the surface and begins to move laterally. This is exacerbated by high pressure which creates smaller droplets that can’t break the surface tension of dry soil. To stop this, you must lower the pressure and switch to a cycle-and-soak method. You need to apply water in short bursts, allowing time for the ‘capillary action’ of the soil to pull the moisture down. If you see water on the sidewalk, turn the system off immediately. You’ve reached the saturation limit for that cycle.

Fix 3: Retrofitting with PRS Spray Heads

If you don’t want to dig up your valve boxes, you can fix the pressure at the head. Pressure-Regulated Spray (PRS) heads have a small regulator built into the stem of every sprinkler. Whether the valve is sending 70 PSI or 40 PSI, the head only puts out a steady 30 PSI. This is now code in many states like California and Texas for a reason. It works. We recently did a sod install on a steep slope where runoff was a nightmare. By switching to PRS heads and high-efficiency rotary nozzles, we eliminated the misting and the runoff. The water stayed on the hill. The grass actually grew. It is a simple swap that saves thousands of gallons of water a year.

Fix 4: Managing Soil Infiltration with Core Aeration

You can have the best irrigation valves in the world, but if your soil is as hard as a parking lot, you will still have runoff. This is where yard cleanup becomes more than just raking leaves. You need to physically open the soil. Core aeration removes 3-inch plugs of dirt, breaking up the surface compaction and allowing the water a direct path to the root zone. I tell my clients: aeration is the ‘lung’ of the lawn. It allows for gas exchange and water infiltration. After aerating, top-dress with a thin layer of compost. This introduces organic matter that acts like a sponge, holding the water in place so it doesn’t run off into the gutter. It is a biological solution to a mechanical problem.

The 10-Point Irrigation Audit Checklist

  • Check the static pressure at the outdoor spigot using a $10 gauge.
  • Inspect every head for ‘misting’ or ‘fogging’ while the zone is running.
  • Look for ‘weeping’ valves where water leaks out even when the system is off.
  • Ensure every head is straight; tilted heads cause uneven application and runoff.
  • Clear grass and debris away from the spray path to prevent pooling.
  • Test the solenoid resistance with a multimeter to ensure electrical health.
  • Adjust the arc and radius of every nozzle to keep water off the pavement.
  • Clean the internal filters in every spray head to maintain even flow.
  • Check the valve box for standing water, which indicates a cracked manifold.
  • Verify the controller’s ‘cycle and soak’ settings to match your soil type.
{“@context”:”https://schema.org”,”@type”:”HowTo”,”name”:”How to Fix Irrigation Runoff Using Valve Pressure Controls”,”step”:[{“@type”:”HowToStep”,”text”:”Test the system pressure at the head using a pitot tube gauge to identify high PSI zones.”},{“@type”:”HowToStep”,”text”:”Install a master pressure regulator at the main line to bring municipal pressure down to 65 PSI.”},{“@type”:”HowToStep”,”text”:”Retrofit individual zone valves with pressure-regulating modules to customize PSI for specific plant needs.”},{“@type”:”HowToStep”,”text”:”Swap out standard spray heads for Pressure-Regulated Spray (PRS) bodies to ensure consistent output at 30-45 PSI.”}],”totalTime”:”PT3H”}
March 10, 2026 | Jane Doe

Patio Installation Warrenton VA: 3 Costs You MUST Know in 2026

Patio Installation Warrenton VA: 3 Costs You MUST Know in 2026

Why Your Warrenton Backyard Deserves Better in 2026

The shift in home living has pushed outdoor spaces from a luxury to a necessity. In Warrenton, the demand for high-quality outdoor living has never been higher. When you look out at your lawn, you aren’t just seeing grass; you’re seeing potential square footage for hosting, relaxing, and increasing your home equity. However, the price of entry has changed. Relying on outdated 2023 or 2024 quotes will lead to sticker shock. You need to grasp the specific economic pressures currently hitting Fauquier County. High demand for quality craftsmanship means you have to plan ahead and budget with precision. Waiting too long might cost you more than just money; it could cost you a whole season of enjoyment.

The Reality of Hardscaping contractors Warrenton VA Today

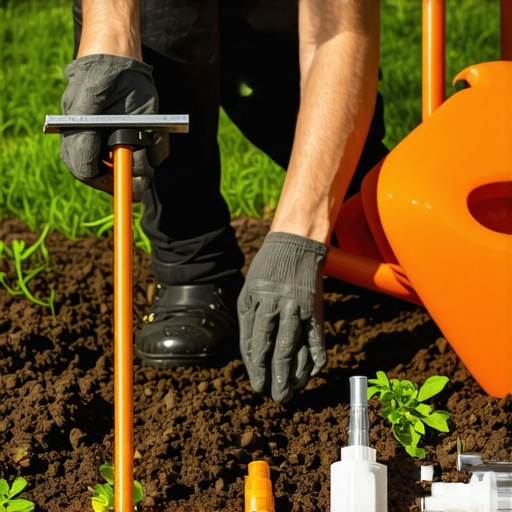
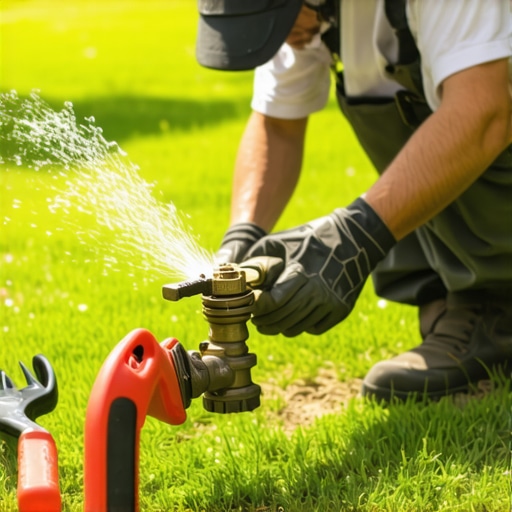
Finding reliable Hardscaping contractors Warrenton VA involves more than checking a few reviews. The industry has matured. True pros are now booked months in advance. Why? Because the complexity of these builds has skyrocketed. We aren’t just tossing down bricks. We are managing stormwater runoff, local permitting, and complex soil stabilization. The red clay in our area is notorious. Without a solid gravel base and proper compaction, your patio will buckle during the first deep freeze. 2026 standards require a more robust engineering approach than previous decades. Shortcuts are expensive. Proper preparation is the only way to protect your investment long-term. [IMAGE_PLACEHOLDER]

Hidden Factors Influencing Your Patio Budget

Materials represent the lion’s share of your bill. In 2026, natural stone remains the gold standard, but the cost of transport has leveled up. Local sourcing is no longer just a trend; it’s a financial strategy. Beyond the stone, consider the “invisible” costs. Excavation, debris removal, and site preparation can swallow 30% of your budget before the first paver is even laid. If your property has a slope, you’ll likely need the expertise of skilled crews to create a level grade. These structural requirements aren’t flashy, but they ensure your patio lasts thirty years instead of three. Labor is the other side of the coin. Specialized masons are in high demand. Their precision ensures joints are tight and patterns are symmetrical. In 2026, you’re paying for their eyes as much as their hands. A single drainage error can flood your basement, turning a $20,000 project into a $50,000 disaster.

Is a New Patio Still a Good Investment in Warrenton?

Homeowners often ask if the ROI holds up in today’s market. The answer is a resounding yes. Modern buyers in Northern Virginia prioritize “move-in ready” outdoor spaces. If you invest in professional Warrenton VA landscape design, you’re not just buying a patio; you’re buying a lifestyle upgrade that pays dividends at closing. A well-designed hardscape can return 70% to 80% of its cost in home value. Plus, it eliminates the constant headache of high-maintenance turf in areas where grass struggles to grow. Instead of fighting weeds, you’re enjoying an evening by the fire pit. It is about creating a space that works for your family while securing your financial future in an ever-growing community.

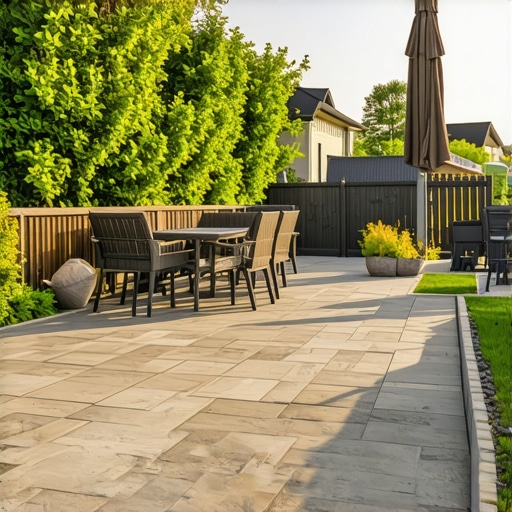
Modern Features That Define a 2026 Warrenton Patio

Once the structural foundation is secure, the focus shifts toward functionality and ambiance. In 2026, a patio isn’t just a static stone surface; it is a dynamic environment that extends your home’s smart features into the outdoors. High-end Landscaping services in Warrenton VA now routinely include integrated low-voltage lighting systems that operate via localized sensors or smartphone apps. These aren’t just for show. Path lighting and recessed step lights are safety essentials for navigating the varied elevations common in Fauquier County properties. Beyond light, the inclusion of permanent gas fire features has become the standard over traditional wood-burning pits. They offer instant gratification without the smoke or the mess, allowing you to use your outdoor space on a whim, even during a chilly November evening. [IMAGE_PLACEHOLDER]

Managing Water: More Than Just a Slope

Warrenton’s geography presents unique challenges, specifically when dealing with our heavy, moisture-retaining clay. A patio that looks perfect in July might become a swamp in April if drainage isn’t handled with surgical precision. Expert crews are now leaning heavily toward permeable paver systems. Unlike traditional solid surfaces, these allow rainwater to filter through the joints and back into the ground, reducing runoff and protecting your home’s foundation. This isn’t just about environmental stewardship; it’s about engineering. By reducing the hydrostatic pressure underneath the stones, we prevent the heaving and shifting that ruins so many DIY projects. If your yard has a significant grade, a simple slope won’t suffice. You may need integrated French drains or decorative dry creek beds that redirect water away from the living area without sacrificing aesthetics.

The Role of Softscaping in Hardscape Longevity

The transition between your stone patio and the rest of your property is where the magic happens. Without proper Warrenton VA landscape design, a patio can feel like an island rather than a part of the home. In 2026, we are seeing a shift toward living walls and perimeter plantings that provide natural privacy screens. Selecting the right species is critical; you need deep-rooted plants that won’t disrupt your paver base but are hardy enough to survive the Virginia humidity. Think about the sensory experience. Planting lavender or rosemary near the seating area adds a fragrance layer that a stone-only project lacks. Furthermore, the strategic placement of shrubs can act as a windbreak, making your fire pit area significantly warmer in the winter months. This synergy between hard and soft elements ensures the space feels intentional and grounded.

Seasonal Durability and the Forever Patio Concept

Northern Virginia’s climate is brutal on masonry. We experience intense UV rays in the summer and aggressive freeze-thaw cycles in the winter. To combat this, the 2026 approach focuses on high-density materials and advanced polymeric sands. This sand doesn’t just fill the cracks; it hardens to a flexible, rubber-like consistency that keeps weeds out and prevents water from penetrating the base layer. If you ignore this detail, the ice will eventually win, pushing your pavers apart and creating trip hazards. Maintenance has also evolved. While older patios required annual power washing and resealing, modern porcelain pavers and treated natural stones are nearly maintenance-free. This set-it-and-forget-it mentality is driving the current market, as homeowners prioritize their time over weekend yard chores. When planning your layout, consider the traffic patterns from your kitchen or basement door…

The Engineering Behind the “Forever” Base

A patio’s longevity is determined long before the first stone is set. In the specific terrain of Northern Virginia, the “standard” 4-inch gravel base is no longer sufficient for 2026 climate expectations. Advanced Landscaping services in Warrenton VA now advocate for a tiered compaction strategy. This involves a multi-layered approach using varying aggregates to ensure zero settling over decades.

  • Subgrade Stabilization: Clearing the organic soil and treating the clay sub-layer with a geotextile fabric to prevent aggregate migration.
  • The Core Layer: 6 to 8 inches of 21A or 57 stone, compacted in 2-inch “lifts” to achieve maximum density.
  • The Setting Bed: A 1-inch layer of washed concrete sand or fine chips, screeded to a perfect grade for the pavers.

Choosing Materials for 2026 Climate Resilience

With temperatures fluctuating more wildly than in previous decades, material selection has pivoted toward thermal stability. Porcelain pavers have surged in popularity because they do not absorb water, making them virtually immune to the freeze-thaw cycles that often crack natural slate or travertine in Fauquier County. If you prefer the look of natural stone, Warrenton VA landscape design experts now recommend denser options like thermal-finish bluestone or granite. These materials provide a non-slip surface while resisting the “spalling” (surface peeling) common in cheaper sandstone alternatives. [IMAGE_PLACEHOLDER]

Common Misconceptions in Northern Virginia Hardscaping

One of the most persistent myths is that “bigger is always better” when it comes to stone size. While large-format slabs are trending, they require a significantly more precise base. A 24×36 inch stone has a much higher risk of “rocking” if the base is off by even an eighth of an inch. Another misconception is that sealants are optional. In 2026, we view sealing not just as an aesthetic choice for “wet looks,” but as a chemical shield against the acidic rain and bird droppings that can etch natural stones. Without a breathable, penetrating sealer, your investment will start to look weathered within just three seasons.

Advanced Drainage: Moving Beyond the French Drain

Traditional drainage often fails when faced with the “micro-burst” storms now common in the region. Advanced site engineering now incorporates “Bioswales” and “Rain Gardens” integrated directly into the patio perimeter. Instead of just piping water to the street, these features use specialized soil mixes and deep-rooted native plants to filter and absorb runoff on-site. This is becoming a requirement in many local building codes to mitigate the impact on the Chesapeake Bay watershed. It’s an elegant solution that turns a utility requirement into a lush, vibrant landscape feature.

The Science of Polymeric Sand in 2026

The “glue” that holds your patio together has seen massive technological leaps. Modern polymeric sands are now “rain-safe” in as little as 90 minutes. This is crucial for local projects where afternoon thunderstorms are unpredictable. The advanced polymers create a flexible bond that moves with the earth’s natural shifts while remaining hard enough to deter ants and weeds. It is the final, essential step that converts a collection of individual stones into a unified, monolithic surface that can withstand the weight of heavy patio furniture and high-traffic social gatherings.

Zoning Your Space for Maximum Utility

Proper flow is what separates a professional build from a DIY effort. We recommend dividing your patio into distinct “zones”: a cooking zone near the house, a central dining area, and a peripheral relaxation zone with a fire feature. By using different paver patterns or subtle border changes, you can define these areas without needing walls. This maximizes the usable square footage and ensures that a large group of guests never feels crowded in one corner. Consider the “work triangle” of your outdoor kitchen just as you would indoors, ensuring the path between the grill, the prep area, and the indoor kitchen is clear and unobstructed.

The Rise of the “Smart” Hardscape in Fauquier County

As we move deeper into 2026, the definition of a “patio” continues to expand. We are no longer looking at just a place to put a table; we are looking at a fully integrated tech hub. High-end homeowners are now requesting built-in, weather-proof charging stations and hidden acoustic systems that blend seamlessly into the stonework. Imagine sitting by your fire pit while your outdoor speakers, disguised as granite boulders, provide a crisp surround-sound experience. This level of integration requires precise planning during the excavation phase, ensuring all conduits for power and data are buried deep beneath the “forever” base we discussed earlier. It is this foresight that separates a standard backyard from a 2026-ready entertainment powerhouse.

Why Do Some Patios Sink While Others Last Decades?

This is the most common question we hear from residents. The answer almost always lies in the invisible layers. In Warrenton, the freeze-thaw cycle acts like a slow-motion hydraulic jack. If there is any moisture trapped in the sub-base, it expands when it freezes, pushing the pavers upward. When it thaws, the stone drops, but rarely back into its original position. Over a few seasons, this creates the “wave” effect seen in many older driveways and walkways. Professional Warrenton VA landscape design accounts for this by utilizing non-frost-susceptible aggregates and ensuring a pitch that moves water at least 10 feet away from the patio’s edge. [IMAGE_PLACEHOLDER]

Sustainable Aesthetics: The 2026 Environmental Shift

Environmental consciousness has moved from a niche interest to a primary driver in material selection. We are seeing a massive surge in the use of recycled composite pavers that mimic the look of rare hardwoods without the maintenance or the environmental footprint of logging. Additionally, “cool-roof” technology is being applied to pavers to reduce the heat island effect. In the peak of a Virginia July, traditional dark stones can reach blistering temperatures. The new generation of solar-reflective materials stays up to 20% cooler, making your backyard usable even in the high noon sun. This focus on sustainability extends to how we manage the surrounding flora, ensuring that the Landscaping services in Warrenton VA you choose are utilizing native, drought-resistant species that require zero chemical fertilizers.

The Convergence of Indoor and Outdoor Living

The “California Room” concept has officially arrived in Northern Virginia. This involves creating a seamless transition where the flooring of your kitchen or sunroom appears to continue right out onto the patio. This is achieved using ultra-thin porcelain veneers over concrete slabs or matching the grout colors of indoor tiles with the polymeric sand of outdoor pavers. By blurring the lines between “inside” and “outside,” you effectively double your home’s perceived square footage. It’s not just a renovation; it’s a spatial revolution that maximizes every inch of your property’s footprint. When you factor in the added value of permanent outdoor structures like pergolas with louvered roofs, you’re creating a space that is functional 365 days a year, regardless of the unpredictable Fauquier County weather patterns.

Frequently Asked Questions

How long does a professional patio installation usually take in Warrenton?

In 2026, a standard high-quality patio build in Northern Virginia typically takes 2 to 4 weeks, depending on complexity and weather. This timeline includes the deep excavation and multi-layer base preparation required to combat the local red clay soil. While smaller projects might move faster, the engineering required for a “forever” patio cannot be rushed.

Do I need a permit for a new patio in Fauquier County?

Generally, patios at grade do not require a building permit in Fauquier County, but they must comply with specific setback requirements and lot coverage limits. However, if your Warrenton VA landscape design includes a retaining wall over three feet or a permanent roof structure like a pavilion, formal permits and inspections are mandatory.

What is the best way to clean my pavers without damaging them?

Avoid high-pressure power washing at close range, as it can dislodge the essential polymeric sand from the joints. Instead, use a pH-neutral cleaner and a soft-bristle brush. Re-evaluating the joint sand every few years is the best way to maintain the structural integrity of your Landscaping services in Warrenton VA investment. [IMAGE_PLACE_HOLDER]

The Bottom Line

Building a patio in 2026 is no longer just about aesthetics; it is a sophisticated engineering project designed to enhance both your home’s equity and your daily quality of life. By prioritizing a robust foundation, climate-resilient materials, and smart spatial zoning, you ensure your outdoor space remains a sanctuary for decades. The heavy clay of Warrenton and the volatile Virginia weather are formidable opponents, but they are no match for the right preparation and expert craftsmanship. Investing in your backyard is not just about the stone you see on the surface; it is about the peace of mind that comes from knowing the structure beneath is built to last. Your home deserves a space that is as functional as it is beautiful, reflecting the modern standards of 2026 living. Ready to start your transformation? Connect with local experts to bring your vision to life and secure your place on the 2026 installation calendar.