March 9, 2026 | Emily Clark

6 Early-Season Pruning Mistakes Killing Your 2026 Hydrangeas

6 Early-Season Pruning Mistakes Killing Your 2026 Hydrangeas

Why Your Pruning Schedule Is A Biological Death Sentence

Early-season pruning mistakes typically involve removing terminal buds on old wood varieties or failing to sanitize shears, leading to bacterial wilt and bloom failure for several seasons. Most homeowners treat pruning as a cosmetic yard cleanup task, but it is actually a surgical procedure that dictates the carbohydrate distribution and auxin levels within the plant’s vascular system.

I always drill into my new crew members: if you don’t fix the soil grading and understand the plant’s physiological cycle first, every plant you put in the ground is just expensive compost. I’ve seen guys go into a high-end estate and ‘clean up’ a row of Hydrangea macrophylla in March, effectively charging the client five figures to ensure they won’t see a flower for two years. It’s not just about the look; it’s about the biology of the wood. You are either working with the plant’s hormones or you are fighting them. I prefer to work with them.

Mistake 1: Decapitating Old Wood Varieties in Spring

Hydrangea macrophylla and Hydrangea quercifolia (Oakleaf) set their flower buds for the following year in late summer or early fall. When you take the hedge trimmers to these plants during your yard cleanup in March, you are physically removing the reproductive tissue needed for the 2025 and 2026 seasons. You leave the plant with nothing but vegetative energy. It won’t die, but it will be a green bush of disappointment.

“Bigleaf and oakleaf hydrangeas bloom on old wood. Pruning these plants in the spring will remove the flower buds that were formed during the previous summer.” – Penn State Extension

Mistake 2: Ignoring the Root Flare During Mulching

We see it every year: the ‘mulch volcano.’ People pile six inches of dyed mulch against the root flare of the hydrangea. This traps moisture against the bark, creates hydrostatic pressure in the soil pores, and invites Phytophthora root rot. A hydrangea needs its crown to breathe. If the bark stays saturated, the lenticels clog, and the plant literally suffocates at the ground level. We excavate these regularly to save the root system.

Mistake 3: The ‘Flat Top’ Shear Technique

Hacks love to use power shears to make everything into a neat square. This is a disaster for hydrangeas. When you cut across the top indiscriminately, you force the plant to divert auxins to the lateral buds, creating a ‘witches broom’ effect. The result is a dense, weak outer shell of growth that prevents light from hitting the interior. This leads to powdery mildew and stem dieback because the interior of the plant never dries out after a rain or an irrigation cycle.

How do I know if my hydrangea blooms on old or new wood?

Determine your hydrangea variety by examining the stem structure and bloom timing; macrophylla (mopheads) and quercifolia (oakleaf) flower on old wood, while paniculata (PeeGee) and arborescens (Annabelle) bloom on new wood. If you see buds forming at the tips of woody stems in late winter, do not touch them. If the plant is a late-summer bloomer with cone-shaped flowers, it is likely a new-wood variety and can handle early spring thinning.

Hydrangea TypePruning WindowGrowth HabitMistake Level
Bigleaf (Macrophylla)Post-Bloom (Summer)Old WoodCritical
Oakleaf (Quercifolia)Post-Bloom (Summer)Old WoodHigh
Panicle (Paniculata)Late Winter/Early SpringNew WoodLow
Smooth (Arborescens)Late Winter/Early SpringNew WoodLow

Mistake 4: Using Dull or Unsanitized Tools

I don’t care if you spent $100 on your Felco shears; if they aren’t sharp and cleaned with 70% isopropyl alcohol between plants, you are a vector for disease. A dull blade crushes the xylem and phloem instead of slicing it. This creates a jagged wound that cannot heal (codit) properly. This invite cankers and fungal spores to settle into the stem. One infected plant can ruin an entire landscaping project if your tools are dirty.

“Pruning tools should be cleaned and disinfected after use on every plant to prevent the spread of pathogens, particularly bacterial and viral infections that can survive on metal surfaces.” – University of California Agriculture and Natural Resources

Mistake 5: Over-Fertilizing with High Nitrogen

Early season yard cleanup often includes a ‘quick green’ fertilizer. Stop. High nitrogen (N) levels encourage rapid, soft, succulent growth. This growth is a magnet for aphids and is highly susceptible to late-season frosts. For hydrangeas, you want a balanced, slow-release nutrient profile that favors phosphorus (P) for root development and bloom strength. If you are doing a new sod install nearby, keep that high-N turf fertilizer away from your hydrangea beds.

How much water does a newly pruned hydrangea need?

A hydrangea requires approximately one inch of water per week delivered via drip irrigation or deep soaking to ensure soil saturation at the root zone without wetting the foliage. Avoid overhead sprinklers. Wet leaves in the morning lead to Cercospora leaf spot. Use a soil moisture meter to check the depth of hydration before you turn on the taps. Don’t guess. Measure.

Mistake 6: Neglecting the 3-D Rule

The only pruning you should do in the early spring for all types is the removal of the 3 Ds: Dead, Damaged, or Diseased wood. If you ignore these, they become a breeding ground for borers. However, homeowners often go too far and remove structural wood that is simply dormant. Scratch the bark with your fingernail; if it’s green underneath, it’s alive. If it’s brown and brittle, it’s gone. Cut it back to the branch bark ridge, but not into it.

The Master Landscaper’s Early Season Checklist

  • Check USDA Hardiness zone before pruning; a late frost can kill new growth on pruned stems.
  • Sanitize shears with alcohol between every single bush.
  • Inspect the irrigation lines for leaks that create anaerobic soil conditions.
  • Remove only dead wood from Macrophylla varieties in the spring.
  • Apply a 2-inch layer of organic compost, keeping it 3 inches away from the main stem.
  • Test soil pH; 5.5 for blue (aluminum availability), 6.5+ for pink.

March 9, 2026 | Jane Doe

Fix Spongy Sod: 4 Leveling Tactics for a Flush 2026 Lawn

Fix Spongy Sod: 4 Leveling Tactics for a Flush 2026 Lawn

The Forensic Autopsy of a Spongy Lawn

Sponginess in a lawn is rarely a sign of health; it is a symptom of a failing subsurface ecosystem where organic biomass, excessive moisture, and poor soil structure converge. When you walk across your yard and feel that unsettling ‘give’—as if you are traversing a saturated marsh rather than a stable sod install—you are likely witnessing the slow-motion collapse of your turf’s root zone. This isn’t just a cosmetic issue. It is a structural failure that leads to fungal pathogens, crown rot, and localized dry spots when the roots eventually fail to reach the actual mineral soil. I recently got called out to a property where a homeowner had spent $15,000 on a high-end sod install that was sinking because the previous contractor failed to address the 15% clay-to-silt ratio of the subsoil. They laid the sod directly over uncompacted backfill from a recent pool construction. Within three months, the yard was a series of hummocks and hollows. We had to perform a full forensic excavation, installing a network of 4-inch perforated French drains and a three-stage leveling protocol to save the investment. If you don’t fix the physics of the soil, the biology of the grass will never follow.

Diagnosing the Squish: Why Your New Sod Feels Like a Sponge

Spongy turf is caused by an accumulation of un-decomposed organic matter known as thatch, compounded by high hydrostatic pressure within the top two inches of the soil profile. This layering effect prevents proper gas exchange and forces the turf to live in a perpetual state of anaerobic stress, leading to a shallow root system. [IMAGE_PLACEHOLDER]

How do I know if my sod is too wet or just poorly leveled?

The distinction lies in the ‘rebound’ of the turf. If the ground remains indented after a step, you have a drainage and saturation issue. If it bounces back but feels soft, you are likely dealing with a thatch layer exceeding 0.5 inches or a ‘suspended water table’ where water sits in the sod layer because it cannot penetrate the compacted soil beneath. Use a soil probe or a long screwdriver to check. If the tool slides in with zero resistance for three inches and then hits a wall of hardpan clay, your leveling issues are rooted in poor site preparation during the initial landscaping phase. Don’t ignore it. It will rot.

Tactic 1: Deep Core Aeration and the Physics of Gas Exchange

Core aeration is the mechanical removal of soil cylinders to break the surface tension of the thatch layer. In a spongy lawn, you must use a professional-grade aerator capable of pulling 3.5 to 4-inch cores. This is not about ‘poking holes.’ It is about physical displacement. By removing these cores, you create a direct conduit for oxygen to reach the rhizosphere. This oxygen stimulates aerobic microbes that begin the process of breaking down the excessive lignin in the thatch layer.

“Compaction reduces the pore space between soil particles, restricting the movement of air and water to the roots, which is the primary cause of turf decline in high-traffic areas.” – Penn State Center for Turfgrass Science

You need at least 20 to 40 holes per square foot. If your machine isn’t pulling clean plugs, your soil is either too dry or too wet. Aim for the ‘moist brownie’ consistency. Anything else is a waste of time.

Tactic 2: Top-Dressing with High-Percentage Silica Sand

Top-dressing is the only way to achieve a golf-course-flush finish. While many DIYers reach for bags of topsoil or compost, these materials are too compressible for leveling. You need masonry sand or a specific 70/30 sand-to-soil mix. Sand does not compact; it provides a stable, non-shifting base that fills the voids in the turf canopy. When you apply sand after a deep aeration, the sand fills the core holes, creating ‘sand pillars’ that act as permanent drainage chimneys. This facilitates downward water movement and prevents the sponge effect from returning.

Use the following table to determine your material needs based on the severity of your lawn’s depressions:

Material TypeDrainage RateOrganic ContentIdeal Depth per Application
USGA Spec SandHigh (15+ in/hr)0%0.25 – 0.5 inches
70/30 Sand/Soil MixMedium (5-10 in/hr)30%0.5 – 0.75 inches
Screened TopsoilLow (1-2 in/hr)HighNot recommended for leveling

Tactic 3: Mechanical Vertical Mowing (Dethatching) for Biomass Control

If your lawn feels like a mattress, the biomass is the culprit. Vertical mowing, or power raking, uses steel blades to slice through the stolons and runners of the grass, physically pulling out the dead underlayer. For a lawn that is being prepped for 2026, you must be aggressive. This process will make the yard look like a disaster zone for 14 days, but it is necessary. You are removing the ‘sponge’ that holds the water. Once the thatch is thinned, your irrigation can actually reach the soil, and your leveling sand can settle into the low spots instead of sitting on top of a dead mat of grass. Do this in the early spring or early fall when growth is at its peak. Never do this in the heat of summer. You will kill the crown.

Tactic 4: Grade Correction and Sub-Surface Drainage

Sometimes the sponginess isn’t about the grass at all—it’s about the grade. If you have a low spot that stays wet for more than 24 hours after a rain, you have a drainage failure. The 2% rule is your bible here: you need a 2-foot drop for every 100 feet of run to move water effectively. If your yard cleanup doesn’t include checking the pitch of the land, your new sod install is doomed. In heavy clay environments, sand leveling won’t be enough. You may need to install a French drain using 1-inch clean wash stone and a non-woven geotextile fabric.

“Irrigation should be applied at a rate that matches the soil’s infiltration capacity to prevent runoff and ensure deep root penetration.” – Texas A&M AgriLife Extension

Avoid the cheap, corrugated pipe sold at big-box stores. It collapses. Use Triple-wall or SDR-35 PVC. It’s harder to install, but it’s a permanent fix.

How much sand do I need for leveling a 1,000 sq ft lawn?

For a standard leveling application of 0.5 inches, you will need approximately 1.5 to 2 cubic yards of sand per 1,000 square feet. Do not apply more than 0.75 inches in a single pass, or you risk smothering the turf and causing a localized die-off. It is better to do three light applications over two growing seasons than one heavy application that kills your base. Slow and steady wins the level.

The 2026 Flush Lawn Roadmap

  • March 2025: Conduct a soil test and apply 811 Dig Safe if installing drainage.
  • April 2025: Heavy core aeration (2 passes) followed by 0.5-inch sand top-dressing.
  • June 2025: Monitor irrigation; switch to deep, infrequent watering (1 inch per week).
  • September 2025: Vertical mowing and a second light sand application.
  • March 2026: Final leveling touch-ups and balanced NPK fertilization (e.g., 16-4-8).

Maintaining a flush lawn requires a commitment to the ‘Deep and Infrequent’ watering philosophy. Most homeowners kill their lawns by watering for 10 minutes every night. This keeps the surface wet, encourages thatch, and results in that spongy feel. You want to force those roots down. Water deep, once or twice a week, and let the surface dry out. That’s how you build a professional-grade turf. Don’t skip the prep. Do it right once, or you’ll be doing it again in two years. That’s the reality of the dirt.

March 8, 2026 | Emily Clark

Stop Killing Your 2026 Boxwoods: 3 Clay Soil Drainage Fixes

Stop Killing Your 2026 Boxwoods: 3 Clay Soil Drainage Fixes

The Forensic Autopsy of a Dying Boxwood Hedge

I recently got called out to tear up a $30,000 patio that was sinking because the previous contractor failed to address the subterranean hydraulics of the site, but the real tragedy was the line of English Boxwoods flanking the stone. They weren’t just dying; they were liquefying. When I pulled a three-gallon Buxus sempervirens out of the ground, the root ball smelled like a swamp. The hack who installed them had dug ‘death bowls’—perfectly round holes in heavy, compacted clay that acted as ceramic basins. Every time the irrigation system ran, those holes filled with water that had nowhere to go. The roots were literally suffocating in an anaerobic tomb. In 2026, we have to stop treating landscaping like a cosmetic hobby and start treating it like the civil engineering challenge it is. Clay soil, with its microscopic plate-like particles smaller than 0.002 millimeters, is the most unforgiving medium in the world for boxwoods. Without a technical intervention in soil drainage, your 2026 planting budget is just expensive compost in the making.

Fix 1: The Engineered French Drain and Subsurface Diversion

An engineered French drain provides a low-resistance path for hydrostatic pressure to dissipate, preventing water from saturating the root zone of your boxwoods in heavy clay soil. By using a 4-inch perforated PVC pipe encased in ASTM D448 No. 57 stone and wrapped in a non-woven geotextile fabric, you create a permanent escape route for excess moisture before it triggers Phytophthora root rot.

When we talk about yard cleanup, we aren’t just talking about raking leaves. We are talking about clearing the structural path for water. Most residential lots are graded at a 2% slope, which is fine for turf but disastrous for a plant with a shallow, fibrous root system like the boxwood. If you have heavy clay, the water doesn’t move vertically; it moves laterally until it finds a pocket. That pocket is usually the loose soil of your new planting hole. You must install a curtain drain. We dig a trench 18 inches deep, flanking the uphill side of the hedge. I always tell my crew: if you don’t see the water leaving the pipe at the discharge point, you haven’t fixed the problem. You’ve just built a longer bathtub.

“A retaining wall doesn’t fail because of the stone; it fails because of the water trapped behind it.” – Hardscape Engineering Axiom

This same logic applies to your planting beds. Water trapped in the pore space of the soil exerts pressure that prevents oxygen exchange. No oxygen equals root death. Period.

Fix 2: Structural Berms and Root Flare Elevation

Constructing structural berms involves importing loamy topsoil and coarse sand to raise the planting site 8-12 inches above the native clay grade, effectively moving the root flare out of the saturation zone. This technique relies on gravity-fed drainage to ensure that the primary root system remains in an aerobic environment even during peak rainfall events in 2026.

The biggest mistake I see in landscaping is the ‘mulch volcano.’ People pile mulch up against the trunk, which traps moisture against the bark and invites fungal pathogens. Instead, you need to build a wide, flat-topped berm. I use a mix of 60% native soil and 40% expanded shale or coarse slate. Do not use fine sand; when mixed with clay, fine sand creates something resembling low-grade concrete. You want the root flare—that transition point where the roots meet the trunk—to be visible. If it’s buried, the plant is on a countdown to failure. During a sod install, we often see the grade raised around existing trees and shrubs, which is a death sentence. You have to maintain that critical root zone. A boxwood’s roots need to breathe just as much as they need to drink. If you are working in a flat yard with zero perk, the berm is your only legal and biological move to save those 2026 specimens.

Fix 3: Vertical Mulching and Soil Fracturing

Vertical mulching is a remediation technique where an auger is used to create 2-inch wide columns 12-18 inches deep around the drip line of the boxwood, which are then backfilled with porous aggregate. This process breaks the compacted clay pan, allowing for gas exchange and deep irrigation penetration that encourages the roots to grow downward rather than circling near the surface.

This isn’t just poked holes with a pitchfork. That’s for amateurs. We use a heavy-duty power auger. We create a grid. This fractures the surrounding clay via mechanical force and replaces the void with high-permeability material. It’s like installing a thousand tiny chimneys for the soil to breathe.

“The most critical factor in urban tree and shrub survival is the maintenance of adequate soil macropores for oxygen diffusion.” – Penn State Agricultural Extension Manual

If your landscaping crew isn’t talking about bulk density or soil compaction, fire them. They are just laborers, not horticulturists. When we do a yard cleanup for a high-end client, we are looking at the soil’s resistance. If I can’t push a soil probe 6 inches down with one hand, those boxwoods are going to struggle. Vertical mulching bypasses the ‘hard pan’ that form from years of construction equipment or even just heavy foot traffic. It is the surgical strike of drainage fixes.

How much modified gravel do I need for a patio base?

To calculate modified gravel for a patio, multiply the square footage by the depth in feet (usually 0.5 feet for a 6-inch base), then divide by 27 to get cubic yards. For a 100-square-foot patio, you need approximately 1.85 cubic yards of compacted aggregate to ensure stability.

Can I plant boxwoods in standing water?

No, you cannot plant boxwoods in standing water or areas with poor drainage. Boxwoods are highly susceptible to waterlogging and Phytophthora; they require well-drained soil with a pH between 6.5 and 7.2. Standing water will kill the root system within days by cutting off oxygen.

SolutionInstallation TimeTechnical DifficultyPrimary Benefit
French Drain8-12 HoursHigh (Requires Grading)Removes bulk water from site
Raised Berms4-6 HoursMediumElevates roots above clay pan
Vertical Mulching2-3 HoursMediumIncreases oxygen to root zone
  • Perform a percolation test: Dig a 12-inch hole, fill with water, and ensure it drains within 4 hours.
  • Check irrigation timing: Ensure zones are not overlapping and creating saturated ‘hot spots.’
  • Inspect the root flare: Always plant 1-2 inches ‘proud’ or above the existing grade.
  • Apply 1 inch of pine bark fines: Avoid heavy hardwood mulch that mats down and prevents air flow.
  • Test soil pH: Ensure the clay hasn’t become too acidic, which locks out essential nutrients.

The reality of 2026 landscaping is that we are dealing with tighter lots and more disturbed soils than ever before. You cannot just dig a hole and hope. You have to engineer the environment. If you follow these three clay soil drainage fixes, your boxwoods won’t just survive; they will thrive with the kind of structural integrity that only comes from deep, healthy roots. Don’t be the homeowner who calls me to do an autopsy on a dead hedge. Do the dirt work right the first time. It is cheaper to move soil than it is to replace mature nursery stock.

March 8, 2026 | Anna Lee

Fix 2026 Irrigation Pressure Drops with This $15 Valve Hack

Fix 2026 Irrigation Pressure Drops with This $15 Valve Hack

The sound of a failing irrigation system is unmistakable to a professional. It is not the rhythmic, soothing ‘chk-chk-chk’ of a well-tuned impact head. It is a frantic, high-pitched hiss—the sound of water atomizing into a useless mist that drifts off in the wind before it ever touches a blade of grass. When your lawn starts showing those tell-tale localized brown spots, most homeowners make a fatal mistake: they assume they need more water. In reality, they usually need better pressure management. For over two decades, I have seen ‘mow-and-blow’ contractors tell clients they need a $3,000 mainline replacement when the solution was actually a $15 mechanical adjustment at the valve. Landscaping is not just about aesthetics; it is about managing the hydraulic forces and soil physics that keep a micro-ecosystem alive.

The Anatomy of a Pressure Failure: A Forensic Audit

To fix irrigation pressure drops, you must first distinguish between static pressure (the PSI when the water is off) and dynamic pressure (the PSI when the zone is running). If your heads are barely popping up or ‘weeping’ at the base, you are likely suffering from friction loss caused by undersized Schedule 40 PVC or a malfunctioning flow control mechanism. A drop of just 10 PSI can reduce the radius of a rotor head by 15%, leaving your yard with catastrophic ‘donuts’ of dead turf.

I remember a homeowner who called me in a panic after they completely torched their front lawn. They saw yellowing grass and, assuming it was a nutrient deficiency, dumped forty pounds of high-nitrogen fertilizer and liquid iron onto a lawn that was already suffering from irrigation pressure loss. Without enough water to dilute the salts, the nitrogen literally sucked the moisture out of the root cells through osmotic stress. The lawn looked like it had been hit with a flamethrower. They didn’t need chemicals; they needed a screwdriver and a $15 replacement part for their Hunter PGV valve. It was a textbook case of treating a symptom while ignoring the engineering reality of the yard.

“A landscape irrigation system is only as efficient as its weakest hydraulic link; excessive pressure creates misting, while insufficient pressure causes poor distribution uniformity.” – Texas A&M AgriLife Extension

How do I know if my irrigation pressure is too low?

You can diagnose low irrigation pressure by observing the spray pattern of your heads; if the water is ‘drooping’ and failing to reach the adjacent head (head-to-head coverage), your PSI is below the manufacturer’s operating threshold. Use a pitot tube and a pressure gauge to get a real-time reading at the nozzle. Anything under 30 PSI for spray heads or 45 PSI for rotors is a red flag.

What causes a sudden drop in sprinkler pressure?

A sudden drop in sprinkler pressure is typically caused by a clogged solenoid filter, a cracked mainline, or a failed diaphragm inside the zone valve. If the drop is isolated to one zone, the problem is mechanical and located at the valve box, not the meter. Debris as small as a grain of sand can prevent the valve diaphragm from opening fully, restricting flow.

The $15 Valve Hack: Flow Control Calibration

The ‘hack’ that most big-box contractors won’t tell you about is the manual flow control adjustment. Most professional-grade valves (like the Rain Bird DV or Hunter Pro-C series) have a flow control handle—a small knob on top of the valve. Over time, these can vibrate shut or become clogged with mineral deposits from hard water. By replacing the valve bonnet or just the flow control assembly—a part that costs less than $15—you can manually override the resistance and restore full dynamic flow to the zone. This is significantly cheaper than excavating a sod install to find a nonexistent pipe crush.

SymptomProbable CauseThe $15 Fix
Misting/FoggingHigh PSI (Over 60)Install Pressure Regulating Stem (PRS)
Heads Won’t Pop UpFlow RestrictionReplace Valve Diaphragm/Flow Handle
Dry Spots Between HeadsPoor UniformityAdjust Flow Control Nozzle Output
Valve Won’t CloseDebris in SolenoidFlush Valve and Replace Solenoid

The Physics of Soil and Water Interaction

When you are dealing with a sod install, the first 14 days are critical. If your pressure drops during this window, the knitting process of the roots to the soil subgrade will fail. The soil pH and cation exchange capacity (CEC) won’t matter if the water isn’t penetrating the first 3 inches of the profile. We see too many ‘experts’ ignore the hydrostatic reality of the site. If your yard has a slope, the heads at the top will always have lower pressure than the heads at the bottom due to elevation head loss. For every 1 foot of elevation rise, you lose 0.433 PSI. It’s basic physics. Do not ignore it.

“To ensure long-term stability of any hardscape or turf project, water must be managed through precise mechanical regulation, not guesswork.” – ICPI Tech Spec 2

  • Check the Solenoid: Unscrew the solenoid and check for grit in the plunger.
  • Inspect the Diaphragm: If the rubber is brittle or torn, your pressure will fluctuate.
  • Flush the Zone: Remove the last head on the line and run the water to clear debris.
  • Audit the Nozzles: Ensure you haven’t exceeded the GPM (Gallons Per Minute) capacity of your pipe diameter.

Professional Maintenance Protocol

Irrigation isn’t ‘set and forget.’ It’s a mechanical system subject to thermal expansion and mineral calcification. A yard cleanup should always include a system audit. Check your backflow preventer for leaks. Inspect the valve box for standing water. If you see a ‘swamp’ in your valve box, your pressure drop isn’t a hack—it’s a leak. Fix it. Don’t let a $15 part turn into a $5,000 sod replacement. Real landscaping is about precision. If you can’t measure the PSI, you aren’t managing the yard; you’re just guessing. And guessing is expensive.

March 7, 2026 | Emily Clark

Repair Clogged Sprinkler Heads in 10 Minutes [Fast Fix]

Repair Clogged Sprinkler Heads in 10 Minutes [Fast Fix]

The Forensic Autopsy of a Failed Irrigation Zone

I recently got called out to tear up a $30,000 patio that was sinking because the previous contractor failed to properly troubleshoot a series of ‘clogged’ sprinkler heads. The homeowner thought it was just a few dirty nozzles, but the reality was far more sinister. A small fracture in the lateral line was sucking in sandy subsoil every time the system cycled off, creating a vacuum that pulled debris into the manifold. Over six months, that ‘clog’ wasn’t just blocking the water—it was washing away the modified stone base beneath their pavers. By the time I arrived, the structural integrity of the entire hardscape was compromised. This is why I tell my crew: a clogged head isn’t just a nuisance; it is a diagnostic symptom of your entire landscaping health.

The 10-Minute Fix: Immediate Remediation Protocol

To repair a clogged sprinkler head in 10 minutes, you must unscrew the nozzle assembly, extract the internal mesh filter, and flush the riser stem by running the zone manually for five seconds. This ejects lateral line sediment and calcified mineral deposits that otherwise cause distorted spray patterns or total nozzle failure.

“Irrigation efficiency is not just about water delivery; it is about the uniformity of distribution (DU), which is instantly compromised by even a partial orifice obstruction.” – Texas A&M AgriLife Extension

How do I know if my sprinkler head is clogged?

Look for the ‘weeping riser’ or a distorted fan pattern. If the head pops up but only produces a dribble or a skewed jet of water, the filter screen is likely packed with silt or biological growth. If the head fails to pop up entirely, you are likely looking at a friction-based failure in the wiper seal caused by grit, or a more serious drop in dynamic pressure. Don’t guess. Pull the head and inspect the screen first. It is the cheapest diagnostic step in your landscaping arsenal.

The Technical Breakdown: Why Irrigation Systems Fail

Most ‘mow-and-blow’ hacks will tell you to just poke a wire into the nozzle. Don’t do that. You’ll ruin the precision-engineered orifice and destroy the precipitation rate. Modern nozzles, especially high-efficiency rotary types, are built to tight tolerances. Even a micron-level scratch can cause misting, which leads to massive water loss through evaporation before the moisture ever hits your sod install. Yard cleanup isn’t just about raking leaves; it’s about ensuring the area around your heads is clear of organic debris that can infiltrate the wiper seals during retraction. When grass clippings or mulch are allowed to accumulate around the head, they become abrasive agents that eat away at the rubber seals, leading to pressure loss and eventual clogging.

The Anatomy of a Clog: Filter vs. Nozzle

In 90% of cases, the blockage isn’t in the nozzle itself but in the 20-mesh or 50-mesh filter screen sitting directly beneath it. These screens are designed to catch sediment before it reaches the fine apertures of the head. However, if you’ve recently had a sod install or performed significant yard cleanup involving soil grading, the influx of particulates can overwhelm these screens in a single cycle. Use needle-nose pliers to pull the screen. If it’s coated in a grey slime, that’s bacterial iron; if it’s gritty, that’s sand from a potential pipe break upstream.

SymptomTechnical CauseRemediation Action
Low Radius / MistingHigh Dynamic PressureInstall Pressure Regulating Stem (PRS)
Distorted Fan PatternOrifice ObstructionNozzle Replacement / Vinegar Soak
Head Won’t RetractWiper Seal GritClean Riser Shaft / Replace Seal
Dribbling after cycleLow Head DrainageInstall Check Valve (HCV)

How much pressure is needed for a clean spray?

Most fixed-spray heads require a minimum of 30 PSI to achieve their designed radius. If your head is partially clogged, the friction loss across the filter screen can drop that pressure to 15 PSI, causing the water to ‘plop’ rather than atomize. This results in ‘doughnut’ watering patterns—green grass at the head, brown grass four feet out. It’s a death sentence for new sod. Keep your lines clean to maintain the hydraulic balance of the entire zone.

“A system operating at 30 PSI with a clogged filter loses roughly 15-20% of its design radius, leading to localized dry spots and eventual turf dormancy.” – Irrigation Association Technical Manual

The Master Landscaper’s Maintenance Checklist

  • Weekly Visual Inspection: Run each zone for 2 minutes to spot ‘lazy’ heads.
  • Spring Flushing: Remove the last head on every lateral line and flush the system at the start of the season.
  • Wiper Seal Lubrication: Use only water-based lubricants if a head is sticking; never use WD-40 which degrades the rubber.
  • Filter Replacement: If a screen is more than 50% discolored, toss it. They cost pennies compared to the cost of replacing dead landscaping.
  • Nozzle Alignment: Ensure the ‘fixed’ side of the arc is aligned with the hardscape to prevent sidewalk runoff.

The Forensic Reconstruction: Preventing Future Blockages

If you find yourself cleaning the same head every week, you don’t have a clog problem; you have a filtration or integrity problem. Check your backflow preventer and your main filter at the valve box. For those on well water, sand is your constant enemy. You might need to upgrade to 100-mesh filtration at the source. If you’re on municipal water and seeing grit, there might be a break in the city line or your own supply line. Don’t ignore it. That grit is sandpaper for your internal plumbing valves. It will rot your system from the inside out. Don’t skip the flush. It’s the most important five seconds of the repair process. Run it hard, run it clean, and only then put the nozzle back on.

March 7, 2026 | Michael Smith

Stop New Sod Lifting: 3 Root-Locking Fixes for May 2026 [Pro]

Stop New Sod Lifting: 3 Root-Locking Fixes for May 2026 [Pro]

The Science of Sod Anchorage: Why New Turf Lifts

To stop new sod lifting, you must eliminate the air gap between the rhizome layer and the subgrade by ensuring 100% root-to-soil contact. This involves mechanical rolling with a 300-pound drum, precision irrigation scheduling, and correcting soil compaction before the first roll is laid. If the roots don’t find a home in the first 72 hours, the sod will curl, shrink, and eventually lift like a bad carpet.

I always drill into my new crew members: if you don’t fix the soil grading and the interface first, every plant or roll of turf you put in the ground is just expensive compost. I’ve seen $15,000 installs go to the graveyard because a ‘pro’ thought they could just slap sod over compacted clay without a starter fertilizer or a heavy roller. They think the weight of the grass is enough to keep it down. It isn’t. Soil is a living matrix, and if you leave an air pocket, the roots will hit that void, dry out, and the entire slab will lift as the blades transpire moisture it can’t replace. You aren’t just laying grass; you are performing a biological transplant.

1. Mechanical Integration: The 300lb Rule

Mechanical integration requires the use of a water-filled sod roller to press the turfgrass roots into the topsoil, removing all air pockets that cause lifting. A light footprint is not enough; you need roughly 25 to 30 PSI of downward pressure to bridge the gap between the sod’s farm-grown peat and your yard’s native soil profile. This process, known as ‘knitting,’ is the physical foundation of the lawn. Without it, the root tips will desiccate before they ever penetrate the subgrade. Don’t skip the roller. It’s the difference between a lawn and a collection of dying green squares.

“Successful establishment of turfgrass sod requires immediate and continuous contact with moist soil to prevent the drying of the delicate root hairs.” – Texas A&M AgriLife Extension

In May 2026, we are looking at higher-than-average evaporation rates. If you lay sod on a dry afternoon and don’t roll it within sixty minutes, you’ve already lost 15% of your root viability. The heat creates a micro-greenhouse effect under the sod, steaming the roots if they aren’t pressed into the cooler earth below. We use a double-pass method: once North-to-South, once East-to-West. This ensures the seams are locked. If you can slide a finger under a seam, the wind will eventually catch it, and the sod will lift.

2. Hydrostatic Root-Forcing: Beyond Surface Spraying

Hydrostatic root-forcing involves deep-cycle irrigation that saturates the first 4 inches of soil to encourage geotropism, the natural downward growth of roots. Most homeowners make the mistake of light, frequent misting, which keeps the surface wet but leaves the subsoil dry, causing roots to stay shallow or ‘lift’ toward the moisture. By May, the ground temperature is rising, and you need to push that water down. We recommend 1 inch of water immediately after installation, followed by 0.25 inches twice daily—not for the grass, but for the soil interface. The sod should feel like a wet sponge, but the ground underneath must be firm enough not to turn into muck.

How much water does new sod actually need?

New sod requires approximately 1 to 1.5 inches of water per week, delivered in short bursts during the first 14 days to prevent hydrostatic rejection. After day 14, you should transition to deep, infrequent watering to force the roots to chase the moisture downward. This develops a resilient root architecture capable of surviving the upcoming July heat spikes. If you see the edges of the sod turning brown or curling upward, you aren’t watering enough, or your sprinkler heads are misaligned. Adjust the nozzles. A dry seam is a lifting seam.

Soil TypeWater Frequency (Days 1-7)Roller Weight (Lbs)Target Root Depth (Week 4)
Heavy Clay3x Daily (10 mins)250-3003.5 Inches
Sandy Loam4x Daily (15 mins)200-2505.0 Inches
Silty Dirt2x Daily (20 mins)3004.0 Inches

3. The Biological Lock: Mycorrhizae and pH Correction

The biological lock is achieved by applying mycorrhizal fungi and a high-phosphorus starter fertilizer (e.g., 10-20-10) to the bare soil before the sod is laid. These fungi form a symbiotic relationship with the grass roots, effectively increasing their surface area and helping them ‘anchor’ into the soil faster. If your soil pH is above 7.5 or below 6.0, the grass will struggle to uptake the nutrients needed for root elongation. This chemical stress leads to a weak bond, making the sod prone to shifting or lifting during heavy rain or wind. In May, the soil is waking up; feed it the right microbes, and it will grab the sod and never let go.

“A retaining wall doesn’t fail because of the stone; it fails because of the water trapped behind it. Similarly, a lawn doesn’t fail because of the grass; it fails because the soil chemistry won’t allow the roots to penetrate.” – Hardscape and Agronomy Manual

Can I fix sod that is already lifting?

Yes, you can fix lifting sod by performing a ‘slice and soak’ technique: use a sharp utility knife to cut a 6-inch slit in the center of the lifting piece, apply rooting hormone through the slit, and place a heavy weight (like a cinder block) on the area for 48 hours while keeping it saturated. This forces the air out and the roots down. If the sod has already turned straw-colored and brittle, the vascular system is dead. At that point, you aren’t fixing it; you’re replacing it. Cut it out, prep the soil properly this time, and start over.

The May 2026 Pro-Grade Sod Checklist

  • Soil Test: Verify pH is between 6.2 and 7.0 before ordering.
  • 811 Call: Mark all irrigation lines and utilities before grading.
  • Pre-Hydration: Dampen the bare dirt 24 hours before the pallets arrive.
  • Seam Staggering: Lay sod in a brick pattern to prevent long run-off channels.
  • The Hand-Tuck: Hand-press every edge where the sod meets concrete or flower beds.
  • Post-Roll: Roll within 1 hour of the first pallet being finished.

March 6, 2026 | Jane Doe

3 Prep Steps to Stop New Sod From Wilting in Clay Soil [2026]

3 Prep Steps to Stop New Sod From Wilting in Clay Soil [2026]

3 Prep Steps to Stop New Sod From Wilting in Clay Soil [2026]

Success in sod install isn’t about the day the green carpet rolls out; it is about the 10 days of grueling landscaping prep that happen before the first pallet is delivered. If you are dealing with heavy clay soil, you aren’t just planting grass; you are managing a structural material that behaves more like concrete than a growing medium. I always drill into my new crew members: if you don’t fix the soil grading and chemistry first, every square foot of turf you put in the ground is just expensive compost. I have seen too many rookies drop $5,000 on high-end fescue only to watch it turn into a yellowed, soggy mess within three weeks because they didn’t understand the ‘bath-tub effect’ of clay.

Step 1: Mechanical De-compaction and Precision Grading

To stop new sod from wilting in clay, you must mechanically disrupt surface compaction at a depth of 4 to 6 inches to allow for root penetration and gas exchange. Clay particles are microscopic and flat, stacking together like wet sheets of paper that prevent water from moving vertically, leading to anaerobic conditions that kill irrigation-saturated roots. This isn’t a job for a hand rake; you need a rear-tine tiller or a skid-steer with a Harley rake attachment. We aim for a bulk density below 1.4 grams per cubic centimeter. If the soil is too tight, the roots will simply grow sideways, never establishing the drought resistance needed for a hot 2026 summer. Don’t skip this. You must also ensure a 2% slope away from any foundations. In clay, water doesn’t soak in; it sits. If your grade is flat, your new lawn is effectively a swamp. We use a transit level to ensure every inch of the yard cleanup area is pitched correctly. Failure here means the sod will literally drown in its own irrigation water.

“A retaining wall doesn’t fail because of the stone; it fails because of the water trapped behind it. The same logic applies to turf in clay; the grass dies because the water has nowhere to go.” – Hardscape Engineering Axiom

How long does it take for sod to root in clay?

In heavy clay, sod install rooting typically takes 14 to 21 days for the primary adventitious roots to knit into the subsoil, provided the soil has been properly de-compacted. Without mechanical aeration or tilling, this process can take twice as long, increasing the risk of desiccation or fungal pathogens. We check this by gently tugging on a corner of the sod; if there is resistance, the irrigation schedule can be tapered. If it lifts like a rug, you are in trouble.

Step 2: Chemical Flocculation and Organic Amendment

To improve clay soil structure permanently, you must incorporate gypsum (calcium sulfate) to promote flocculation and blend 2 inches of aged organic compost to increase the Cation Exchange Capacity (CEC). Clay is chemically ‘sticky,’ and gypsum helps break those ionic bonds, creating larger soil aggregates that allow for better irrigation drainage and oxygen flow. We don’t just sprinkle it on top. We till it in. We also look for a pH balance between 6.2 and 7.0. Clay often leans acidic or extremely alkaline depending on your region, and a sod install on the wrong pH will lead to immediate nutrient lockout. Nitrogen, phosphorus, and potassium (NPK) are useless if the soil chemistry is skewed. We use a 10-10-10 starter fertilizer only after the organic amendments are incorporated. This creates a bio-active zone that supports the landscaping for years, not just weeks.

Soil PropertyHeavy Clay (Untreated)Engineered Turf Base
Porosity< 15% (Micropores)> 35% (Balanced)
Drainage Rate0.05 inches/hour1.2 inches/hour
Compaction RiskSevereModerate-Low
Root Depth Potential2-3 inches8-12 inches

“Clay soils have a high buffering capacity, meaning they resist changes in pH. Amending these soils requires specific calculations based on the Cation Exchange Capacity (CEC).” – Texas A&M AgriLife Extension

Step 3: The Hydrostatic Irrigation Protocol

Proper irrigation for new sod on clay requires deep, infrequent watering after the initial 7-day ‘knit’ period to force roots to chase moisture downward into the amended subsoil. For the first week, you need to keep the sod and the top inch of soil consistently moist—usually 3 to 4 short cycles per day. However, by day 10, the most common mistake is continuing this high-frequency watering. On clay, this leads to ‘damping off’ and Pythium blight. You must transition to one deep soak every two days. We use a tuna can or a rain gauge to ensure we are hitting exactly 1 inch of water per week. This isn’t a suggestion; it’s engineering. If the water pools on the surface for more than 20 minutes, your soil is saturated, and you must shut the system down. Use a soil probe to check. If the probe doesn’t slide 6 inches into the ground with ease, your clay is too dry. If it comes up smelling like rotten eggs, you are over-watering. It’s a fine line. Follow the checklist below to ensure your yard cleanup and install stay on track.

Should I put sand on clay before sod?

Never put a thin layer of sand directly over clay; this creates a physical reaction similar to making concrete, which will ruin your landscaping project. Adding sand to clay without adding massive amounts (over 70% by volume) actually increases compaction. Instead, use a high-quality landscaping compost or a specialized top-dressing mix to improve the soil structure during your yard cleanup phase. Sand is for golf courses with 12-inch deep sand-based greens, not for your backyard clay.

  • Test the Soil: Get a lab report on pH and CEC levels.
  • De-compact: Till to a minimum of 4 inches depth.
  • Amend: Add 50 lbs of gypsum per 1,000 sq. ft.
  • Grade: Ensure a 2% minimum slope for drainage.
  • Roll: Use a water-filled roller to settle the soil, but don’t over-compact.
  • Water: Monitor with a soil probe daily for the first 14 days.

The transition from yard cleanup to a finished lawn is a biological race. In clay, the deck is stacked against you. You are fighting physics and chemistry. If you treat the soil like a structural base rather than just ‘dirt,’ your sod will survive the 2026 heat. If you cut corners, the clay will reclaim your investment. It will rot. Do not skip the prep. Your lawn’s lifespan is determined by the three days before the sod arrives, not the three years after.

March 6, 2026 | Emily Clark

Clean Your Yard in One Afternoon Using These 5 Pro Tools [2026]

Clean Your Yard in One Afternoon Using These 5 Pro Tools [2026]

The Veteran’s Approach to Yard Restoration

To clean your yard in one afternoon using professional-grade tools, you must prioritize high-velocity debris removal, structural pruning, and sub-surface soil assessment. Efficient yard cleanup in 2026 isn’t about labor; it is about mechanical advantage and understanding the biological requirements of your specific turf species. I always drill into my new crew members: if you don’t fix the soil grading and clear the organic clutter first, every plant you put in the ground is just expensive compost. Most homeowners waste four weekends doing what a professional does in four hours because they use underpowered consumer-grade plastic tools that lack the torque or reach to handle real volume. Don’t be that guy. Stop treating your yard like a hobby and start treating it like a biological asset.

The Apprentice Lesson: Why Prep Matters

Early in my career, I watched a guy spend three days hand-raking three acres of oak leaves. By the time he finished, the lack of sunlight and trapped moisture had already triggered a Pythium blight outbreak in his fescue. I walked in with a 900-cfm backpack blower and a stand-on leaf vacuum and finished the job in two hours. He didn’t just lose time; he lost his lawn. Understanding the hydrostatic pressure of wet debris on your turf is the difference between a clean yard and a dead one. If you leave wet organic matter sitting on your root zone, you are essentially suffocating the soil’s gas exchange. It will rot. Fast.

“A retaining wall doesn’t fail because of the stone; it fails because of the water trapped behind it. Similarly, a lawn doesn’t fail because of the heat; it fails because of the thatch and debris blocking the roots’ ability to breathe.” – Hardscape Engineering Axiom

1. The Commercial-Grade Backpack Blower (900+ CFM)

A high-velocity backpack blower is the primary tool for rapid yard cleanup because it utilizes cubic feet per minute (CFM) to move mass and miles per hour (MPH) to break debris loose from the soil surface. In 2026, we are looking at brushless motor tech or 80cc gas engines that can clear a 10,000-square-foot lot in under 30 minutes. Forget the handheld units. You need the air volume to move wet, matted leaves and small sticks without stopping to pick them up by hand. This tool clears the way for every other operation. Without a clear surface, you can’t see drainage issues or pest infestations. Airflow is king.

2. High-Carbon Steel Bypass Loppers with Geared Leverage

For structural pruning and clearing overgrown perimeter brush, high-carbon steel bypass loppers offer the cleanest surgical cuts required to prevent fungal pathogens from entering the plant’s vascular system. Anvil pruners crush the stem; bypass loppers slice it. You need a tool with at least a 2-inch cutting capacity and geared leverage to reduce operator fatigue. This isn’t just about aesthetics. Removing deadwood increases the UV penetration to the understory, which is critical for preventing moss and mold. Every cut must be at the branch collar. No stubs. No tears.

3. The Power Rake or Dethatcher

A mechanical power rake is essential for removing thatch buildup—the layer of dead organic matter between the grass blades and the soil surface—which prevents water and nutrients from reaching the roots. If your thatch layer exceeds half an inch, your irrigation is mostly evaporating before it hits the dirt. A power rake uses spinning steel tines to pull this debris up. It looks violent, but it’s necessary for soil gas exchange. If you don’t dethatch, you are just fertilizing the weeds that live on top of the soil.

How much modified gravel do I need for a patio base?

While clearing the yard, you may find sinking pavers. For a standard patio, you need 6 inches of compacted 21A modified gravel. Calculate this by multiplying your square footage by the depth in feet, then dividing by 27 to get cubic yards. Compaction is non-negotiable.

Tool TypePro SpecificationHomeowner MistakeBiological Benefit
Blower900+ CFM / 200+ MPHHandheld Electric (Low CFM)Prevents Pythium Blight
LoppersHigh-Carbon BypassAnvil Style (Crushes stems)Promotes Callous Healing
Power RakeSteel Flail TinesHand Raking (Surface only)Increases Nitrogen Uptake
Soil ProbeStainless Steel 12-inchGuessing by sightMonitors Root Depth
Pressure SprayerViton Seals / Constant PSIWand AttachmentsUniform Pre-emergent Cover

4. The Stainless Steel Soil Probe

The stainless steel soil probe is the most underrated tool in the professional arsenal, allowing you to extract a 12-inch core to analyze soil compaction, moisture levels, and root depth. You cannot manage what you cannot see. A probe tells you if your irrigation system is actually penetrating the clay or if it’s just sheeting off the top. In 2026, we use these to check for sub-surface salt accumulation and to see if the rhizome structure of your sod is actually knitting into the native soil. If the core comes up dry 4 inches down, your lawn is starving.

5. Professional Grade Pressure Sprayer

A high-pressure sprayer with Viton seals is required for the precise application of pre-emergent herbicides and liquid aeration products that prevent weed seeds from germinating. Cheap sprayers have inconsistent pressure, leading to “holidays” or gaps in your chemical barrier. You need a constant 30-45 PSI to ensure the droplet size is small enough to coat the soil surface evenly. This tool is your insurance policy. If you clean the yard but don’t lay down a pre-emergent, you’ve just cleared the way for every dandelion seed in the county to take root in your fresh soil.

What is the best way to install new sod?

Before sod install, you must ensure soil-to-root contact by tilling the top 4 inches and adding a starter fertilizer with a high phosphorus ratio. Roll the sod after laying it to eliminate air pockets. Air is the enemy of new roots.

“Agronomy is the science of the invisible. What you see above ground is merely a reflection of the bacterial and fungal health within the first six inches of the soil profile.” – Penn State Agricultural Extension

  • Check the Grade: Ensure water flows away from the foundation at a minimum 2% slope.
  • Clear the Canopy: Prune branches that prevent at least 4 hours of direct sunlight.
  • Calibrate Equipment: Ensure your sprayer and spreader are set to the correct output rates.
  • Hydrate Deeply: After cleanup, apply 1 inch of water to settle the dust and activate soil microbes.

March 5, 2026 | Anna Lee

6 Hidden Debris Piles Ruining Your 2026 Spring Grass Growth

6 Hidden Debris Piles Ruining Your 2026 Spring Grass Growth

Spring success in 2026 isn’t determined in March of that year; it is determined by the debris you fail to clear today. If you leave organic or inorganic matter to sit on your turf through the winter, you are effectively suffocating the soil’s respiratory system. My crews see it every season: homeowners wondering why their expensive sod install is failing when the culprit is simply a layer of forgotten waste. I always drill into my new crew members: if you don’t fix the soil grading and clear the surface first, every plant you put in the ground is just expensive compost. Last season, I had to explain to a rookie why blowing leaves into a corner ‘out of sight’ was actually creating a biological dead zone. Soil chemistry doesn’t care about your convenience. If you leave a pile of carbon-heavy debris on top of nitrogen-hungry grass, the resulting microbial imbalance will win every time. We are talking about the Cation Exchange Capacity (CEC) and the literal suffocation of the rhizosphere.

1. Matched Wet Leaf Mats and Anaerobic Rot

Wet leaf mats act as a biological suffocant that triggers anaerobic soil conditions by blocking the essential gas exchange between the atmosphere and the root zone. This lack of oxygen leads to the development of fungal pathogens, such as Microdochium nivale, which will decimate turf crowns before the spring growth cycle begins. When leaves are left to saturate, they form a thick, leathery barrier. This barrier prevents the soil from ‘breathing.’ In a healthy lawn, oxygen moves into the pore spaces while carbon dioxide moves out. When you seal that with a wet mat of maple or oak leaves, the oxygen is depleted rapidly. The resulting anaerobic environment smells like rotten eggs—that is hydrogen sulfide gas. It is a sign that your soil biology is dying. You aren’t just looking at yellow grass; you are looking at a dead root system that will require a full sod install to repair by 2026. Stop being lazy with the rake. If the leaves are too wet to blow, pick them up by hand. Every day they sit, the pH of the upper centimeter of soil shifts toward the acidic, locking out micronutrients like iron and magnesium.

“Maintaining a soil pH between 6.0 and 7.0 is critical for nutrient availability; organic debris left to rot can significantly alter this balance.” – Penn State Extension

2. Forgotten Mulch Piles and Nitrogen Immobilization

Forgotten mulch piles lead to a phenomenon known as nitrogen immobilization, where soil microbes consume all available nitrogen to break down the carbon-rich wood chips. This leaves your grass roots starving for nutrients, resulting in severe chlorosis and stunted growth that can last for several seasons. It is a simple ratio problem. Microbes need a carbon-to-nitrogen (C:N) ratio of about 24:1 to function. Wood mulch can have a ratio of 400:1. When a pile of mulch sits on your lawn, the bacteria and fungi go into a feeding frenzy. They pull every scrap of nitrogen out of the surrounding soil to process that carbon. Your grass, which needs that nitrogen for chlorophyll production, gets nothing. It turns a sickly pale green, then yellow, then brown. It doesn’t matter how much fertilizer you throw at it; the mulch is a nitrogen sponge. I’ve seen guys try to save a buck by spreading old mulch over thin spots. Don’t do it. You are better off with bare dirt than a carbon-heavy debris pile that robs your soil of its primary fuel source.

| Debris Type | Soil Impact | Primary Grass Symptom | Recovery Time |
Wet LeavesAnaerobic AcidificationYellowing/Fungal Rot4-8 Weeks
Wood MulchNitrogen RobberyStunted/Pale BladesFull Season
Buried BrickHeat Sink/CompactionLocalized WiltingPermanent until removed
Pet WasteSalt/Ammonia BurnBrown Spots/Green Rings3 Weeks

3. Buried Construction Trash and Heat Sinks

Buried construction debris, such as concrete scraps or brick fragments, creates subsurface heat sinks that radically increase the temperature of the root zone. These hidden obstacles also cause soil compaction, preventing deep root penetration and leading to localized patches of grass that die off during the first summer heat wave. I recently did a forensic autopsy on a lawn that had a mysterious brown square every July. We dug it up and found a buried cinder block just four inches down. That block was absorbing the sun’s energy all day and cooking the roots from underneath. You can’t fix that with irrigation. In fact, more water often makes it worse by creating a ‘pot effect’ where the water sits around the debris and rots the roots. If you had work done on your house recently, check the yard. If the soil feels harder in one spot than others, dig. You’re looking for ‘clean fill’ that isn’t actually clean. Buried debris also disrupts the capillary action of water moving up from the subsoil. It’s a physical barrier to life.

How deep should I aerate my lawn to fix compaction?

To effectively combat the compaction caused by surface debris, you must use a core aerator that pulls plugs at least 3 to 4 inches deep. Anything shallower fails to penetrate the thatch layer and reach the actual soil structure where the rhizosphere resides. Mechanical aeration is non-negotiable for landscaping health. Shallow spikes just push the dirt sideways, increasing compaction. You need to physically remove the soil cores to allow oxygen and water to reach the roots.

4. Accumulated Thatch and Hydrophobic Layers

Excessive thatch accumulation, often exacerbated by leaving heavy grass clippings or small twigs, creates a hydrophobic barrier that repels water away from the soil profile. This prevents your irrigation system from reaching the roots, causing the grass to die of thirst despite frequent watering schedules. Thatch is a layer of living and dead organic matter—stems, roots, and clippings—that builds up between the green vegetation and the soil surface. A little is good; more than half an inch is a disaster. When it gets too thick, it dries out and becomes like a thatched roof on a cottage. Rain hits it and runs right off into the storm drain. I’ve seen homeowners double their water bill while their grass dies. The water never touched the dirt. You have to de-thatch or use a vertical mower to break that seal. If you leave debris piles over the winter, you are fast-tracking this buildup.

“Compaction from heavy debris or equipment reduces pore space, leading to decreased oxygen diffusion and root death.” – Texas A&M Agrilife Extension

5. Fallen Fruit and Seed Pods: The Acidification Trap

Fallen fruit and seed pods ferment on the soil surface, creating localized acidification that drops the soil pH well below the 6.0 threshold required for turfgrass survival. This fermentation process also attracts pests and rodents, which further damage the turf through burrowing and feeding on the weakened root structures. If you have crabapple trees or oaks, those piles are chemical bombs. As the fruit rots, it releases sugars and acids. This isn’t ‘natural fertilizer.’ It’s a localized pH crash. Most lawn grasses, especially high-end sod like Kentucky Bluegrass or Fescue, will go dormant or die when the pH hits 5.0. By the time you notice the bare spots in 2026, the soil chemistry will be so skewed that you’ll have to apply heavy amounts of pelletized lime just to get back to baseline. Pick up the pods. It’s grunt work, but it’s cheaper than a total renovation.

When should I install sod after a yard cleanup?

You should wait at least 14 days after a major yard cleanup and soil remediation before a sod install. This allows the soil microbiology to stabilize and ensures that any anaerobic gases trapped by previous debris piles have fully dissipated from the upper rooting zone. Rushing this process leads to ‘sod transplant shock’ because the new roots cannot survive the acidic or hypoxic conditions left behind by the old debris.

6. Synthetic Litter and Micro-Drainage Blocks

Synthetic litter, including plastic shreds, landscape fabric remnants, or toy parts, creates micro-drainage blocks that disrupt the uniform 1-inch-per-week irrigation requirement of healthy turf. These materials do not break down and eventually become embedded in the soil structure, preventing the lateral spread of roots and creating weak spots in your 2026 lawn. I see this a lot in new builds. The ‘mow-and-blow’ guys just mow over plastic bags or wrappers, shredding them into the grass. These bits of plastic create tiny umbrellas over the soil. Over time, they work their way down. They don’t just sit there; they interfere with the fungal networks—the mycorrhizae—that help grass roots take up phosphorus. It’s a death by a thousand cuts. Clean your yard like a professional. If it isn’t soil, seed, or water, it doesn’t belong there.

  • Step 1: Remove all large-scale organic debris (leaves, sticks, pods).
  • Step 2: Scout for buried inorganic materials using a soil probe.
  • Step 3: Test soil pH to ensure fermentation hasn’t caused an acid spike.
  • Step 4: Core aerate to a depth of 4 inches to reset the oxygen levels.
  • Step 5: Apply a high-quality, slow-release nitrogen fertilizer only after the surface is clear.

February 28, 2026 | Anna Lee

Stop the Runoff: 4 Grade Fixes for 2026 Irrigation Zones

Stop the Runoff: 4 Grade Fixes for 2026 Irrigation Zones

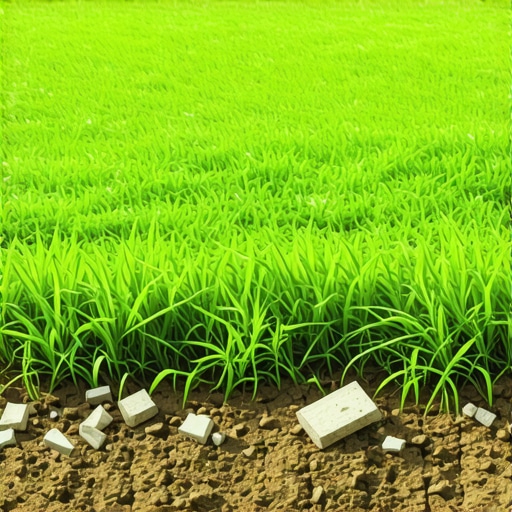
Last spring, I vividly remember standing in my yard, watching a sudden splash of muddy water gush down the driveway after a rain. It was a wake-up call. Turns out, my irrigation system was overwatering, causing runoff that not only wasted water but also threatened my home’s foundation and plant health. That lightbulb moment made me realize—if I didn’t fix this, I’d be throwing away money and risking long-term damage. Have you faced a similar frustrating situation, where your yard’s irrigation feels more like a flood than a helpful soak?

Why Fixing Runoff Before 2026 Is Critical

Proper irrigation isn’t just about watering; it’s about watering intelligently. Runoff occurs when excess water can’t absorb into the soil, leading to waste, erosion, and plant stress. According to the Environmental Protection Agency, as much as 50% of landscape water goes to waste due to inefficiencies like runoff, which is especially problematic with upcoming regulations aimed at conserving water. Failing to address runoff issues now could mean hefty fines or needing costly repairs later, especially as zones are re-evaluated for their efficiency in 2026.

Is Irrigation Fixes Just Hype or Actually Worth the Effort?

Early in my journey, I made the mistake of assuming that simply turning down the watering schedule would solve everything. But that’s not enough—it’s like trying to stop a leak with duct tape. Properly diagnosing and fixing your irrigation system’s runoff issues requires a strategic approach. Without proper expertise, you might not see results or, worse, cause other problems like dry patches or overwatering. But trust me, the benefits of fixing these issues extend beyond water savings—think healthier lawns, fewer weeds, and improved curb appeal. Curious? Dive into the solutions I’ve uncovered, and let’s get your yard performing at its best for 2026.

Assess and Identify Problem Areas

Start by thoroughly inspecting your yard to locate zones where water pools or drains excessively. Take note of slopes, compacted soil, or obstructions that impede absorption. I once spent a Saturday afternoon dragging a hose across different sections, observing where water lingered longest after watering. This hands-on approach highlighted problem spots that might require targeted adjustments.

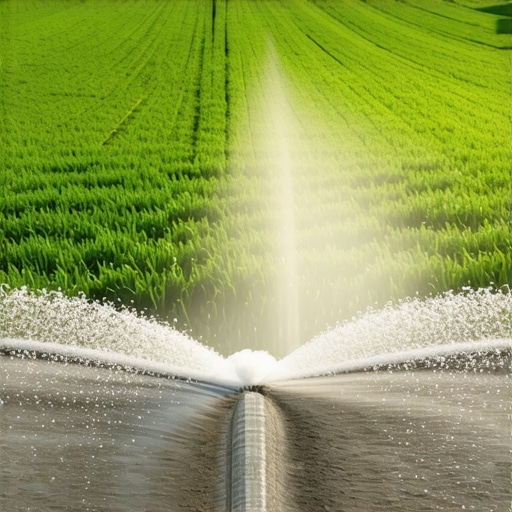
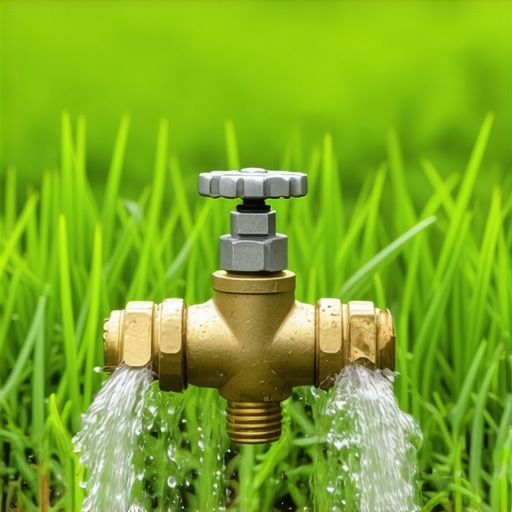
Adjust Your Sprinkler System for Efficiency

Map Out Zones and Modify Pressure

Use a spray pattern to test each zone, checking for uneven coverage or drips. Reducing pressure or reallocating heads can prevent overwatering. I replaced an old nozzle, which immediately stopped puddling and improved coverage. For detailed mapping, consider running through zone tuning techniques.

Implement Smart Controls and Sensors

Invest in smart timers and soil moisture sensors to regulate watering automatically. These devices can detect when soil dryness reaches a certain threshold, turning off the sprinklers before runoff occurs. I calibrated my sensor during a rainy week; now, my system knows not to water when conditions are wet, saving water and preventing runoff.

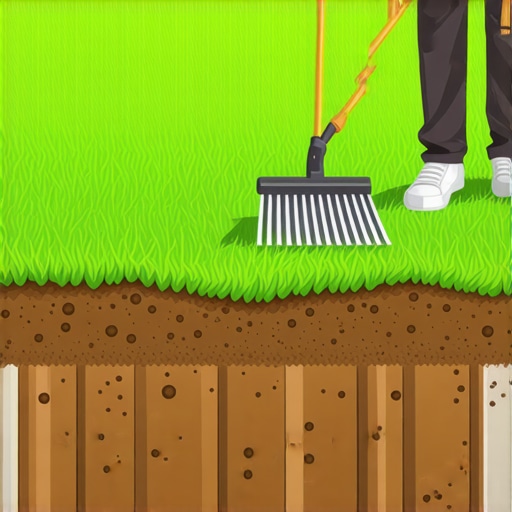
Improve Drainage with Soil and Landscape Modifications

If water stands despite system adjustments, address underlying soil issues. Loosen compacted soil with aeration tools, and amend clay-heavy areas with organic matter. A quick plugin: I overseeded a patch with improved soil drainage, and my lawn no longer sogged after storms.

Incorporate Rain Gardens and Swales

Design strategic low spots or plant rain gardens that absorb excess runoff. Swales — shallow ditches with vegetation — redirect water away from foundations. I carved a shallow swale along my driveway, which now collects runoff instead of flooding the yard.

Regular Maintenance and Monitoring

Set a routine to check sprinkler heads, valves, and drainage solutions periodically. Look for leaks, clogs, or uneven spray patterns. I discovered a cracked valve during a routine check, which if left unrepaired, could have caused more runoff. For ongoing improvements, review tips at yard cleanup techniques.

Prepare for Future Regulations and Inspections

Stay ahead by documenting your modifications and ensuring your system meets upcoming standards. Upgrading to water-efficient heads and implementing smart controls not only reduces runoff but also aligns with 2026 regulations. I installed additional drip lines around my garden beds to optimize water use and avoid penalties.

Many homeowners assume that basic yard cleanup and landscaping are straightforward tasks, but in reality, there’s a layer of nuance that often gets overlooked. One common myth is that more aggressive trimming or aggressive soil removal leads to faster, better results. However, this approach can cause long-term damage by disrupting soil microbiomes and plant root systems. Instead, a strategic, measured approach preserves soil health and promotes healthy growth. An often underestimated mistake is neglecting to consider soil compaction, which can severely impede drainage and root expansion. Aeration techniques, when properly timed and implemented, can unlock the soil’s potential to absorb water efficiently, reducing runoff and disease risk. I once saw a project where ignoring soil structure led to persistent sogginess even after irrigation adjustments, highlighting how soil health underpins successful landscaping.

When it comes to irrigation, many believe that simply increasing watering duration or pressure will solve dry patches. But this often exacerbates runoff and water wastage. An advanced mistake is failing to calibrate smart irrigation systems to account for seasonal variations and soil moisture levels. Incorporating soil moisture sensors, as recommended in expert consultations, can fine-tune watering schedules and prevent overwatering—a common pitfall that drains resources and damages turf. According to a 2022 study by the Water Resources Research Center, properly calibrated digital controls can reduce water waste by up to 35%, demonstrating the importance of precision in irrigation.

In sod installation, the prevailing misconception is that proper soil preparation and watering are enough for successful rooting. The hidden nuance lies in understanding how soil type affects sod health. For example, clay soils retain water longer, leading to rot and poor rooting if not properly amended. A critical but often missed step is soil testing before installation, which guides tailored amendments like organic matter addition. Falling into the trap of uniform soil treatment for diverse yard conditions can doom even the best sod. For comprehensive guidance, exploring resources on soil drainage fixes can prevent issues like rot and uneven growth, and ensure your sod thrives well beyond the initial planting.

Have you ever fallen into this trap of oversimplification? Let me know in the comments. Remember, a nuanced understanding of soil, water, and plant interactions creates a sustainable and beautiful landscape that stands the test of time.

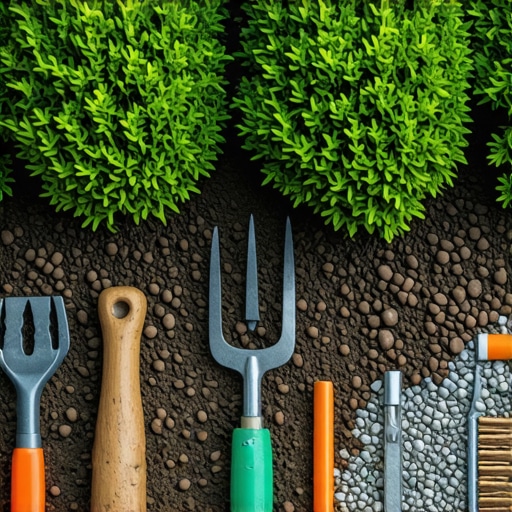
Keep It Running: Essential Tools for Yard Maintenance

Maintaining a lush, healthy yard requires the right tools that combine precision and durability. Personally, I swear by a high-quality pair of cordless pruners, like the Fiskars Steel B Series, which allow me to prune or remove overgrowth quickly without tiring my hand. For soil aeration, I use a spike aerator attachment on my walk-behind lawn tractor; it covers more ground efficiently and prevents soil compaction that hampers drainage. When it comes to irrigation, I rely on smart controllers such as the Rachio 3, which I calibrated with soil moisture sensors to prevent overwatering and runoff issues. Investing in reliable tools not only makes ongoing maintenance manageable but also ensures your yard’s health over years.

Establishing Routine Maintenance for Lasting Results

Long-term yard health depends on consistent monitoring and proactive fixes. I recommend setting a monthly checklist—checking sprinkler heads for leaks, unclogging or replacing damaged nozzles, and inspecting drainage solutions. For instance, I recently noticed some soggy patches during routine checks and promptly cleared clogged filters, avoiding costly repairs later. Documenting your maintenance activities helps track patterns and prioritize repairs, which is essential for compliance with upcoming regulations. Additionally, integrating seasonal soil testing, especially in clay-heavy areas, can reveal nutrient deficiencies or pH imbalances that affect sod health, as detailed in expert guides like this resource.

Scaling Your Yard Care Efforts

Sustainable growth in your landscape is achievable by expanding your toolkit and upgrading your systems over time. For larger projects, a self-propelled dethatcher can speed up cleaning and prepare the soil for amendments, which is vital before overseeding or new sod installation. As your landscape evolves, consider upgrading to zone-specific controllers and portable sensors, allowing finer control and water savings. In the future, integrating AI-powered irrigation systems that adapt to weather forecasts and soil sensors will likely become mainstream, as predicted by industry analysts. Getting comfortable with these technologies now will give you a significant edge in maintaining your yard efficiently.

How do I maintain irrigation systems for optimal performance over time?

To keep your irrigation system functioning correctly, periodic inspections are crucial. Start by checking for leaks in pipes and valves—small leaks can waste hundreds of gallons daily. Replacing worn-out nozzles and recalibrating timers based on seasonal needs ensures even coverage and prevents runoff, which is especially important as regulations tighten. Using soil moisture sensors, like the ones recommended in this article, can automate this process, ensuring your system adapts over time. Additionally, keeping an eye on weather data and adjusting schedules accordingly helps conserve water and maintains a healthy lawn. Experimenting with smart controls inspired by expert advice can help you fine-tune your system for maximum efficiency.

The Hardest Lesson I Learned About yard cleanup,landscaping,irrigation,sod install

One of my most impactful lessons was realizing that quick fixes often mask deeper issues. I once thought trimming bushes vigorously would accelerate growth, only to find myself back at square one with overgrown branches and wasted effort. Patience and measured interventions proved far more effective, reminding me that sustainable landscaping demands a thoughtful approach.

3 Myths About yard cleanup,landscaping,irrigation,sod install That Held Me Back

A significant misconception was believing that more watering speeds up sod establishment; instead, overwatering hampers root growth and invites disease. Another myth was that soil amendments are optional; in reality, understanding soil composition can make or break your project’s success. Disregarding regular system checks also led me to overlook creeping leaks and inefficiencies, costing me water and money.

What Experts Won’t Tell You About yard cleanup,landscaping,irrigation,sod install

Often, seasoned professionals know that soil health is the foundation of any thriving yard. They might skip direct instructions on calibration but emphasize soil testing to tailor amendments. Additionally, they’re aware that integrating smart irrigation sensors isn’t just a luxury but a necessity for water efficiency, especially with upcoming regulations heading into 2026. Learning these nuanced insights transformed my approach from reactive to proactive.

Where to Go from Here

Now that you’re equipped with my hard-earned insights, consider auditing your yard’s current state—inspect drainage, soil, and irrigation systems. Investing in quality tools, like soil moisture sensors or aerators, can save you time and frustration. For deeper guidance, explore dedicated resources and stay ahead of 2026 regulations by implementing efficient practices today. Remember, a resilient yard isn’t built overnight but nurtured with consistent, informed effort.

Fuel Your Yard’s Future with Passion and Precision

Your landscape holds the potential for beauty and sustainability. Embrace the lessons learned, leverage trusted tools, and don’t hesitate to adapt as new techniques emerge. The effort you invest now will reward you with a lush, healthy yard that stands strong against the challenges of tomorrow. Take the first step today—your ideal outdoor space awaits.

What’s one change you’re excited to make in your yard care routine? Share your thoughts below, and let’s inspire each other to create resilient landscapes!