
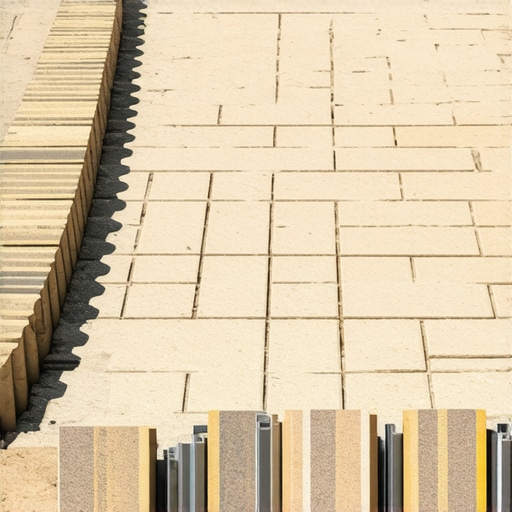
Stop Your Paver Patio From Shifting with This Edge Constraint Move
Planning a hardscape installation requires a shift in perspective: you are not laying stones, you are building a flexible pavement system that must resist lateral displacement. Roughly 80% of the structural integrity of a patio is established before the first paver touches the bedding sand. Without a rigorous focus on sub-base compaction and the mechanical locking of the perimeter, your investment will fail within three seasons. This is not a guess; it is a matter of civil engineering. Most homeowners focus on the color of the stone, but the real work happens in the 12 inches of excavated earth below your feet.
The Hardscape Autopsy: Why Patios Fail
Paver patio failure occurs primarily due to lateral shifting and sub-base settlement caused by improper edge restraint installation and inadequate compaction of modified gravel. When the perimeter is not mechanically locked, the stones migrate outward, opening gaps that allow polymeric sand to wash away and water to infiltrate the base.
I recently got called out to tear up a $30,000 patio that was sinking because the previous contractor used cheap plastic edging and short 6-inch spikes in soft, organic soil. Within two years, the spikes had heaved during the freeze-thaw cycle, and the entire southern edge of the patio had drifted three inches toward the lawn. The homeowner was looking at a total loss. This happened because the contractor ignored the basic physics of hydrostatic pressure. When water gets trapped in the bedding layer, it acts as a lubricant. Without a rigid constraint, those pavers have nowhere to go but out. We had to excavate the entire perimeter, install a proper concrete bond beam, and reset the field. It was a mess that could have been avoided with twenty dollars worth of extra concrete and some engineering common sense.
“A retaining wall doesn’t fail because of the stone; it fails because of the water trapped behind it.” – Hardscape Engineering Axiom
The Physics of Lateral Displacement
Lateral displacement is the outward movement of pavers caused by point loads and thermal expansion, which can be mitigated using mechanical edge restraints and ASTM C33 bedding sand. The force of a human foot or a heavy grill pushes down on a paver, and that force is redirected horizontally through the joints. If the edge restraint is weak, the entire system unzips.
How much modified gravel do I need for a patio base?
To calculate the modified gravel needed, you must measure the square footage and multiply it by a depth of 6 to 8 inches for pedestrian areas, ensuring you account for a 20% compaction factor. For a 200-square-foot patio, you are looking at roughly 5 to 6 tons of 2A modified stone. Don’t skimp. If you don’t have a solid foundation, the best pavers in the world won’t stay level. You need to compact this in 2-inch lifts. If you try to dump 6 inches of gravel and run a plate compactor over it once, the bottom 4 inches will stay loose. It will settle later. Your patio will sink. It is that simple.
| Material Layer | Recommended Specification | Function |
|---|---|---|
| Sub-grade | Native Soil (Compacted) | The structural foundation |
| Geotextile | Non-woven, Class 2 | Prevents soil mixing |
| Base Material | 2A Modified / Crushed Stone | Load distribution and drainage |
| Bedding Layer | ASTM C33 Washed Sand | The leveling course (1 inch) |
| Edge Restraint | Concrete Bond Beam or PVC | Prevents lateral drift |
The Secret Edge Constraint: Mechanical Anchoring
The ultimate edge constraint move involves installing a sub-surface concrete bond beam (often called a ‘soldier course lock’) that physically ties the perimeter pavers to the compacted gravel base. This move replaces flimsy plastic edging with a rigid, triangular wedge of concrete that sits below the grade of the grass but above the gravel base. It is invisible once the yard cleanup and sod install are finished, but it provides a permanent barrier that cannot be moved by frost or foot traffic.
Most ‘mow-and-blow’ contractors hate this method because it takes time. You have to mix the concrete on-site and trowel it at a 45-degree angle against the outside edge of the pavers. But here is the technical reality: a plastic edge restraint is only as strong as the spike holding it. In clay-heavy soils, those spikes move. A concrete bond beam, however, becomes part of the base itself. It creates a monolithic structure. I always drill into my new crew members: if you don’t fix the soil grading and lock the edges, every plant you put in the ground is just expensive compost because the patio drainage will eventually rot the root flares of your landscaping. We use a 4000 PSI fiber-reinforced mix for these beams. It doesn’t move. Period.
What is the best edge restraint for pavers?
The best edge restraint for high-traffic or freeze-thaw climates is a structural concrete bond beam or a heavy-duty aluminum restraint system secured with 10-inch galvanized steel spikes driven into a densified aggregate base. While plastic is common, it lacks the structural rigidity required for long-term stability in areas with significant moisture fluctuation or irrigation runoff.
“Pavement sections should be designed to support the anticipated traffic loads and to provide a stable, well-drained foundation for the pavers.” – Interlocking Concrete Pavement Institute (ICPI) Manual
Step-By-Step: The Professional Edge Lock
- Excavate the Over-run: Always dig your base 6 inches wider than the actual patio footprint. This provides a ‘shoulder’ for the edge restraint to sit on.
- Verify Compaction: Use a plate compactor until the machine literally bounces off the stone. That is the sound of 95% Standard Proctor density.
- Set the Field: Lay your pavers on 1 inch of uncompacted sand. Do not walk on the sand.
- Install the Bond Beam: Remove the sand from the outer 4 inches of the perimeter. Apply a stiff concrete mix against the side of the pavers, sloping it away at a 45-degree angle.
- Backfill and Sod: Once the concrete is cured, cover it with topsoil. This is where your sod install happens. The grass roots will further stabilize the soil over the bond beam.
The Information Gain: Why Your Irrigation Matters
While the internet tells you to water every day, turf grass actually needs deep, infrequent watering—exactly 1 inch per week—to force roots to chase the water down. This is critical for your patio’s health. Over-watering your sod install near a new patio creates a saturated sub-grade. This reduces the shear strength of the soil. If your irrigation heads are spraying directly onto the paver joints, you are inviting efflorescence and joint sand washout. Ensure your heads are adjusted to spray away from the hardscape. A dry base is a stable base. If you have a yard cleanup scheduled, make sure the crew doesn’t blow debris into the joints. That organic matter will rot, create gaps, and invite weeds. Maintain the integrity of the polymeric sand like your life depends on it. It is the ‘glue’ that keeps the system flexible yet tight.