The Anatomy of a Dark Controller: A Forensic Autopsy of Irrigation Failure
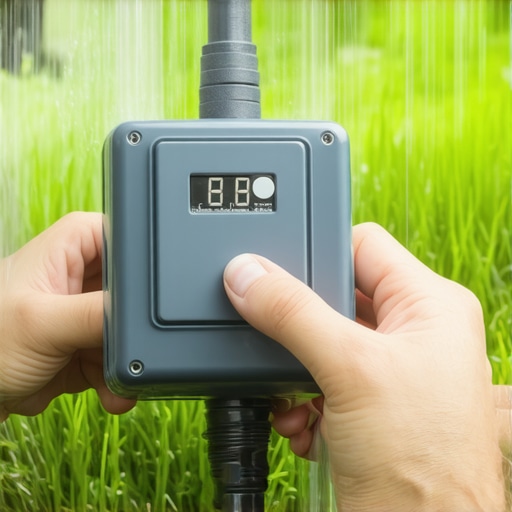
You walk into your garage or check the side of your house and see it: a blank, lifeless LCD screen on your irrigation controller. In the yard, your expensive sod install is starting to show the tell-tale grayish-blue tint of wilt. I have seen this scenario a thousand times. When an irrigation timer dies, homeowners panic and call for a full system replacement. I always drill into my new crew members: if you don’t fix the soil grading first, every plant you put in the ground is just expensive compost. The same logic applies to your irrigation controller. You can buy a $500 WiFi-enabled unit, but if your common wire is grounded in a puddle because of poor site drainage, it is nothing but a plastic brick on your garage wall. We do not guess in this business; we measure. A dead timer is rarely a total computer failure. It is usually a break in the electrical chain or a triggered safety mechanism. If you do not catch it within 48 hours, your yard cleanup project turns into a total lawn replacement. [image_placeholder_1]
The Power Source Protocol: Why Your Timer Is Dark
To fix a sprinkler timer that won’t turn on, you must systematically check the GFCi outlet, the internal fuse or transformer, and the ribbon cable connections. Most failures result from simple electrical breaks rather than computer malfunctions, requiring a multimeter to diagnose the 24V AC output. Most residential systems run on 24-volt alternating current. This is safe enough that it won’t kill you, but sensitive enough that a single lightning strike or a rodent chewing through a wire in the valve box can short the entire board. Before you throw the unit in the trash, check the outlet. Press the reset button on the GFCi. It sounds simple, but 30 percent of my service calls are solved by that one click. If the outlet has power but the screen is blank, the transformer is your primary suspect.
“A retaining wall doesn’t fail because of the stone; it fails because of the water trapped behind it.” – Hardscape Engineering Axiom
How many volts should a sprinkler transformer produce?
A functional sprinkler transformer should output between 24 and 28 volts AC when tested with a multimeter. Connect your probes to the two 24VAC terminals on the controller board. If you see 0 or 12 volts, the internal copper windings have failed, and you need a replacement transformer, not a new timer. This is common after power surges or if the unit is housed in a high-heat environment like an uninsulated garage. Heat increases resistance, and high resistance kills electronics.
The Multimeter Diagnostic: Testing the Internal Components
Once you verify that the outlet is live, you must open the faceplate. Every professional landscaper carries a multimeter because dirt and electricity are natural enemies. Set your meter to AC voltage. Touch the probes to the power input terminals. If you have 24 volts there but no display, look for a small glass fuse or a plastic automotive-style fuse on the board. These are designed to blow if a solenoid in the yard shorts out. If the fuse is black or the filament is broken, you have found your problem. However, do not just replace the fuse. A blown fuse is a symptom. It means one of your valves is pulling too many amps, likely due to a failing solenoid coil that has melted internally. If you replace the fuse without checking the valves, it will pop again in five seconds. It is a cycle of failure that many DIYers get stuck in.
How do I test a solenoid with a multimeter?
To test the solenoid, turn your multimeter to the Ohms (resistance) setting. Disconnect the station wire and the common wire for the zone in question. A healthy solenoid should read between 20 and 60 ohms. If it reads below 10, it has a short. If it reads above 80 or shows ‘OL’ (Open Loop), the wire is broken or the coil is dead. Testing this at the controller tells you the health of the entire wire run and the valve without digging a single hole.
| Symptom | Probable Cause | Required Fix |
|---|---|---|
| Blank Screen | Tripped GFCi / Dead Transformer | Reset Outlet / Replace 24V Transformer |
| Screen On, No Water | Master Valve Fault / Common Wire Break | Test Common Wire for Continuity |
| Fuse Blows Constantly | Shorted Solenoid Coil | Locate and Replace Valve Solenoid |
| Partial Display/Garbage | Static Surge / Ribbon Cable Corrosion | Reseat Ribbon Cable / Power Cycle Board |
The Irrigation and Sod Install Connection
Why does a 10-minute fix matter? Because the biology of a yard cleanup or a fresh sod install does not wait for a contractor to show up. When you lay new turf, the root system is severed. It relies entirely on the top inch of soil moisture. If your timer fails on a Tuesday and you do not notice until Friday, the leaf blades will reach a permanent wilting point. At this stage, the cellular structure collapses, and no amount of water will bring it back. You are left with expensive straw. Professional landscaping requires a proactive approach to irrigation. You should be checking your controller weekly. If you see a ‘Sensor’ light on, check your rain sensor. Many homeowners think their timer is broken when, in reality, a $20 rain sensor is stuck in the ‘wet’ position due to debris or spider webs. Scrub the sensor discs, and the system will resume its schedule. Don’t let a small piece of plastic ruin a $5,000 landscaping investment.
“Turfgrass irrigation should be based on the depletion of soil moisture rather than a fixed calendar schedule to promote deep rooting.” – Penn State Center for Turfgrass Science
The Landscape Professional’s Troubleshooting Checklist
- Verify the GFCi outlet is not tripped by plugging in a lamp or drill.
- Inspect the internal fuse for a broken filament or scorch marks.
- Use a multimeter to confirm 24V-28V AC output at the transformer.
- Check the ‘Common’ wire terminal to ensure it is tight and free of corrosion.
- Ensure the rain sensor bypass switch is in the ‘Active’ or ‘Off’ position as needed.
- Look for a ‘Low Battery’ icon which can cause some units to glitch during power flickers.
- Unplug the ribbon cable connecting the faceplate to the backplane and reseat it firmly.
Maintaining System Integrity After the Fix
Once you get the power back on, your job is not done. You need to ensure the system is actually delivering water. A controller that is ‘on’ doesn’t mean the yard is being watered. Check your station run times. After a power failure, many units revert to a factory default of 10 minutes per zone, which is rarely enough for high-needs areas or shaded zones. Recalibrate your timing based on the season. In the peak of summer, you need deep, infrequent watering to force roots to chase the moisture down into the soil profile. This builds a resilient lawn that can survive the next time your controller decides to take a nap. If you have just completed a yard cleanup, clear the grass and mulch away from your pop-up heads. A blocked head creates backpressure that can eventually crack the lateral line or cause the valve to fail to close, leading to a massive water bill and a flooded basement. Landscaping is a system of moving parts; the timer is just the conductor of the orchestra. Keep it running, or the music stops for your plants.
Comments are closed.