
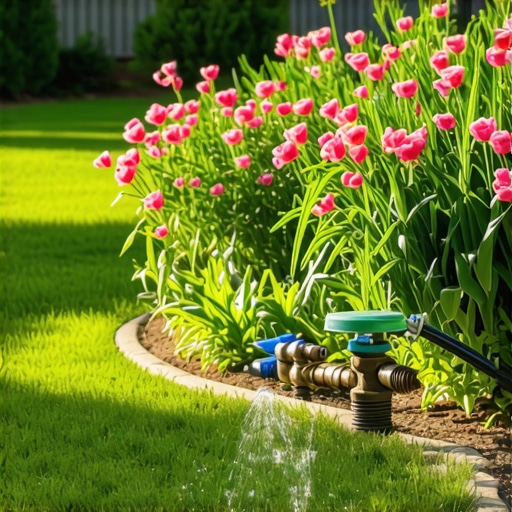
Expert Advice for Spring Irrigation Startup
Successful de-winterization of a sprinkler system involves a precise sequential pressurization of the main line and lateral valves to avoid water hammer. Property owners should confirm that soil temperatures at a six-inch depth consistently exceed 40 degrees Fahrenheit and inspect backflow prevention assemblies for mechanical fatigue before initializing the controller.
The Apprentice Lesson: Why Fundamentals Prevail
I always drill into my new crew members: if you don’t fix the soil grading first, every plant you put in the ground is just expensive compost. The same logic applies to your irrigation network. Many rookie contractors think they can just crank the main valve and walk away. That is how you blow a solenoid right through a valve box. Years ago, I watched an apprentice do exactly that on a large commercial sod install. The resulting surge of high-pressure water didn’t just break the pipe; it excavated a four-foot crater in the client’s new lawn. We spent the next three days doing a yard cleanup that could have been avoided with five minutes of patience. You are dealing with fluid dynamics, not just plumbing. Treat the system with respect or it will fail when the July heat hits.
Step 1: Soil Thaw and Frost Line Verification
Before you even touch a wrench, you must understand the thermal state of your property. If the ground is still frozen at the depth of your lateral lines, typically 8 to 12 inches, any water introduced will freeze and expand. This causes PVC to shatter. Use a soil thermometer. If the ground is consistently above 40 degrees, the risk of a snap freeze damaging your components is low. This is critical for sod install projects where the root zone must remain moist but not trapped in an ice block.
Step 2: The Slow Pressurization Protocol
The most common cause of spring irrigation failure is water hammer. This occurs when a surge of water hits a pocket of air at high velocity. The pressure can spike to three times the normal operating PSI.
“A retaining wall doesn’t fail because of the stone; it fails because of the water trapped behind it.” – Hardscape Engineering Axiom
This principle of hydrostatic pressure applies to your pipes too. Open the main shut-off valve only 1/4 turn. You should hear the water slowly filling the main line. Wait until the sound of rushing water stops before opening the valve fully. This protects the diaphragms in your zone valves from rupturing under the initial surge.
Step 3: Backflow Preventer and Valve Inspection
Your backflow preventer is the most expensive and vital part of the system. It prevents lawn chemicals and bacteria from entering your potable water supply. Inspect the brass or plastic housing for hairline cracks. Even a microscopic fracture from winter ice expansion will become a geyser under pressure. Check the test cocks and ensure they are closed. If you have a Pressure Vacuum Breaker (PVB), the internal poppet and bonnet must move freely. If they are stuck, the system will not seal, and you will lose pressure across all zones.
How much water does new sod need after de-winterizing?
New sod requires approximately 1 inch of water per day for the first two weeks, but this must be delivered in short, frequent bursts to keep the soil-to-root interface saturated without causing runoff. Once the roots knit into the soil, transition to deep, infrequent watering. This forces the roots to grow deeper into the profile to find moisture.
“Maintaining a functional irrigation system requires more than just turning on a valve; it demands an understanding of soil water-holding capacity.” – IA Design Standards
Step 4: Zone-by-Zone Mechanical Audit
Activate one zone at a time using the controller. Do not just look for water; look for performance. Are the heads popping up fully? If a head is weeping at the base, the wiper seal is shot. If a rotor is stuck in one position, the internal gears are likely fouled with grit. This is the time for landscaping maintenance. Use a shovel to level any heads that have settled too deep. Low heads lead to ‘donuts’ of dead grass because the spray pattern is blocked by the surrounding turf. Check the nozzles for clogs. A single grain of sand can distort a 15-foot spray pattern into a 2-foot dribble.
Step 5: Controller Calibration and Scheduling
Do not set your spring schedule to your mid-summer run times. In the spring, evapotranspiration rates are low. Over-watering in April leads to root rot and fungal pathogens like Pythium. Use the following table to calibrate your system based on nozzle type and soil absorption.
| Nozzle Type | Precipitation Rate (In/Hr) | Best Soil Type | Run Time Recommendation |
|---|---|---|---|
| Fixed Spray | 1.5 – 2.0 | Sandy Loam | 10-15 Minutes |
| Rotary Nozzle | 0.4 – 0.6 | Heavy Clay | 30-45 Minutes |
| Impact Rotor | 0.5 – 0.8 | Silt | 25-35 Minutes |
Can I de-winterize my own sprinkler system?
While a homeowner can technically perform these steps, a professional irrigation technician uses specialized gauges to test for hydrostatic pressure and flow rates. If your system is connected to a well, you also need to prime the pump and check the pressure switch. If you skip the backflow test, you could be in violation of municipal health codes. It is often cheaper to pay for a professional startup than to replace a blown main line.
The Spring Startup Critical Checklist
- Verify soil temperature is above 40°F at 6 inches.
- Inspect the backflow preventer for freeze damage or cracks.
- Open the main water valve slowly to prevent water hammer.
- Check every sprinkler head for clogs and proper height.
- Clean out any debris around the valve boxes for easy access.
- Adjust the controller for spring weather, not summer heat.
- Test the rain sensor to ensure it shuts off during storms.
Remember that yard cleanup is not just about raking leaves. It involves clearing the grass and mulch away from your sprinkler heads. If your landscaping has grown over the heads, they cannot distribute water evenly. Cut back the sod around the heads using a donut cutter or a sharp spade. This ensures the spray arc is unobstructed. A well-maintained system uses 30% less water than a neglected one. Do the work now or pay the water bill later. It is that simple. Don’t be the homeowner who ignores their system until the grass turns brown. By then, it’s often too late to save the root structure without an expensive sod install.