
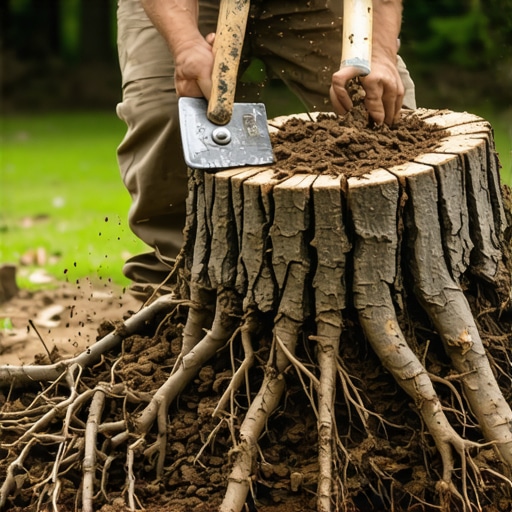
The Hard Truth About Leftover Stumps in the Landscape
Removing a tree stump without a heavy-duty grinder requires understanding the structural engineering of a root system and the leverage physics necessary to break soil suction. Most homeowners make the mistake of cutting a tree too low to the ground, losing the crucial leverage needed to pull the stump from its anchor points. To properly execute a manual removal during a yard cleanup, you must treat the stump like a biological puzzle, identifying the lateral roots that provide stability and the taproot that provides vertical anchoring. If you skip this, your sod install will eventually fail as the wood rots and the soil collapses into a sinkhole.
The Apprentice Lesson: Why Shortcuts Cost Double
I always drill into my new crew members: if you don’t fix the soil grading first, every plant you put in the ground is just expensive compost. I remember a job in the suburbs where a client had three large oak stumps ‘buried’ by a previous contractor who just threw dirt over them. Two years later, their irrigation lines were snapping because the rotting wood caused the ground to shift six inches. We had to dig up a $15,000 lawn just to do what should have been done the first time. Physics doesn’t care about your weekend schedule. If you leave wood in the ground, it will rot. It will sink. It will invite termites. Do it right or don’t do it at all.
“The physical properties of woody roots, particularly their tensile strength, are what allow trees to resist uprooting, but these same properties make manual extraction a test of mechanical advantage rather than brute force.” – USDA Forest Service Research Note
The Physics of Manual Stump Removal
The fastest way to dig out a stump without a grinder is the Leverage and Sever method, utilizing a high-lift jack or a 10-foot pry bar. This process focuses on the root flare—the area where the trunk expands into the root system. You must excavate a trench at least 24 inches wide around the circumference of the stump to expose the primary lateral roots. Use a 5-lb mattock to clear soil and a reciprocating saw with a 12-inch demolition blade to cut through the wood. Avoid using an axe in the dirt; the silica in the soil will dull the edge in three swings. Use a pressure washer to blast soil off the roots if you can’t see where to cut. Once the laterals are severed, the stump is held only by the taproot.
| Tool Type | Primary Function | Efficiency Rating (1-10) |
|---|---|---|
| Mattock/Pick | Soil excavation and root exposure | 9 |
| Reciprocating Saw | Severing lateral roots in-situ | 10 |
| High-Lift Jack | Vertical extraction leverage | 8 |
| Digging Bar | Prying and soil compaction breaking | 7 |
How much modified gravel do I need for a stump hole backfill?
Filling a stump hole requires stratified backfilling with structural soil or a 70/30 mix of screened topsoil and coarse sand to prevent future settling. You should calculate the cubic footage of the hole (V = πr²h) and add 20% for compaction. Do not fill the hole with wood chips or mulch. As those organic materials decompose, the nitrogen levels in the soil will spike, then crash, killing any sod install or new landscaping you place on top. Tamp the soil in 4-inch lifts. If the tamper doesn’t bounce off the surface, it isn’t compacted enough. If you ignore this, the area will remain a muddy depression for a decade.
Can I burn a stump out safely?
Burning a stump is rarely the ‘fastest’ way and often fails because the lignin in the wood is insulated by the surrounding damp earth. For a successful burn, you need to drill 1-inch diameter holes 12 inches deep into the stump and fill them with potassium nitrate to provide an internal oxygen source. However, in many jurisdictions, this violates fire codes and can smolder for weeks, potentially traveling along root lines to ignite nearby structures or peat-heavy soil. Manual extraction is cleaner and allows for immediate yard cleanup and replanting.
The Step-by-Step Extraction Protocol
- Step 1: The Trench. Dig a circle 3 feet out from the trunk. You need room to work.
- Step 2: Root Identification. Locate the four largest lateral roots. These are your primary targets.
- Step 3: The Sever. Cut the laterals twice—once at the stump and once at the trench wall—to remove a ‘chunk’ of root. This prevents the root from binding during extraction.
- Step 4: Mechanical Advantage. Place a high-lift jack on a solid 4×4 timber base. Chain it to a remaining root and crank. The stump will groan; that’s the sound of the taproot stretching.
- Step 5: The Final Cut. Once the stump is lifted 6 inches, reach underneath with your saw and sever the taproot.
“Soil moisture content significantly impacts the shear strength of the root-soil bond; saturated soils often allow for easier extraction but carry a high risk of soil structure collapse.” – International Society of Arboriculture (ISA) Handbook
Integrating Extraction with Future Landscaping
Once the stump is out, your landscaping prep begins. The hole is a biological void. If you are planning an irrigation install, this is the perfect time to run your lateral lines through the cleared area. Check the soil pH. Rotting wood increases acidity, often dropping the pH below 5.5. Apply pelletized lime to neutralize the site before you attempt a sod install. High-quality turf like Kentucky Bluegrass or Bermuda requires a neutral pH (6.5-7.0) to establish the deep root systems needed for long-term health. Don’t be the hack who throws seed over a hole. Fix the chemistry. Fix the grade. Then grow the grass.