The Forensic Autopsy of a Dying Lawn
You step onto your new lawn and it feels like walking on a parking lot, or worse, a wet sponge that never dries. The grass is yellowing at the tips, the blades are thinning, and you can literally pull up a 12-inch square of sod like a piece of loose carpet six months after it was laid. This is root girdling caused by high bulk density in your soil. Most homeowners think they have a ‘black thumb,’ but the reality is they have a compaction problem that effectively suffocates the root zone. I always drill into my new crew members: if you don’t fix the soil grading and compaction first, every plant you put in the ground is just expensive compost. You cannot shortcut physics. If the soil lacks the macropores necessary for oxygen exchange, the roots will never dive deep enough to survive a standard summer heatwave. You’re not just growing grass; you’re managing a biological filtration system that requires specific pore space to function.
How do I know if my soil is too compacted for sod?
Soil compaction is the process where soil particles are pressed together, reducing the pore space between them which is essential for air and water movement. You can diagnose this by attempting to drive a 12-inch screwdriver into the ground; if it stops before 4 inches, your bulk density is too high for sod install success.
“Soil compaction occurs when soil particles are pressed together, reducing pore space between them. Heavily compacted soils contain few large pores, which are critical for water infiltration and root growth.” – Penn State Center for Turfgrass Science
The Physics of Bulk Density and Root Failure
When we talk about soil compaction, we are measuring bulk density—the weight of dry soil per unit of volume. For most turfgrass species to thrive, you need a bulk density below 1.5 grams per cubic centimeter. Once you hit 1.8, root penetration stops. The roots hit a ‘hard pan’ and begin to grow horizontally. This is why your 2026 sod won’t knit. The roots are literally trapped in the top two inches of the sod farm’s peat base, unable to break into your native soil. This leads to a total failure of the irrigation strategy. You can dump gallons of water on the lawn, but it will either sit on the surface and cause fungal rot or run off into the street. It never reaches the sub-soil. We call this ‘hydrostatic resistance.’ You must break the surface tension of the soil to allow for deep-cycle watering.
| Soil Type | Compaction Risk | Optimal Bulk Density (g/cm³) | Drainage Rate |
|---|---|---|---|
| Heavy Clay | Extreme | < 1.10 | < 0.05 inches/hr |
| Silt Loam | Moderate | < 1.35 | 0.5 – 2.0 inches/hr |
| Sandy Loam | Low | < 1.60 | 2.0 – 6.0 inches/hr |
What is the best month to install sod for deep root growth?
For most cool-season grasses, sod install should occur in early autumn when soil temperatures are between 50°F and 65°F. This allows the plant to focus 100% of its photosynthetic energy on root development rather than heat survival or seed production.
The Remediation Protocol: Mechanical and Chemical Fixes
Fixing compaction isn’t just about yard cleanup; it’s about structural engineering. If you are prepping for a 2026 install, you start now. Mechanical core aeration is the gold standard. You need a machine that pulls actual 3-inch plugs, not those cheap spike aerators that actually increase compaction by pushing soil sideways. Once you have the holes, you top-dress with a 70/30 mix of masonry sand and organic compost. This changes the soil texture over time. We are aiming for cation exchange capacity (CEC) improvement. If your pH is off, your nutrients are locked up. I see guys throwing 10-10-10 fertilizer at a lawn with a 5.2 pH. It’s a waste. The grass can’t eat if the soil is too acidic. You need to apply calcitic lime based on a lab-verified soil test. Stop guessing.
“A retaining wall doesn’t fail because of the stone; it fails because of the water trapped behind it, and a lawn doesn’t fail because of the seed, but because of the soil’s inability to breathe.” – Hardscape Engineering Axiom
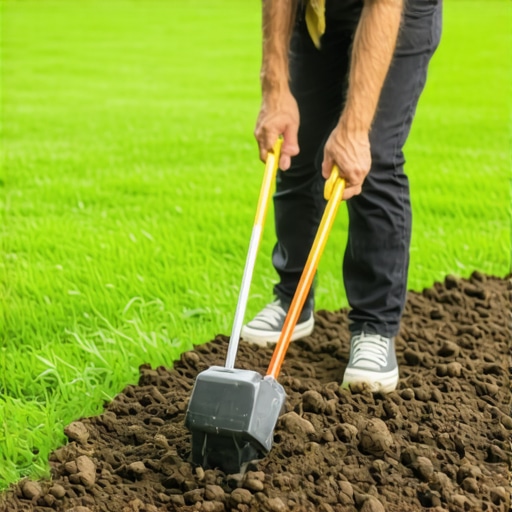
- Excavate: Remove the top 2 inches of old debris and ‘muck’ during your yard cleanup.
- Grade: Ensure a 2% slope away from foundations to prevent hydrostatic pressure buildup.
- Amend: Incorporate 3 cubic yards of organic matter per 1,000 square feet.
- Tiller: Use a rear-tine tiller to mix amendments to a 6-inch depth.
- Roll: Use a water-filled roller to firm the surface without over-compacting.
The Irrigation Engineering Mandate
Most homeowners over-water the surface and under-water the roots. To force your 2026 sod to knit, you need to follow the ‘1-inch rule.’ You need 1 inch of water per week, delivered in two deep sessions. This forces the roots to chase the moisture downward as the top inch of soil dries out. Shallow, daily watering keeps the roots at the surface where they cook in the sun. If you have an automated irrigation system, check your head pressure. Low pressure leads to large droplets that contribute to surface sealing—a microscopic form of compaction. You want a consistent mist or rotating stream that allows for infiltration. Don’t be a hack. Do the work before the sod arrives. If you don’t, you’re just laying a very expensive, very temporary green blanket. It will rot. Fix the dirt first.