The Physics of Desiccation: Why Sod Edges Fail First
Sod edges dry out because of air pocket desiccation where the cut margin of the turf roll meets the air. To stop this, you must tamp the seams manually to eliminate the air gap and ensure capillary action between the soil and the roots, preventing the rhizosphere from overheating. It is a fundamental engineering requirement for any high-end sod install.
I always drill into my new crew members: if you don’t fix the soil grading first, every plant you put in the ground is just expensive compost. Last season, I watched a junior tech lay down $4,000 worth of premium Kentucky Bluegrass without properly knifing in the edges or tamping the seams. Within 72 hours, the entire perimeter looked like shredded wheat. The homeowner thought it was a water issue. It wasn’t. It was a physics issue. The air was getting underneath the edges, wicking away every drop of moisture before the roots could even wake up from their harvest shock. We had to rip it out, regrade, and start over on my dime. That is why we do not skip the tamping move. Landscaping is not just about aesthetics; it is about managing the microscopic environment where biology meets the dirt.
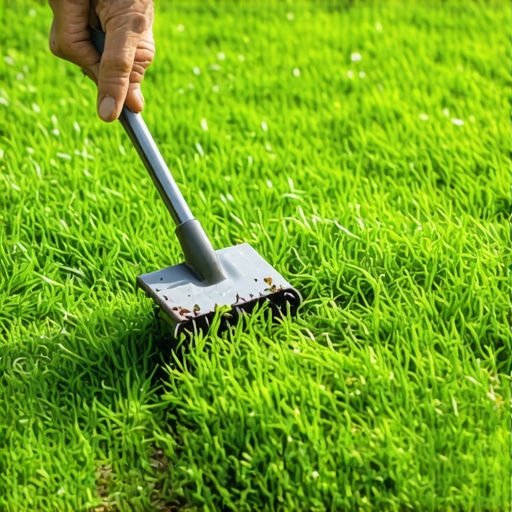
The Anatomy of the Tamping Move
To prevent edge failure, you must understand the interface between the subgrade and the sod mat. Most installers think a water-filled roller is enough. It is not. A roller provides broad, even pressure, but it often misses the slight undulations at the seams where the rolls meet. You need a 10-inch by 10-inch steel hand tamper. This tool allows you to apply localized compaction force exactly where the rolls join. You are looking for a specific sound: a dull thud. If it sounds hollow, you have an air pocket. You need to hit that spot until the sod and soil become one singular mass.
“Effective turfgrass establishment depends heavily on the elimination of air pockets at the soil-to-root interface to ensure immediate hydraulic conductivity.” – Penn State Center for Turfgrass Science
The Tool and Pressure Matrix
| Tool Type | PSI Applied | Contact Efficiency | Root Zone Impact |
|---|---|---|---|
| Water Roller | 5-10 PSI | Low (Surface Only) | Minimal Edge Seal |
| Hand Tamper | 25-40 PSI | High (Localized) | Superior Edge Compression |
| Foot Tamping | Varies | Inconsistent | High Risk of Divots |
Phase One: The Yard Cleanup and Subgrade Prep
The success of your sod install starts weeks before the first roll arrives. You need a thorough yard cleanup that involves more than just raking leaves. You must remove every rock larger than a marble. You must eradicate every weed down to the taproot using a non-selective herbicide with zero residual soil activity. If you leave organic debris under the sod, it will decompose and create anaerobic pockets. This leads to methane buildup, which kills tender new roots. I check for a soil pH of 6.5. If the soil is too acidic, the phosphorus required for root development becomes chemically locked and unavailable to the plant. This is the difference between a lawn that survives and a lawn that thrives.
How long does sod take to root?
New sod typically begins to develop white, fibrous roots within 7 to 14 days if the soil-to-root contact is maintained through proper tamping and moisture. Without tamping, this process can take twice as long, significantly increasing the risk of fungal pathogens like Pythium blight taking hold in the stressed turf.
Phase Two: The Precision Install Protocol
When laying the sod, you must stagger your joints like a bricklayer. This prevents long, continuous seams that act as wind tunnels for moisture. Once the rolls are down, the irrigation system must be checked. I do not trust automated timers until I have hand-tested every zone. You need 1 inch of water immediately following the install. But water alone will not save a loose edge. You must go back to the seams. Take your tamper and walk the perimeter of every single roll. The tamper should literally bounce off the compacted base. If the tamper sinks, your subgrade is too soft. If the edge doesn’t flatten, your sod is too dry. Fix it now. Do not wait until tomorrow. Tomorrow is too late.
“A retaining wall doesn’t fail because of the stone; it fails because of the water trapped behind it, and a lawn doesn’t fail because of the grass, but because of the soil preparation beneath it.” – Hardscape Engineering Axiom
Should I roll or tamp my new sod?
You should do both. Use a water-filled roller for the main body of the lawn to level the surface, but use a steel hand tamper for the edges and seams. The roller provides the uniformity, while the tamper provides the critical seal needed at the margins where drying occurs most rapidly.
Irrigation and the Hydraulic Gradient
After the tamping is complete, your irrigation strategy must shift. You aren’t just watering the grass; you are maintaining a hydraulic gradient. The first three days require three waterings per day: 10:00 AM, 2:00 PM, and 6:00 PM. You want the soil to stay at field capacity but not become a swamp. If you see water pooling, your soil has hit its saturation point and you are risking root rot. Use a soil probe to check the depth. You want the moisture to penetrate 4 inches into the subgrade to encourage the roots to chase the water downward. Deep, infrequent watering is the goal for established lawns, but for the first 14 days, consistency is king. Don’t skip a cycle.
- Check for 811: Always call for utility marking before any deep grading.
- Check the Crown: Ensure the sod is 1/2 inch below the level of any hardscape or pavement to prevent mower damage.
- Edge Tightness: Use a sharp linoleum knife to trim edges; never overlap the sod rolls.
- Tamping Check: If you can pull up a corner with two fingers, it was not tamped hard enough.
The Post-Install Maintenance Engine
By day 21, you should be ready for the first mow. Set your deck to the highest possible setting. Do not remove more than one-third of the leaf blade. If you scalp the lawn now, you destroy the plant’s ability to photosynthesize and recover from the stress of transplant. I tell my clients to avoid high-nitrogen fertilizers for the first 30 days. You want the plant to focus on its root architecture, not top growth. Use a starter fertilizer with a high phosphorus (P) ratio to stimulate the meristematic tissue in the roots. It is science, not magic. If you follow the physics of the tamping move and the chemistry of the soil, your lawn will be bulletproof.
Comments are closed.