
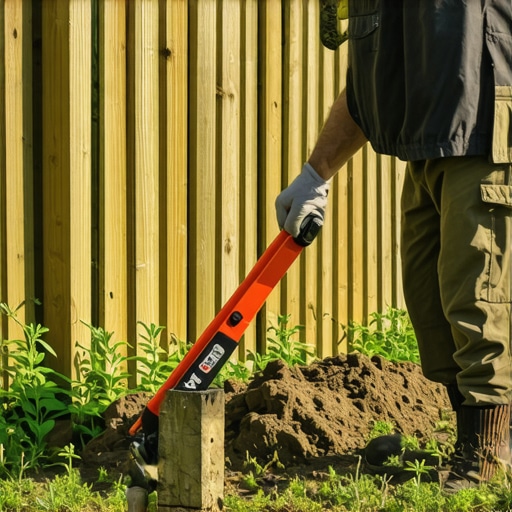
The Forensic Autopsy of a Failing Fence Line
I recently got called out to tear up a $30,000 patio that was sinking because the previous contractor failed to account for hydrostatic pressure and used a substandard base. While I was there, I noticed the homeowner’s perimeter fence looked like a series of jagged teeth. The posts were leaning at 15-degree angles, dragging the rails down and putting immense stress on the fasteners. This wasn’t just an aesthetic issue; it was a structural collapse in slow motion. The homeowner thought they had to hire a crew to rip every post out with a skid steer, destroying their recent sod install and landscaping. I told them to stop. You don’t always need to dig. Most fence failures are symptoms of sub-grade physics, not just a broken post. When a post sinks, it is usually because the soil beneath the footer has reached its liquid limit or the original contractor created a ‘bell-shaped’ footer that the frost has grabbed and shoved. We are going to look at how to fix this using engineering principles rather than brute force.
How to Level a Sinking Fence Post Without Digging It Out
To level a sinking fence post without total excavation, you must address the sub-grade voids or soil compaction failure using high-density expanding structural foam or pressure-injected gravel. This method restores the vertical plumb by creating a new load-bearing surface beneath the existing concrete footer without disturbing the surrounding turf grass or irrigation lines.
“A retaining wall doesn’t fail because of the stone; it fails because of the water trapped behind it.” – Hardscape Engineering Axiom
The Physics of Post Failure: Why It Sinks
Before you grab a jack, you need to understand soil bearing capacity. Soil is not a solid mass; it is a matrix of minerals, air, and water. When you have a yard cleanup that involves heavy machinery or significant grading changes, you often alter the way water moves across the property. If your irrigation system is dumping five gallons a minute near a post, the soil saturates, losing its shear strength. The weight of the fence, combined with wind load (lateral pressure), forces the post into the softened earth. In technical terms, the void ratio of the soil increases, and the bulk density decreases. This is why a post that was level for five years suddenly starts to dive after a wet spring or a new sod install that requires heavy daily watering. You are essentially standing the fence in a bowl of soup. Most DIYers try to throw more concrete at the problem. Don’t do that. Adding more weight to a failing soil base only accelerates the sinking. You need to stabilize the ground, not add mass.
Method 1: The Hydraulic Lift and Structural Foam Injection
This is the surgical approach. It involves using a high-lift jack to pull the post back to plumb and then injecting a closed-cell polyurethane foam into the cavity beneath the footer. This foam is the same material used to level interstate highways and airport runways. It expands with enough force to lift thousands of pounds per square foot. First, you must detach the fence rails from the post to prevent the weight of the entire fence line from fighting your lift. Secure a 2×4 ‘cleat’ to the post with heavy-duty timber screws. Use a farm jack (Hi-Lift) placed on a solid 2×12 wood base to prevent the jack itself from sinking. Slowly crank the post up until it is level. Once the post is held in place by the jack, you drill a 5/8-inch hole down alongside the concrete footer. You then inject the structural foam. As it reacts, it fills every microscopic void in the soil and hardens into a waterproof, rock-solid mass that won’t rot the wood. It is a permanent fix that respects the biology of the surrounding root zones.
| Method | Load Capacity | Material Cost | Skill Level | Duration of Fix |
|---|---|---|---|---|
| Structural Foam | 3,500 PSI | High | Intermediate | 25+ Years |
| Gravel Shimming | 2,200 PSI | Low | Professional | 10-15 Years |
| Concrete Sleeving | 2,800 PSI | Medium | Professional | 15-20 Years |
Method 2: The Pressure-Packed Gravel Sleeve
If you don’t want to mess with chemicals, you go with modified gravel. This is an old-school foreman trick. After jacking the post to level, you will find a void where the footer used to sit. Instead of pouring wet concrete—which will just shrink as it cures—you use 3/4-inch crushed stone with fines (often called 21A or CR-6). You use a tamping bar to drive this gravel into the void. The key is compaction. You want to reach a 95% Proctor density. You are essentially building a new, miniature hardscape base under the post. This method is superior for areas with high freeze-thaw cycles because the gravel allows for hydrostatic pressure relief. Water can move through the gravel instead of pushing against the footer. It’s the same logic we use for French drains and retaining walls. If the water has a path, it won’t move your structure.
“Soil compaction is the most overlooked element of residential construction. Without a stable base, any vertical structure is merely a temporary installation.” – Agronomy Manual Section 4.2
How much modified gravel do I need for a patio base?
While we are discussing compaction, homeowners often ask about patio bases during a yard cleanup. Typically, you need a minimum of 6 inches of compacted modified gravel for a pedestrian patio and 12 inches for a driveway. For a single fence post remediation, you will generally need about 0.5 to 1 cubic foot of gravel, depending on the size of the void created by the sinking. Always over-buy; unused gravel is great for filling low spots to prevent irrigation runoff.
Why is my fence post sinking after a yard cleanup?
A yard cleanup often involves removing thick brush, old mulch, or organic debris that was actually absorbing a significant amount of surface water. When that ‘sponge’ is removed and replaced with sod, the water now moves directly to the lowest points—often your fence post holes. If the grading wasn’t corrected during the landscaping phase to slope away from the posts (at least a 2% grade), you have created a series of miniature wells. The soil saturates, the friction pique of the soil drops, and the post sinks. Always check your irrigation heads after a cleanup to ensure they aren’t spraying directly onto the timber.
The Post-Leveling Maintenance Checklist
- Check all irrigation heads to ensure they aren’t creating localized saturation near the post base.
- Apply a hydrophobic sealant to the area where the post meets the ground to prevent 100% moisture contact.
- Verify that the sod install hasn’t buried the ‘weep hole’ or the top of the concrete footer; the soil should be 2 inches below the top of the concrete.
- Inspect the post for root girdling if there are large trees nearby; roots can heave or pull posts depending on the species.
- Ensure surface drainage moves at least 3 feet away from the fence line using a gentle swale if necessary.
Environmental Variables: Clay vs. Sand
Your soil type dictates your success. In heavy red clay (common in the Southeast), you have high water retention and massive expansion potential. In these environments, you must use the gravel method to provide a capillary break. In sandy loam, the soil drains fast but lacks cohesive strength. Here, the structural foam is king because it binds the loose sand particles together into a monolithic block. If you are dealing with expansive soils, ignore the internet ‘hacks’ like pouring dry concrete in a hole. That creates a brittle, porous ‘popcorn’ concrete that will crack within two seasons. Do it right or don’t do it at all. The physics of the earth do not care about your weekend schedule. Leveling a post is about managing moisture content and compaction. Period. No amount of decorative landscaping will hide a fence that is falling over. Fix the dirt, then fix the fence.