
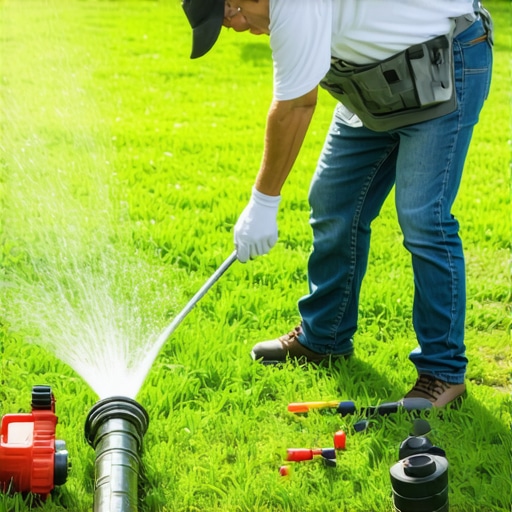
The Forensic Autopsy of a Failed Irrigation Line
You notice it first as a localized swampiness, a sponge-like texture beneath your boots that suggests the soil is saturated far beyond its field capacity. It is not a localized irrigation cycle error; it is a structural failure of the subterranean hydraulic network. A broken sprinkler pipe is more than a leak; it is an erosive force that can undermine hardscape footings and drown the aerobic microbes in your root zone. When the water pressure in a standard residential main line—typically 50 to 80 PSI—is unleashed through a lateral crack, it creates a scouring effect that displaces the pipe bedding and creates voids. I recently got called out to tear up a $30,000 patio that was sinking because the previous contractor ran a thin-walled Class 200 pipe directly under the sub-base without a sleeve. The pipe eventually hairline-fractured from the static load, and the resulting wash-out turned the modified gravel base into a slurry. We had to excavate four cubic yards of saturated material just to reach the point of repair. Do not let this be your backyard. Understanding the engineering behind PVC (Polyvinyl Chloride) and the chemical process of solvent welding is the difference between a permanent fix and a temporary patch that will fail under the next thermal expansion cycle.
The Answer Capsule: What Is the Easiest Way to Replace a Broken Sprinkler Pipe?
The most efficient method for professional sprinkler pipe repair involves using a telescoping repair coupling, commonly known as a slip-fix. This component eliminates the need to bend or stress the existing PVC line, allowing for a watertight seal in tight excavations by sliding the coupling to the required length between two fixed points of Schedule 40 pipe.
“Irrigation systems are essentially small-scale civil engineering projects. Failure often occurs at the joints due to improper solvent welding or the use of incompatible materials that cannot withstand the cyclical stress of water hammer.” – Agricultural Irrigation Manual
The Physics of Pipe Failure: Why PVC Cracks
Why do pipes break? It is rarely a random act. Most failures are the result of three specific stressors: mechanical impact, environmental degradation, or improper installation. In many cases, I find that a sod install crew accidentally nicked a line with a spade, or a yard cleanup team drove heavy machinery over a shallow lateral. PVC has a specific ‘bend radius.’ When a pipe is forced into a trench that isn’t straight, it lives its entire life under tension. Eventually, the molecular bonds in the plastic fatigue. This is exacerbated by the ‘Water Hammer’ effect—the sudden stop of water flow when a zone valve closes, sending a shockwave back through the system. If your pipes aren’t bedded in sand or fine stone dust, they vibrate against jagged rocks in the soil. Over years, those rocks act like a slow-motion saw, eventually piercing the pipe wall. This is why landscaping professionals must prioritize the trench floor preparation as much as the pipe itself.
The Essential Toolkit for Irrigation Restoration
Before you break ground, you need the right kit. Professionals do not use hacksaws; they leave burrs that compromise the seal. You need a dedicated PVC ratcheting cutter. Below is the material load-out for a standard 1-inch lateral repair.
| Material/Tool | Purpose | Professional Grade Specification |
|---|---|---|
| Telescoping Repair Coupling | Connecting fixed ends | Schedule 40 PVC, double O-ring seal |
| Purple Primer | Chemical softener | ASTM F656 compliant |
| Medium Gray PVC Cement | Solvent welder | ASTM D2564 compliant |
| Ratcheting Pipe Cutter | Clean, square cuts | Steel blade with 2-inch capacity |
| 811 Locate Ticket | Safety | Call before digging to mark gas/electric |
Step 1: The Surgical Excavation
Do not just dig a hole. You need to perform a ‘Window Excavation.’ Start by cutting a clean square of sod about 24 inches wide. Set it on a tarp to keep your landscaping clean. Dig down carefully until you find the pipe, then expand the hole horizontally. You need at least 6 inches of clearance beneath the pipe and 12 inches of length on either side of the break. If you don’t have room to work, you will get dirt in the primer, and the joint will fail. Dirt is the primary enemy of a solvent weld. If even a grain of sand gets into the cement, it creates a capillary channel for water to escape. Clean the pipe with a wet rag, then dry it completely. It must be bone-dry. Any moisture will cause the solvent to ‘flash’ or cure prematurely, leading to a weak bond.
How deep should irrigation pipes be buried?
In most residential applications, lateral lines (the pipes after the valves) should be at least 8 to 12 inches deep. Main lines (the pipes under constant pressure) should be deeper, typically 12 to 18 inches. This depth protects the plastic from the freeze-thaw cycles that occur in the upper soil horizons. If you live in a region with deep frost lines, you must ensure the system is blown out with compressed air in the autumn, as no reasonable depth will protect a static water column from a sustained polar vortex.
Step 2: The Precision Cut and Prep
Identify the damaged section. Use your ratcheting cutters to remove the fractured segment. Ensure your cuts are perfectly square. A slanted cut reduces the surface area for the chemical bond. Once the section is removed, use a deburring tool or a piece of sandpaper to smooth the edges. You are looking for a ‘chamfered’ edge on the outside of the pipe. This prevents the pipe from ‘plowing’ the glue out of the fitting socket when you push them together. Now, apply the purple primer. Do not skip this. The primer is not a cleaner; it is a chemical pre-treatment that dissolves the glossy factory finish and softens the PVC. You must apply primer to both the outside of the pipe and the inside of the repair coupling.
“The strength of a PVC joint is not in the glue itself, but in the chemical fusion of the two plastic surfaces. Without proper priming, the joint is merely a mechanical fit, prone to failure under thermal expansion.” – ICPI Technical Guidelines
Step 3: The Solvent Welding Process
Apply a generous layer of PVC cement over the primed areas. While the cement is still wet, slide your telescoping coupling onto one side of the pipe. Then, extend the ‘slip’ side onto the other pipe. Give it a quarter-turn as you seat it to ensure the glue is evenly distributed. Hold it firmly for at least 30 seconds. PVC cement is a solvent welder; it literally melts the two pieces of plastic into a single, homogenous piece. If you let go too soon, the ‘memory’ of the plastic or the telescoping tension might push the pipe out of the socket. Wait at least 30 minutes before pressure testing. If the weather is cold or humid, double that time. Don’t rush this. A ‘hot’ fix usually leads to a ‘wet’ failure.
What causes PVC pipes to crack underground?
Beyond mechanical damage, the most common cause is ‘Point Loading.’ This happens when a pipe rests on a sharp rock or a brick. As the ground shifts during the seasons, the weight of the soil above presses the pipe against that hard object. Over time, this creates a stress fracture. Another silent killer is tree root intrusion. Roots don’t actually ‘strangle’ pipes; they find a tiny leak or a weak joint, enter it to find water, and then expand inside the pipe until it bursts from the internal pressure. If you are doing yard cleanup and notice roots near your irrigation valves, it is time for a proactive inspection.
Step 4: The Pressure Test and Backfill
Before you put the dirt back, turn the water on. This is the moment of truth. Check for ‘weeping’ around the seals. If it’s dry, you’re good. When backfilling, do not just shovel the native soil back in. Use ‘select fill’ like sand or fine pea gravel to surround the pipe for the first two inches. This provides a cushion against future point loading. Tamp the soil in layers—known as ‘lifts’—to prevent future settling. If you just throw the dirt back in loosely, the first heavy rain will cause a sinkhole, and your sod install will look like a topographical map of the moon. Compact the soil until it is firm to the touch, then replace your sod square.
- Checklist for a Successful Repair:
- Verify pipe size (usually 3/4″ or 1″ for laterals).
- Ensure the telescoping coupling is rated for Schedule 40.
- Clean all mud and debris from the pipe ends.
- Apply primer until the plastic loses its sheen.
- Hold the joint for 30 seconds to prevent push-out.
- Flush the line before replacing the sprinkler head to remove debris.
Proper irrigation maintenance is an ongoing discipline. A single broken pipe can waste thousands of gallons of water in a month, leading to astronomical utility bills and localized plant death due to root rot. By using the slip-fix method and adhering to the chemical standards of solvent welding, you ensure that your landscaping remains a managed ecosystem rather than a soggy liability. It will hold. Do not settle for substandard patches.