
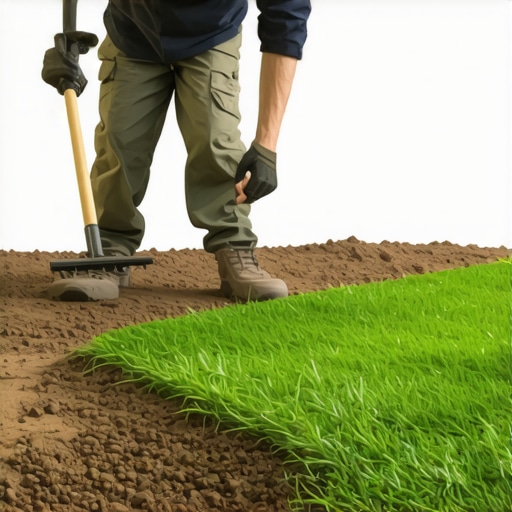
Why Clay Soil Kills New Sod Installs Without Proper Prep
Installing sod over heavy clay soil requires mechanical remediation and chemical balancing to prevent the turf from suffocating in a waterlogged environment or starving in a compacted hardpan. Successful sod installation on clay hinges on breaking the surface tension and incorporating organic matter to create a porous root zone that allows for gas exchange and deep water penetration.
I always drill into my new crew members: if you don’t fix the soil grading and structure first, every piece of sod you put in the ground is just expensive compost. I’ve seen $15,000 installs turn into a brown, mushy graveyard within three months because the contractor didn’t want to spend the time running a tiller or testing the pH. They just threw the grass down on top of red clay that was as hard as a brick. When the rain hit, that yard turned into a bathtub. The roots literally drowned because they had nowhere to go. We ended up having to rip the whole thing out and start from the dirt up. It was a waste of money and a waste of good grass. Don’t be that guy.
The Mechanical Reality of Clay Particles
Clay is composed of microscopic, flat plates that stack together tightly. This structure creates high surface tension and low permeability. In landscaping, we call this a ‘perched water table’ when you put a layer of loose soil or sod on top of raw clay. The water hits the clay line and stops. It won’t move down. It just sits there. This leads to anaerobic conditions where the roots rot from lack of oxygen.
“Soil compaction and high clay content limit oxygen diffusion to the root zone, which is the primary cause of turfgrass decline in urban landscapes.” – Texas A&M AgriLife Extension
Phase 1: Yard Cleanup and Grading
The first step is a brutal yard cleanup. You need to strip the area of every weed, rock, and bit of debris. Don’t just mow the weeds down; kill them with a non-selective herbicide or scalp them and till them under. If you leave organic debris like old wood or thick thatch under the new sod, it will create air pockets. Air pockets are death for sod. The roots need 100% soil-to-root contact.
Check your grade. You need a minimum of a 1% to 2% slope away from the house. In clay, this is non-negotiable. If you have a flat spot on clay, you have a pond. Use a transit or a simple string level. Measure twice. Dig once. If the grade is off, your irrigation system will just make the problem worse by pooling water in the low spots.
Phase 2: Soil Modification and Chemical Balance
How much soil amendment do I need for clay soil? For most residential projects, you should aim to incorporate 2 to 3 inches of high-quality organic compost into the top 6 inches of the clay base. This changes the soil structure from a solid mass into a crumbly, well-drained medium. Do not use sand alone. Sand mixed with heavy clay creates something similar to concrete. Use compost or a compost-manure blend.
| Amendment Material | Purpose for Clay | Application Rate |
|---|---|---|
| Organic Compost | Breaks up clay plates | 2-3 inches tilled to 6″ depth |
| Gypsum (Calcium Sulfate) | Displaces sodium in clay | 40 lbs per 1,000 sq ft |
| Agricultural Lime | Raises pH in acidic clay | Based on soil test results |
| Core Aeration | Relieves compaction | Double-pass minimum |
Get a soil test. Most clay soils are notoriously acidic. If your pH is below 6.0, your sod cannot take up the nutrients in the fertilizer. You are throwing money away. You likely need to add lime to bring that pH up to a 6.5 or 7.0 range.
“Maintaining a soil pH between 6.0 and 7.0 is critical for nutrient availability and microbial activity in home lawns.” – Penn State Center for Turfgrass Science
Phase 3: The Sod Install Process
Once the soil is prepped and the irrigation heads are set to the proper height (usually 1/2 inch above the final soil line), it is time for the sod install. Order your sod for delivery on the day you plan to lay it. Sod starts to heat up and ferment the moment it is harvested. If it sits on the pallet for 48 hours, it’s garbage.
- Start at a straight edge: Usually a driveway or a sidewalk.
- Stagger the seams: Lay the sod in a brick-like pattern. This prevents water from carving channels down the seams.
- Tight joints: Butt the edges together firmly but do not overlap. Overlapping causes the edges to dry out.
- The Heavy Roller: This is the most skipped step. Rent an 800lb water-filled roller. Roll the entire yard once it is laid. This forces the roots into the soil and eliminates air pockets.
How long does it take for sod to root in clay?
In optimal conditions (spring or fall), sod will begin to knit into clay soil within 10 to 14 days. However, do not assume it is established. You shouldn’t allow heavy traffic or mow for at least 3 weeks. If you can tug on the grass and it doesn’t lift up, the roots have taken hold. If it lifts, stay off it.
Irrigation Strategy for Clay
Irrigation on clay is different than on sandy soil. You cannot dump a ton of water at once because it will just run off. Use the ‘Cycle and Soak’ method. Instead of watering for 20 minutes, water for 7 minutes, wait an hour, and water for another 7. This allows the tight clay particles time to actually absorb the moisture. For the first two weeks, keep the sod consistently damp. After that, transition to deep, infrequent watering. You want to force those roots to chase the water down into the amended clay. It will rot if you keep it soaking wet for months. Don’t skip the drainage check.
Maintenance Schedule for Year One
The first year is the most critical. Avoid high-nitrogen fertilizers in the heat of the summer, as this can lead to fungus in the humid micro-climate of the new turf. Use a slow-release fertilizer with a balanced NPK ratio. In the fall, perform a core aeration. This is vital for clay yards. It pulls 3-inch plugs out of the ground, allowing oxygen to reach the roots and further breaking up that clay compaction. One year of neglect can ruin five days of hard work.