
The Hard Truth About Summer Sod Installation: Engineering Survival in Triple-Digit Heat
I always drill into my new crew members: if you don’t fix the soil grading first, every plant you put in the ground is just expensive compost. This is never truer than in the dead of July when a client wants a new yard. Most homeowners think they can just roll out a green carpet and walk away. They are wrong. High-end landscaping is not about the aesthetic; it is about managing biological and physical stress. When you cut sod from the farm, you are severing over 90 percent of its root system. You are essentially putting a living organism into the intensive care unit. If you do not understand soil physics and transpiration rates, you are flushing thousands of dollars down the storm drain. We do not do ‘mow-and-blow’ work here. We engineer ecosystems that survive.
The Critical First 14 Days of Summer Sod Establishment
To keep new sod alive in summer heat, you must maintain field capacity in the top 2 inches of soil through evapotranspiration management. This requires deep irrigation cycles that keep the root-soil interface moist without causing anaerobic conditions or fungal pathogens like Pythium blight.
Why Soil Preparation Precedes the Pallet
Before the first pallet of Bermuda or Zoysia arrives, the site must be surgically prepared. We do not just clear the debris; we perform a full yard cleanup that involves stripping the top layer of weed-infested organic matter. If you have heavy clay, the roots will hit it like a brick wall and stop. If you have sand, the water will vanish before the roots can drink. We use a power rake to loosen the top 4 to 6 inches of earth. This increases the pore space in the soil, allowing for gas exchange and easier root penetration. Without this, the sod will simply sit on top of the ground and bake. It is a slow death by dehydration. We test the pH levels to ensure they sit between 6.0 and 7.0. If the soil is too acidic, the nutrients are chemically locked away from the plant. No amount of water fixes a nutrient lockout.
| Soil Type | Water Retention Level | Compaction Risk | Necessary Amendment |
|---|---|---|---|
| Heavy Clay | High (Poor Drainage) | Extreme | Gypsum and Sand |
| Sandy Loam | Moderate | Low | Organic Compost |
| Pure Sand | Very Low | Minimal | Peat Moss / Topsoil |
“Establishment of turfgrass from sod requires immediate and frequent irrigation to prevent desiccation of the shallow root system, especially when air temperatures exceed 85 degrees Fahrenheit.” – Kansas State University Agricultural Experiment Station
The Physics of Irrigation: More Than Just Turning on a Sprinkler
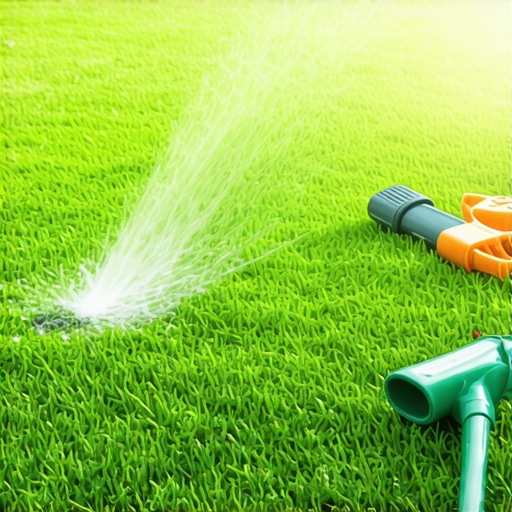
Irrigation for new sod is an engineering problem, not a chore. You are not ‘watering the grass’; you are cooling the plant and the soil. During a sod install in the heat, the temperature of the soil under the sod can reach 120 degrees if it is dry. This will cook the tender new white roots instantly. We recommend a cycle-and-soak method. Instead of one long drenching that leads to runoff, we run the zones for shorter periods multiple times a day. This keeps the humidity high at the ground level and prevents the blades from wilting. Don’t skip the edges. The seams where two pieces of sod meet are the most vulnerable. They dry out first and will shrink, leaving gaps that allow the sun to hit the exposed soil and heat it up even faster.
How much water does new sod need in 90 degree weather?
In temperatures exceeding 90 degrees, new sod requires roughly 0.25 to 0.5 inches of water applied across three to four irrigation cycles daily. This frequency must be maintained for the first 10 to 14 days until the root system successfully anchors into the underlying substrate.
- Day 1-7: Water 3 to 4 times daily (8am, 11am, 2pm, 5pm).
- Day 8-14: Reduce to 2 times daily (early morning and late afternoon).
- Day 15-21: Transition to once daily, increasing the volume of water per session.
- Day 22+: Move to deep, infrequent watering (1 inch per week) to encourage deep roots.
Avoiding the Chemical Nightmare: Fertilizer and Heat Stress
One of the biggest mistakes hacks make is throwing high-nitrogen fertilizer on new sod in the summer. Nitrogen forces top growth. In the heat, you do not want top growth; you want root development. If you force the plant to grow leaves when it has no roots to support them, the plant will collapse. We use a starter fertilizer with a high phosphorus count (the middle number on the bag) to stimulate the roots. Phosphorus is less likely to ‘burn’ the turf than nitrogen. We also look at the salt index of the fertilizer. Cheap fertilizers are full of salts that actually suck moisture out of the plant cells. It is a chemical drought. If you see your sod turning a blue-gray color, it is not hungry; it is thirsty and stressed. Put the spreader away and grab the hose. Avoid pre-emergent herbicides for at least 60 days. Those chemicals work by stopping cell division in the root tips. That is the last thing you want for a new install.
“Soil compaction is the single greatest enemy of root penetration in newly installed sod, as it limits the availability of oxygen to the rhizosphere.” – University of Florida IFAS Extension
Should I fertilize new sod immediately?
You should only apply a low-nitrogen starter fertilizer during the sod installation process, preferably tilled into the soil before the turf is laid. Avoid high-nitrogen ‘turf builders’ for at least four to six weeks to prevent foliar burn and heat exhaustion of the grass blades.
The Mechanical Integrity of the Install
When my crew lays sod, we use a lawn roller. This isn’t for looks. The roller ensures ‘capillary contact.’ If there is a pocket of air between the sod and the dirt, the roots will die as soon as they hit it. Air is an insulator, but in this case, it is a barrier to life. We also never use small ‘slugs’ or scraps of sod in high-traffic areas. They dry out too fast. Every piece must be tight against the next. We staggered the joints like bricks in a wall. This prevents water from channeling between the rows and washing away the soil underneath. If you are on a slope, you must peg the sod. If it slides even an inch, it breaks the new root hairs that are trying to take hold. It is a one-way trip to the compost pile at that point. Don’t let the grass get too long, but don’t scalp it either. Your first mow should be at the highest setting on your mower, and only after you can no longer pull the sod up by hand. If the sod moves when you tug it, it is not ready for the mower.