
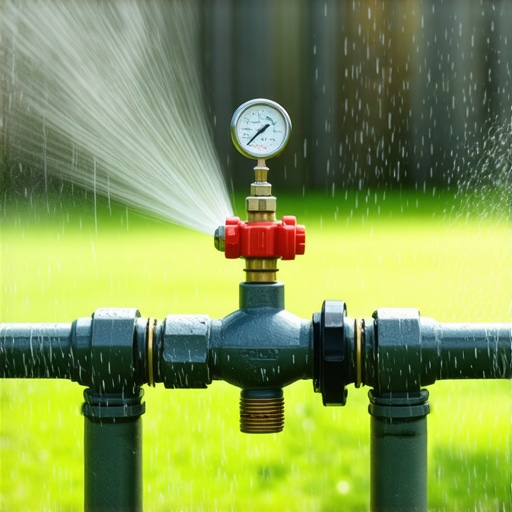
Low water pressure in your sprinkler lines is a symptom of a systemic hydraulic failure, often manifesting as limp spray patterns, dry turf patches, or heads that fail to pop up entirely. To fix it, you must identify whether the issue is a mechanical restriction, a volumetric leak, or an incorrectly sized meter by performing a zone-by-zone pressure test and inspecting the backflow assembly for internal scaling.
The Irrigation Autopsy: A Tale of Buried Negligence
I recently got called out to a property where a homeowner had spent $12,000 on a high-end sod install, only to watch it turn into expensive straw within three weeks. They assumed the city water pressure had dropped. After three hours of digging, I found the culprit: the previous contractor had installed a 1-inch main line but reduced it to a 1/2-inch poly-pipe to save fifty cents a foot. The friction loss was so high that by the time the water reached the furthest zone, the PSI had dropped from 65 to 14. You can’t fight physics with hope. If the pipe diameter isn’t calculated for the GPM (gallons per minute) requirements of your heads, your lawn dies. Every time.
“Friction loss in irrigation systems increases with the square of the flow rate. Doubling the flow through a pipe quadruples the pressure loss due to friction.” – Irrigation Association Technical Manual
Diagnosing the Source: Static vs. Dynamic Pressure
To diagnose irrigation pressure drops, you must first distinguish between static pressure (water at rest) and dynamic pressure (water in motion). If your static pressure at the hose bib is 70 PSI but drops to 10 PSI when a zone kicks on, you have a restriction or a massive leak. Common culprits include partially closed gate valves, crushed lateral lines, or mineral buildup inside an aging backflow preventer. Don’t just buy a bigger pump; find the bottleneck.
| Symptom | Likely Cause | Diagnostic Tool |
|---|---|---|
| Entire system has low pressure | Main valve restriction or failed PRV | Pressure gauge at the source |
| Single zone is weak | Cracked lateral line or clogged valve | Visual inspection for ‘soft spots’ |
| Heads ‘weeping’ water | Worn wiper seals or internal debris | Physical inspection of head |
| Erratic spray patterns | Clogged nozzle filters | Nozzle removal and rinse |
How much water pressure do I need for my sprinkler system?
Most residential gear-driven rotors require a minimum of 30 to 45 PSI at the head to rotate and atomize water correctly. Fixed spray heads typically operate best between 20 and 30 PSI. If your pressure at the source is below 50 PSI, you have zero margin for error regarding friction loss through the valves and piping.
The Critical Check: The Backflow Preventer and Main Shutoff
Before you start digging up your yard, check the easiest failure points. The main shutoff valve (usually a ball valve or gate valve) should be fully open. I’ve seen homeowners accidentally bump these half-closed while reaching for a garden hose. Furthermore, the backflow preventer—that brass assembly usually sticking out of the ground—contains internal check valves and springs. These parts wear out. If the springs lose tension or the check valves become fouled with grit, they create a massive pressure drop. It happens. Clean them annually.
“Backflow prevention assemblies must be tested annually to ensure they are providing the necessary protection and are not impeding the required flow rates for downstream components.” – Penn State Agricultural Extension
How do I know if my main water line is leaking?
To identify a main line leak, turn off all water inside the house and ensure the irrigation controller is off. Check your water meter. If the ‘leak indicator’ (usually a small triangle or star) is spinning, you have a break. If it only spins when the irrigation system is running, the leak is downstream of your master valve. Soil saturation in a specific area of the yard, even during dry spells, is a dead giveaway of a pipe fracture.
Step-by-Step Remediation Process
Fixing the pressure isn’t about one single ‘trick’; it’s about a methodical audit. Follow this checklist to restore your system’s performance:
- Check the Master Valve: Ensure the handle is turned completely parallel to the pipe.
- Clean Nozzle Filters: Pop up each head and pull the small plastic filter under the nozzle. If they are filled with silt, your pressure will plummet.
- Flush the Lines: Remove the last head on a zone and run the water for 30 seconds to blow out rocks or debris.
- Inspect for ‘Mulch Volcanoes’: If you have recently done a yard cleanup, ensure your heads aren’t buried under three inches of mulch. This creates backpressure and ruins the spray arc.
- Verify Valve Solenoids: An old solenoid might not be pulling the diaphragm up all the way, restricting flow like a clogged artery.
Soil Grading and Hydrostatic Impact
If you are fixing pressure issues because you just finished a sod install or landscaping project, pay attention to your grade. If the ground has settled and your pipes are now under extreme weight or shifting soil, they can kink. Poly-pipe is especially prone to this. In heavy clay soils, the earth expands and contracts with moisture levels. This movement can crush a thin-walled pipe that wasn’t bedded in sand. Always use Schedule 40 PVC for main lines and heavy-duty poly for laterals if you want the system to last twenty years.
The Long-Term Maintenance Schedule
Pressure issues are rarely ‘one and done.’ Irrigation systems are living mechanical organisms. Every spring, you should perform a full audit. Every autumn, blow out the lines with compressed air (if you’re in a freeze zone) to prevent ice from expanding and hairline-cracking your pipes. One small crack is all it takes to lose 5 PSI. And in the world of hydraulics, 5 PSI is the difference between a green lawn and a dirt patch. Don’t be the homeowner who ignores the signs. If the heads aren’t popping, something is wrong. Fix it now. Or pay for it later.