
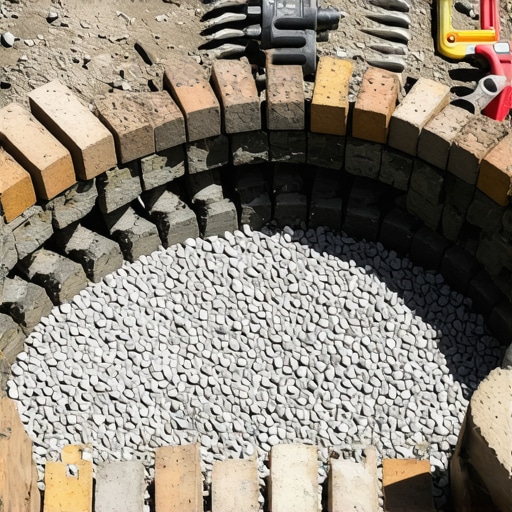
Building a Fire Pit: Why Fire Bricks are Non-Negotiable
Planning a high-end outdoor living space begins long before the first shovel hits the dirt. To build a fire pit that lasts decades rather than one season, you must prioritize engineering over aesthetics and recognize that thermal dynamics will destroy any structure not built to handle 1,500 degree heat. Most homeowners start with a yard cleanup to clear the site, but the real work involves excavating a structural base that can withstand both the weight of the stone and the intense heat of the fire. Skipping the technical requirements of fire brick is a recipe for catastrophic structural failure.
The Engineering Reality of Fire Pit Construction
A professional-grade fire pit must utilize kiln-fired refractory fire bricks as the inner lining because they are specifically engineered to survive extreme thermal expansion without cracking or exploding. These bricks have low thermal conductivity, meaning they keep the heat concentrated in the fire chamber and protect the decorative outer masonry from heat damage. Standard landscape blocks or concrete units will fail when the moisture trapped in their pores turns to steam and expands rapidly.
“Firebrick is a block of refractory ceramic material used in lining furnaces, kilns, fireboxes, and fireplaces, where high heat resistance is mandatory for structural safety.” – ASTM International Standards
I recently got called out to tear up a $30,000 patio that was sinking because the previous contractor failed to understand basic thermodynamics. The homeowner was seeing massive cracks in their fire pit and the surrounding pavers. When I performed the hardscape autopsy, I found they had used standard 4-inch wall blocks for the fire ring. The heat from their first three fires caused the blocks to expand so aggressively that they pushed the entire outer veneer two inches outward. Because they did not use refractory fire bricks or leave a proper air gap, the entire $15,000 fire feature was effectively a ticking time bomb. We had to excavate the entire area, re-compact the subgrade, and start from the dirt up. It was a complete waste of the client’s money and a testament to why you don’t hire the guy with the cheapest quote. High-heat environments require high-heat materials. Period.
The Physics of Thermal Spalling and Block Failure
Thermal spalling occurs when moisture trapped inside porous materials like concrete or standard clay bricks reaches the boiling point and converts into steam, creating internal pressure that exceeds the material’s tensile strength. This process results in the surface of the stone popping or exploding, which can throw hot shards of concrete several feet into the air. Refractory bricks are manufactured with specialized clays that have a high alumina content, making them virtually non-porous and resistant to this pressure-cooker effect.
Can I use standard bricks for a fire pit?
No, standard red clay bricks are not designed for direct flame contact because they lack the refractory properties required to manage 1,200 to 2,000 degree temperatures. While they look solid, standard bricks often contain air pockets and moisture that lead to internal fracturing after just a few heating and cooling cycles. Once a single brick in your fire ring cracks, the structural integrity of the entire wall is compromised. Using the wrong material is not just a maintenance issue; it is a safety hazard. Proper hardscaping requires using the right tool for the job. You wouldn’t use a screwdriver to drive a nail, and you shouldn’t use a decorative paver to contain a 1,000 degree fire.
| Material Type | Max Temp Tolerance | Porosity Level | Expected Lifespan in Fire Pit |
|---|---|---|---|
| Refractory Fire Brick | 2,000F+ | Very Low | 20+ Years |
| Standard Clay Brick | 800F-1,000F | Moderate | 1-2 Years |
| Concrete Wall Block | 300F-500F | High | Less than 1 Year |
The Critical Importance of the Air Gap and Drainage
An air gap between the fire brick lining and the decorative outer stone acts as a thermal break, preventing the intense heat of the fire from transferring directly into the exterior veneer. This gap allows the inner refractory ring to expand and contract independently of the outer structure, which is essential for preventing the mortar joints from cracking under stress. Without this 1-inch to 2-inch buffer, the entire structure will eventually heave and split apart as the heat forces the materials to fight for space.
“A retaining wall or fire pit doesn’t fail because of the stone; it fails because of the water trapped behind it or the heat trapped inside it.” – Hardscape Engineering Axiom
When we talk about yard cleanup in the context of fire pits, we are also talking about site grading. You must ensure that the area around the fire pit is graded to pull water away from the base. If water pools under your fire pit, the freeze-thaw cycles in regions like the Northeast will lift the entire structure. This is where your irrigation system management becomes vital. You must locate and reroute any irrigation lines that are within three feet of the fire pit’s footprint. If a line leaks under the pit, it will saturate the 2A modified gravel base, leading to settling and uneven heaving. We always use a vibratory plate compactor on the subgrade until we reach 98 percent Proctor density. If the base isn’t rock solid, the fire pit will move, and once it moves, it’s broken.
How much modified gravel do I need for a patio base?
For a standard fire pit and surrounding patio, you need a minimum of 6 inches of compacted 2A modified stone over a geotextile fabric. This requires excavating at least 10 to 12 inches below your finished grade to account for the gravel, the sand setting bed, and the thickness of the pavers themselves. Calculating the exact tonnage requires multiplying the square footage by the depth in feet and then multiplying by 0.05 to convert to tons. Never skip the geotextile fabric; it is the only thing keeping your expensive gravel from disappearing into the subsoil over time. Soil migration is the silent killer of hardscapes.
The Step-by-Step Installation Protocol
A successful fire pit installation requires a multi-stage process that begins with deep excavation and ends with a meticulous sod install to restore the surrounding landscape. Each step must be executed with precision, focusing on compaction levels and material specifications to ensure the structure remains stable through decades of use. Do not rush the base preparation; it is the most important part of the job that you will never see once the project is done.
- Excavate the site to a depth of 12 inches, removing all organic matter and soft topsoil.
- Lay down a high-quality non-woven geotextile fabric to separate the subgrade from the base material.
- Add 2A modified crushed stone in 2-inch lifts, compacting each layer with a vibratory plate compactor.
- Check for level frequently; the base must be perfectly flat before the first course of stone is set.
- Construct the inner ring using refractory fire bricks and heat-rated refractory mortar (ASTM C199).
- Leave a 1-inch air gap between the fire bricks and the decorative exterior stones.
- Install the exterior veneer, ensuring all joints are filled with high-strength mortar or polymeric sand.
- Complete a yard cleanup to remove debris and perform a sod install to repair the construction area.
- Test the irrigation system to ensure no heads were damaged or buried during the build.
Once the fire pit is built, the site looks like a war zone. This is why a professional sod install is the final, non-negotiable step. We don’t just throw down seed and hope for the best. We use high-quality turf rolls that match the existing lawn, ensuring the roots can establish quickly before the next season. We also verify that the irrigation heads are properly adjusted to provide 1 inch of water per week to the new sod. Without this follow-through, the project looks unfinished and unprofessional. It is about the details from the refractory mortar to the blade of grass. [IMAGE_PLACEHOLDER]
Maintaining Your Fire Pit for Longevity
Proper fire pit maintenance involves regular ash removal and inspections of the refractory mortar joints to ensure no water is penetrating the structure. Ash is naturally acidic and, when mixed with rainwater, can create a caustic paste that eats away at mortar and stone over time. Keep the pit clean and cover it when not in use to prevent the internal chamber from becoming a bathtub. If you see even a hairline crack in the fire brick, patch it immediately with refractory cement. Small repairs now save you from a full teardown later. Landscaping is a long-term investment, and like any investment, it requires active management to maintain its value.