
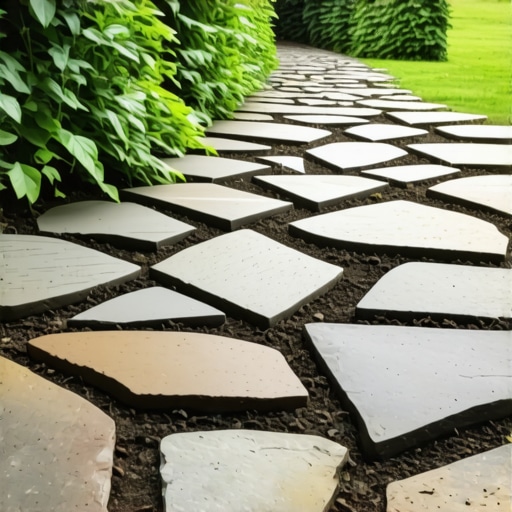
Why Most Flagstone Paths Fail Before the First Winter
Building a flagstone path without heavy mortar requires more than just laying rocks on the ground; it involves a deep understanding of soil mechanics and compaction rates. I recently got called out to tear up a $30,000 patio that was sinking because the previous contractor failed to address the hydrostatic pressure and used ‘screenings’ as a base in a high-clay area. The stones had shifted over 4 inches, creating a literal swamp where a walkway used to be. Most failures happen because people treat soil as a static surface rather than a living, shifting substrate that reacts to every freeze-thaw cycle and heavy rain. If you don’t fix the soil grading and base compaction first, every stone you put in the ground is just expensive future compost.
“A retaining wall or stone path doesn’t fail because of the stone; it fails because of the water trapped behind or beneath it.” – Hardscape Engineering Axiom
The Engineering of the Base Layer
To build a path that lasts thirty years, you must excavate deep enough to replace unstable organic matter with a structural crushed stone base. Excavation depth should reach at least 7 to 9 inches, depending on the thickness of your flagstone. This allows for 4 inches of 3/4-inch modified gravel, 1 inch of bedding sand, and the stone itself. Don’t eyeball it. Use a string line and a line level. Your path needs a 2% slope away from any structures to prevent foundation saturation. It will rot if you trap water. Don’t skip the geotextile fabric. Use a non-woven 4oz fabric to separate the subgrade from your base gravel. This prevents ‘pumping,’ where the soft clay soil works its way up into your clean gravel, ruining its structural integrity.
The Materials Matrix: Comparing Flagstone Options
| Material Type | Thickness Range | PSI Strength | Best Use Case |
|---|---|---|---|
| Pennsylvania Bluestone | 1.5″ – 2″ | 12,000+ | High-traffic walkways and patios |
| Oklahoma Sandstone | 2″ – 3″ | 8,000 | Secondary garden paths, rustic looks |
| Limestone Pavers | 1.25″ – 2″ | 10,000 | Formal entries, high durability |
| Flagstone Steppers | 1″ – 1.5″ | Varies | Low-traffic, mulch-embedded paths |
How much modified gravel do I need for a patio base?
Calculating base material volume involves multiplying the total square footage by the decimal equivalent of your depth (e.g., 4 inches is 0.33 feet) and dividing by 27 to get cubic yards. For a 100-square-foot path with a 4-inch base, you need approximately 1.25 cubic yards of CR-6 or 21A modified stone. Always order 10% extra for compaction loss. When you run a plate compactor over your gravel, the volume will shrink as the fines fill the voids between the larger stones. The tamper should literally bounce off the compacted base. If it feels soft, keep going. You are aiming for 95% Standard Proctor Density.
The Step-by-Step Installation Protocol
- Layout and Utility Marking: Call 811 before you dig. Mark your path with marking paint, adding 6 inches of ‘over-dig’ to each side for edge restraints.
- Excavation: Remove all sod and organic topsoil. If you hit soft ‘muck,’ keep digging until you reach firm subsoil.
- Fabric and Base: Lay non-woven geotextile. Add gravel in 2-inch ‘lifts.’ Compact each lift thoroughly with a gas-powered plate compactor.
- Bedding Layer: Screed 1 inch of coarse concrete sand. Do not walk on the sand once it is leveled.
- Setting Stone: Place stones like a jigsaw puzzle. Keep joints between 1/2 inch and 2 inches. Use a rubber mallet to set the stone into the sand.
- Joint Filling: Sweep in polymeric sand or ‘Gator Dust’ for a semi-rigid joint that resists weeds and washouts.
What is the best base for a dry-set stone path?
The gold standard for a dry-set flagstone base is a combination of 4 inches of compacted graded aggregate topped with 1 inch of coarse bedding sand. Avoid using ‘stone dust’ or ‘screenings’ as the bedding layer in regions with freeze-thaw cycles, as these materials hold too much moisture and lead to heaving. According to the Interlocking Concrete Pavement Institute (ICPI), the base should extend past the edge of the stones to provide lateral stability. This ‘over-build’ prevents the outer stones from tipping or migrating into the surrounding turf. Without this, your edges will fail within two seasons.
“Structural soil compaction is the single most important factor in the longevity of any non-mortared stone assembly.” – USDA Soil Engineering Manual
Managing the Micro-Climate and Drainage
When installing flagstone, you are fundamentally changing the site hydrology. Every square foot of stone is an impervious surface where rain will run off rather than soak in. If your path is long, you may need to integrate a French drain or a dry creek bed alongside it to handle the increased velocity of water. In areas with heavy clay, I often install a ‘chimney drain’—a vertical column of clean 57 stone—to give water a path to the lower subsoil. This prevents the ‘bathtub effect’ where your path base sits in a pool of trapped water. Most contractors won’t tell you this because it takes more time. They’re hacks. Do it right the first time. Check your irrigation heads too. If an irrigation zone is spraying directly onto a dry-set path, it will wash out the jointing sand and cause the stones to wobble. Adjust your nozzles or convert the zone to drip irrigation for nearby plantings.