
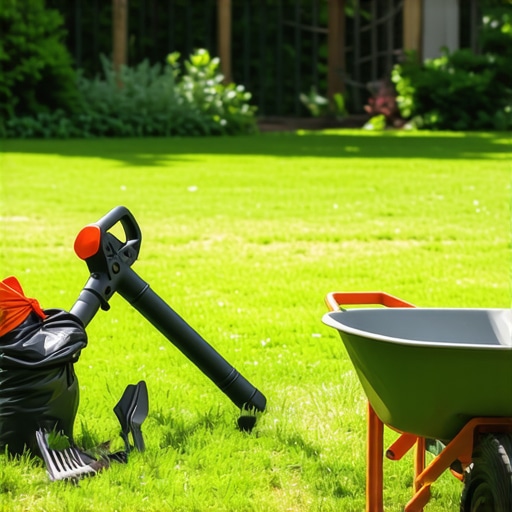
I always drill into my new crew members: if you don’t fix the soil grading first, every plant you put in the ground is just expensive compost. I’ve seen kids come onto my job sites thinking landscaping is about aesthetic pruning, but it is actually about mechanical efficiency and soil physics. If you spend three days raking a one-acre lot, you aren’t a landscaper; you’re a slow-motion composter. Speed in yard cleanup isn’t just about finishing the job; it’s about preventing soil compaction and ensuring that the nitrogen cycle in the turf isn’t disrupted by anaerobic decomposition of heavy leaf mats. Professionals use specific machinery to bypass the physical limitations of the human back, and if you want to compete, you need to understand the engineering behind these tools.
The Science of High-Efficiency Yard Remediation
Efficient yard cleanup requires professional-grade equipment like commercial stand-on blowers, debris loaders, and mini-skid steers to manage high-volume organic waste. These tools optimize landscaping workflows by reducing labor hours, ensuring proper irrigation drainage, and preparing soil for successful sod install projects by removing suffocating debris. When you leave organic matter to rot on a lawn, you are inviting Microdochium nivale or snow mold to decimate your turf. Professional cleanup is the first step in a preventative pathology program.
“Managing leaf litter is critical for turf health, as excessive accumulation can lead to reduced light penetration and increased moisture retention, promoting fungal pathogens.” – Penn State Extension Agronomy Manual
1. The Commercial Stand-On Blower (The CFM King)
Air volume is the metric that matters, not just airspeed. While a cheap handheld unit might boast high miles-per-hour, it lacks the Cubic Feet per Minute (CFM) to move wet, heavy debris. A commercial stand-on blower typically moves between 6,000 and 10,000 CFM. This is a matter of pure physics: you need enough mass of air to overcome the static friction of wet oak leaves against a fescue canopy. I use these units to clear a 5,000-square-foot lawn in under ten minutes. The force is so high it can actually help dry out the surface layer of the soil, preventing the wheels from rutting the turf. If you are preparing for a sod install, this tool is vital for clearing the subgrade of every pebble and twig that would otherwise create air pockets under your new grass. Air pockets lead to root desiccation. Don’t skip the blower pass.
2. Heavy-Duty Truck-Mounted Debris Loaders
Once the leaves are in a pile, the bottleneck is transport. A debris loader is essentially a giant vacuum with a steel impeller that acts as a blender. We are talking about a 15:1 reduction ratio. If you have 15 cubic yards of loose leaves, this machine shreds them down to a single cubic yard of mulch. This is critical for landscaping logistics because it reduces the number of trips to the dump site. The impeller blades are usually made of half-inch thick steel to handle the occasional rock or branch. The suction is generated by a centrifugal fan; as the debris enters, it is pulverized. This shredded material is high-quality organic matter that, if managed correctly, can be cycled back into garden beds to improve soil structure, though we usually haul it off to prevent nitrogen tie-up in the lawn. If your irrigation lines are surface-level, be careful where you point the intake, or you will suck up your poly-pipe.
How much modified gravel do I need for a patio base?
For a standard residential patio, you typically need a 6-inch base of 21A or 57 modified gravel. This requires approximately 1 ton of gravel for every 50 square feet at a 4-inch depth, but for a 6-inch professional base, calculate 1.5 tons per 50 square feet. Compaction is non-negotiable. You must use a plate compactor in 2-inch lifts to reach 98% Proctor density, or your pavers will settle within two seasons.
3. High-Torque Power Brush for Surface Prep
When we do a yard cleanup, we aren’t just looking at the grass. We look at the hardscapes. A power brush uses rotating nylon bristles to scrub debris out of the pores of concrete and the joints of pavers. This is the only way to properly prep a site for new polymeric sand. If there is even a microscopic layer of organic dust in those joints, the sand won’t bond. The brush also lifts the nap of the grass before a final mow, which is a secret trick for that “striped” look. In sod install scenarios, we use the power brush to clear the edges of curbs and driveways so the new sod can sit flush against the hardscape. If the sod is higher than the driveway, water will pool and rot the root flare of the grass. It is a drainage nightmare.
| Tool Type | Manual Labor Hours | Mechanical Hours | Efficiency Gain |
|---|---|---|---|
| Stand-On Blower | 8.0 | 0.5 | 16x |
| Debris Loader | 4.0 | 0.5 | 8x |
| Mini Skid-Steer | 12.0 | 1.0 | 12x |
| Power Brush | 3.0 | 0.25 | 12x |
| Articulating Trimmers | 5.0 | 1.0 | 5x |
4. Articulating Hedge Trimmers for Vertical Management
Stop using standard hedge shears. They force you into awkward angles that lead to uneven cuts and bark tearing. An articulating trimmer allows the head to pivot 135 degrees. This means you can cut the tops of tall shrubs while standing firmly on the ground. From a horticultural perspective, clean cuts are essential. Ragged edges from dull or improper tools leave the vascular cambium exposed to opportunistic insects like borers. During a yard cleanup, we use these to thin out the interior of shrubs to allow airflow. Airflow is the natural enemy of powdery mildew. If your shrubs are dense and wet, they are a breeding ground for fungus. We prune for health first, then for shape.
5. Mini Skid-Steer with a Grapple Bucket
This is the ultimate tool for heavy landscaping remediation. A mini skid-steer can fit through a 36-inch backyard gate but has the hydraulic lift capacity to move 500 to 1,000 pounds of debris. The grapple bucket allows you to pinch large piles of brush and logs without getting off the machine. If you are doing a sod install, you use the bucket to grade the soil. Soil grading is the most ignored part of landscaping. You need a 2% slope away from the house foundation. If you don’t have that, you will have hydrostatic pressure issues in your basement. The mini skid-steer allows you to move tons of topsoil in minutes to achieve that grade. It’s the difference between a yard that drains and a yard that is a swamp.
“A retaining wall doesn’t fail because of the stone; it fails because of the water trapped behind it.” – Hardscape Engineering Axiom
What is the best time of year for a sod install?
The best time for a sod install is during the early fall or late spring when soil temperatures are between 55 and 65 degrees Fahrenheit. This temperature range promotes rapid root initiation without the heat stress of mid-summer or the dormancy of winter. You must ensure your irrigation system is fully operational before the first piece of turf touches the ground, as new sod requires immediate saturation to prevent the edges from curling.
- Inspect all irrigation heads for proper spray patterns before starting.
- Remove all stones larger than 1 inch from the subgrade.
- Apply a starter fertilizer with a high phosphorus ratio (the middle number on the bag).
- Roll the sod with a water-filled roller to ensure soil-to-root contact.
- Maintain a strict watering schedule for the first 14 days.
The transition from a cluttered, debris-ridden lot to a clean, engineered landscape requires more than just effort; it requires the right mechanical leverage. By utilizing high-CFM blowers and hydraulic grapples, you protect the biological integrity of the soil while maintaining the structural requirements of the site. A professional yard cleanup is the foundation of every high-end landscaping project. If you skip the heavy tools, you are just moving dirt around. Real pros move the needle on site health and efficiency. Get the right gear, or stay off the job site.