
Winterizing 2026 Outdoor Faucets: The Foam Cover Myth
I recently got called out to a $1.2 million property in late January for a ‘minor leak’ that turned into a forensic autopsy of a finished basement. The homeowner was standing in three inches of standing water, pointing at a $4 foam dome on his exterior spigot like it was a shattered shield. It was. He had left a 50-foot rubber garden hose attached to the faucet all winter. Even though he had the foam cover on, that hose trapped a column of water inside the sillcock. When the first deep freeze hit, that water expanded with a physical force that no piece of polystyrene could ever hope to contain. The copper pipe didn’t just leak; it split like a hot dog on a grill, dumping 200 gallons an hour directly into his drywall. This is the reality of winterization. If you think a piece of foam is a substitute for proper hydraulic physics, you are setting yourself up for a catastrophic mechanical failure. Landscaping isn’t just about the plants you see; it is about the engineering of the utilities hidden beneath the mulch.
Why Foam Covers Fail During a Deep Freeze
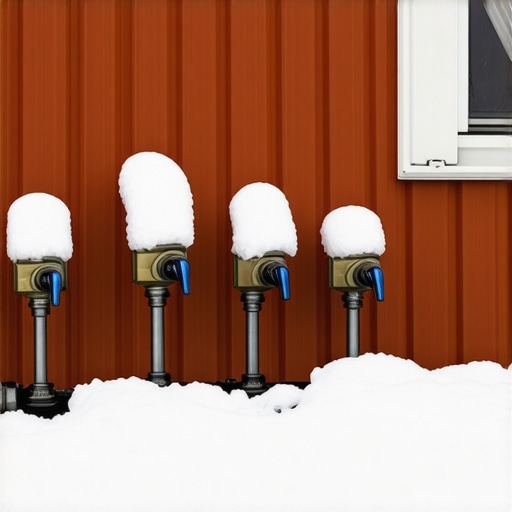
Foam covers for outdoor faucets are largely ineffective because they only provide a superficial thermal barrier rather than addressing the core issue of water entrapment and thermal bridge conductivity. To truly protect a home, you must evacuate the water from the valve body to prevent expansion-related ruptures. [IMAGE_PLACEHOLDER]
Water is a unique substance. When it freezes, its volume increases by approximately 9%. While that sounds small, the pressure generated by that expansion can exceed 100,000 PSI. Your copper or PEX piping is rated for maybe 200 to 400 PSI. It is a total mismatch. A foam cover is essentially a hat for your faucet. If the rest of the ‘body’—the pipe inside the wall—is exposed to freezing temperatures through a thermal bridge, that hat does nothing. Heat moves from warm to cold. Without a heat source inside that foam dome, the temperature inside the cover will eventually equalize with the outside air. It might buy you two hours in a snap freeze, but it will not save you during a 48-hour polar vortex. You need to understand the ‘frost line’ and how it interacts with your home’s envelope.
“The primary cause of outdoor faucet failure is not the external temperature alone, but the entrapment of water within the valve body which expands upon freezing, leading to a structural breach of the pipe wall.” – Plumbing Safety and Infrastructure Standards
How do I drain an outdoor faucet for winter?
To drain an outdoor faucet, you must first locate the interior shut-off valve, typically found in the basement or crawl space. Close this valve tightly. Next, go outside and open the exterior faucet to the full ‘on’ position. This allows the remaining water to gravity-drain out. Crucially, go back inside and find the small bleeder cap on the side of the interior valve. Unscrew it—have a bucket ready—to break the vacuum and allow the rest of the line to empty. If you skip the bleeder cap, a vacuum lock will keep water in the pipe. It will freeze. It will burst.
The Mechanics of Frost-Free Sillcocks
A frost-free sillcock works by placing the actual valve seat 8 to 14 inches inside the heated envelope of the home, utilizing a long stem to control water flow from the outside handle. However, these systems fail if they are not installed with a downward pitch or if accessories remain attached. These are not ‘set and forget’ devices.
| Winterization Method | Effectiveness | Failure Point | Cost Estimate |
|---|---|---|---|
| Foam Cover Only | Low | Thermal Equalization | $5 – $15 |
| Interior Shut-off | High | Vacuum Lock / Bleeder Neglect | $0 |
| Frost-Free Sillcock | High | Improper Pitch / Attached Hose | $150 – $300 |
| Heat Tape/Trace | Medium | Power Failure / GFCIs | $50 – $100 |
The most common error I see with frost-free faucets is improper installation pitch. If the contractor didn’t angle the pipe slightly toward the outside, water sits in the pipe instead of draining out. I’ve seen brand-new builds where the plumber was lazy, the pipe was level, and the first winter resulted in a split pipe. Also, if you leave a garden hose, a splitter, or an irrigation timer attached to the faucet, the water cannot drain out of the stem. The ‘frost-free’ feature is immediately neutralized. It’s a mechanical certainty. Don’t be the homeowner who loses a basement because they didn’t want to unscrew a hose in November.
“A frost-free hydrant must be installed with a slight downward pitch to ensure that gravity evacuates all water once the valve is closed; otherwise, the unit will retain water and succumb to freeze damage.” – International Residential Code (IRC) Section P2903.10
Can a frost-free faucet still burst?
Yes, a frost-free faucet will burst if a hose is left attached, as the hose prevents the internal vacuum breaker from functioning and stops water from draining out of the stem. It can also burst if the internal check valve is faulty or if the house’s interior temperature drops below 55 degrees, allowing the freeze line to migrate inward past the valve seat. Proper maintenance of the rubber washers is also required to ensure a tight seal at the seat.
Landscaping, Irrigation, and Yard Cleanup Integration
Winterizing your faucets is just one part of the late-season yard cleanup. If you have an irrigation system, your spigot winterization must coincide with a professional blowout. We use 185 CFM air compressors to purge every drop of water from the poly-lines. Simply turning off the water isn’t enough. Residual water in the plastic manifolds will crack the housings. While you are at it, look at your sod. A common mistake is stopping all yard care in October. You should be applying a high-potassium ‘winterizer’ fertilizer. This doesn’t push top-growth; it strengthens the cellular walls of the grass roots, making them more resilient to the same freeze-thaw cycles that threaten your pipes. A healthy lawn and a dry pipe are the results of the same thing: attention to detail.
Winterization Checklist for Homeowners
- Disconnect all garden hoses and quick-connect fittings.
- Locate and close all interior isolation valves for outdoor lines.
- Open exterior spigots to drain; leave them open until spring.
- Open the bleeder cap on the interior shut-off valve to break the vacuum.
- Inspect the ‘pitch’ of your sillcocks to ensure they drain outward.
- Flag your irrigation heads so they aren’t hit by snowplows during cleanup.
- Check the insulation in your crawlspace where pipes enter the wall.
Stop trusting the marketing on the back of a foam cover. It is a secondary layer of protection at best. The primary protection is physics. Drain the lines. Break the vacuum. Clear the hoses. If you don’t do this, you aren’t just ignoring your landscaping; you are ignoring the structural integrity of your home. It’s much cheaper to spend ten minutes in your basement than it is to hire a restoration crew to dry out your subfloors in January. Do it right the first time.