
Stop 2026 Sod Peeling: Using a Weighted Roller
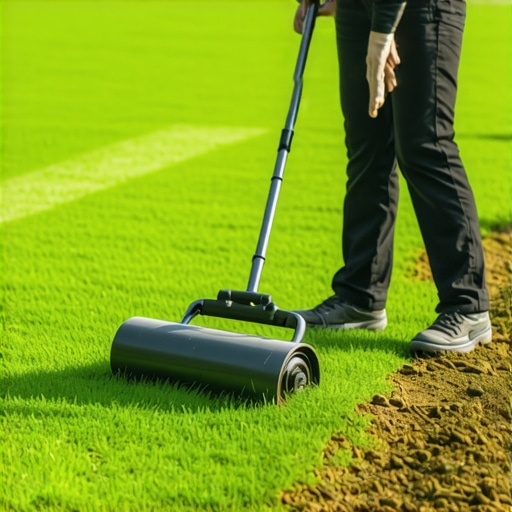
I always drill into my new crew members: if you don’t fix the soil grading first, every plant you put in the ground is just expensive compost. I have seen too many homeowners lose $5,000 in Kentucky Bluegrass because they thought laying sod was like laying a carpet. It is not. It is a biological transplant. If you leave air between the roots and the dirt, those roots will hit a wall of dry air and stop. They will desiccate. We call it sod peeling. It is preventable if you respect the physics of the soil. [image: sod-roller-installation]
Why New Sod Peels and Fails
To prevent sod peeling and ensure root establishment, you must eliminate air pockets using a weighted roller immediately after sod installation. This creates essential capillary action between the soil profile and the root zone, preventing desiccation and turf death.
Sod peeling occurs when the grass mat fails to knit with the native soil. This is rarely a fault of the grass itself. It is a failure of contact. When you lay a piece of sod, the bottom of the turf is uneven. The subgrade you prepared is also uneven. Without mechanical pressure, only about 40 percent of the root surface actually touches the dirt. The remaining 60 percent hangs in an air pocket. These pockets act like miniature ovens, baking the roots as the sun heats the turf surface. Within 48 hours, the edges begin to curl. Once those edges curl, they lose their ability to hold moisture. They peel back. You can literally lift the corners like a loose sticker. If you can see the dirt underneath a week after installation, your contractor failed you. They skipped the roller.
“Successful establishment of sod depends on intimate contact between the turfgrass roots and the soil. This is achieved through proper site preparation and the use of a roller to eliminate air pockets.” – Texas A&M AgriLife Extension
How much does a sod roller weigh?
For residential sod installation, a weighted roller should weigh between 200 and 300 pounds when filled with water. This provides enough downward pressure to compress air pockets without causing soil compaction that would restrict oxygen exchange in the root zone.
The Ground-Up Build: Preparation and Grading
Proper landscaping begins with soil grading and site preparation to ensure a level subgrade that can support capillary water movement. Skipping the yard cleanup or grading phase results in hydrostatic pressure issues and poor drainage, leading to sod failure.
The prep work is where the battle is won. My crew spends 80 percent of the job timeframe on the dirt before the first pallet of sod even arrives. We use a Harley rake to pulverize the top three inches of soil. We remove every stone larger than a nickel. If you leave a stone the size of a golf ball under the sod, it creates a bridge. The sod rests on that stone, and an air pocket forms around it. That is where the peeling starts. We check the pH level. If the soil is too acidic, the roots will refuse to leave the sod mat. They will stay in the nutrient-rich nursery soil and never venture into your yard. You want a pH between 6.0 and 7.0 for most cool-season grasses. Don’t guess. Test. A $20 soil test saves a $2,000 lawn. [image: sod-subgrade-preparation]
How do I fix sod that is peeling up?
If your sod is peeling, you must immediately heavy-water the area to increase turgor pressure, then use a weighted roller to force the root mat back into the soil profile. Follow this with a top-dressing of sandy loam along the sod seams to lock in moisture.
The Physics of the Weighted Roller
Using a weighted roller is a mandatory step in professional landscaping to ensure root-to-soil contact and moisture retention. This process uses mechanical force to knit the sod seams together and facilitate the osmotic process required for nutrient uptake.
The roller is not just for flattening the yard. It is about hydraulic connectivity. When the sod is pressed firmly into the damp soil, it creates a continuous path for water to move upward from the subsoil into the plant. This is the capillary effect. If there is a break in that path—an air pocket—the water stops. The plant dies. We use a poly-drum roller. Fill it about three-quarters full. You want the roller to be heavy enough that the grass blades stay flat for a few minutes after you pass over them. If the grass springs back instantly, the roller is too light. Use the thump test. Walk on the sod. If it feels spongy, it needs more rolling. It should feel firm, like a well-packed hiking trail.
| Soil Type | Roller Weight (lbs) | Pass Frequency | Primary Goal |
|---|---|---|---|
| Sandy Loam | 150 – 200 | 2 passes | Seam sealing |
| Heavy Clay | 100 – 150 | 1 pass | Contact without compaction |
| Rocky/Hardpack | 250+ | 3 passes | Eliminating bridges |
“The goal of rolling is to remove air pockets and ensure the sod is in firm contact with the soil. Over-rolling, especially on wet clay soils, can lead to surface compaction and poor rooting.” – Penn State Center for Turfgrass Science
The Critical Link: Irrigation and Root-to-Soil Contact
Effective irrigation after sod installation requires deep watering to saturate the soil profile at least 4 inches deep, which keeps the sod roots hydrated during the knitting process. Shallow watering cycles cause the sod edges to dry out, leading to peeling and thatch buildup.
Watering is where most homeowners fail. They think five minutes twice a day is enough. It is not. You need to saturate the ground before you roll, and then soak it again after. The first watering should turn the dirt under the sod into a soft paste. When you roll that sod into the paste, it creates a vacuum seal. That seal is what prevents peeling. If you can pull up a corner of the sod and the dirt underneath is dry, you are failing. The roots will not grow into dry dirt. They are not magic. They are biological sensors. They chase water. If the water is only in the top half-inch of the sod, the roots will stay in the top half-inch. Then, the first hot day in July will kill the whole lawn because the roots never went deep. [image: irrigation-sod-soaking]
- Water immediately: Start the sprinklers within 15 minutes of laying the first pallet.
- Check the corners: Peel back a corner to ensure the water has penetrated 2 inches into the subsoil.
- Morning cycles: Water at 4 AM to reduce fungal risk while ensuring maximum hydration before the sun hits.
- Roll early: The best time to roll is right after the first heavy watering when the soil is most malleable.
- Stay off the grass: After the initial rolling, keep foot traffic to zero for at least 14 days.
Long-Term Maintenance: Beyond the Roller
Maintaining a healthy lawn after the sod installation involves managing NPK ratios and monitoring thatch layers to prevent hydrostatic stress. A yard cleanup every autumn that includes core aeration will ensure the soil microbiology remains active and the roots continue to dive deep.
By the time 2026 rolls around, your sod should be a singular, monolithic carpet of green. If you see seams after six months, you didn’t roll it properly or you didn’t water enough. You need to watch for localized dry spots. Sometimes the irrigation head doesn’t hit a corner, and that’s where the peeling starts again. Hand-water those spots. In year two, start a high-nitrogen feeding program, but wait until the roots are deep. Putting high-N fertilizer on new sod is a mistake. It forces top growth at the expense of root growth. You want roots first. Always roots first. Don’t skip the basics. Use the roller. Soak the dirt. Keep the hacks away from your property.