
The Anatomy of a Neglected Yard: Why Power Tools Aren’t Always the Answer
Restoring a yard that has been reclaimed by nature is not about brute force; it is about forensic biology and the precise application of mechanical leverage. Cleaning yard overgrowth without power tools requires a systematic approach involving hand-clearing invasive biomass, managing soil grade, and addressing the root systems of opportunistic species like brambles and woody vines. By using manual implements like mattocks and Swedish brush axes, you avoid the soil compaction and noise pollution associated with heavy machinery while gaining a microscopic understanding of your landscape’s health. I always drill into my new crew members: if you don’t fix the soil grading first, every plant you put in the ground is just expensive compost. You can have the most expensive irrigation system in the county, but if your yard is a tangled mess of invasive overgrowth, that water is just fueling a biological disaster. I’ve seen 20-year-old landscaping designs completely erased in three seasons because a homeowner ignored a few sprigs of English ivy. It starts at the ground level. We look for the root flare. We look for the moisture pockets. We look for the signs of anaerobic soil where the thatch has become so thick that oxygen can’t reach the microbes. If you want to reclaim your yard in 2026, you need to stop thinking like a weekend warrior and start thinking like a civil engineer with a degree in botany.
The Manual Reclamation Strategy: Tools of the Trade
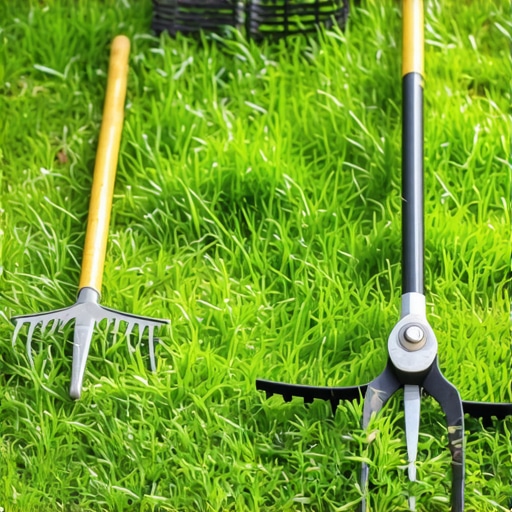
Manual yard cleanup is a discipline of caloric output and sharp steel. The primary tools for cleaning overgrowth without power include the heavy-duty mattock for grubbing out root balls, high-carbon steel loppers for woody stems, and a scythe or sickle for tall herbaceous weeds and grasses. These tools allow for selective removal, preserving beneficial native species that a brush hog would simply pulverize.
“A retaining wall doesn’t fail because of the stone; it fails because of the water trapped behind it.” – Hardscape Engineering Axiom
This principle applies to your yard cleanup too. As you clear brush, you will likely find that the overgrowth was masking significant drainage issues. Water trapped against the foundation because of a three-foot pile of decomposing organic matter is a recipe for hydrostatic pressure failure. When you work by hand, you feel the soil. You notice the difference between sandy loam and heavy, suffocating clay. You see where the previous contractor failed on the sod install by not tilling the subgrade. You notice the irrigation heads that have been buried under six inches of leaf mold. It is slow work. It is hard work. But it is the only way to ensure the long-term structural integrity of the land.
How to clear a backyard full of weeds by hand?
Clearing a backyard manually involves a four-phase process: 1) Cutting back the vertical canopy using loppers, 2) Scything the herbaceous layer, 3) Grubbing the root systems with a mattock, and 4) Amending the exposed soil to prevent immediate re-colonization by invasive seeds.
What is the fastest way to remove thick brush without a brush cutter?
The fastest manual method for brush removal is the ‘cut and grub’ technique, where woody stems are cut at the 4-inch mark to provide leverage for a pick-mattock to pry the entire root crown out of the earth. Don’t skip this. If you leave the root crown, you’re just pruning the weed for a more aggressive return next spring.
Mechanical Leverage vs. Internal Combustion
| Tool Category | Specific Implement | Best Used For | Biological Impact |
|---|---|---|---|
| Cutting | Swedish Brush Axe | Woody stems up to 2 inches | Clean cuts, prevents fungal spread |
| Grubbing | Pick-Mattock | Root ball extraction | Aerates soil, disrupts pest larvae |
| Slashing | Scythe / Sickle | Tall grass and soft weeds | Maintains soil structure |
| Prying | Digging Bar | Stumps and buried rocks | Minimal surface disturbance |
Every tool mentioned above serves a specific niche in the ecosystem of yard reclamation. When you use a brush axe, you are making a surgical strike. A clean, 45-degree cut on a woody invasive like multiflora rose prevents the jagged, shredded edges left by a string trimmer that invite pathogens into the soil.
“Soil compaction is the single greatest deterrent to healthy turf growth in residential landscapes, often exceeding the impact of nutrient deficiencies.” – Penn State Center for Turfgrass Science
When you walk the yard with a mattock instead of driving a skid-steer over it, you are preserving the pore space in the soil. You are protecting the nitrogen cycle. You are ensuring that when you finally do a sod install, those roots have somewhere to go besides sideways.
Phase 1: The Canopy and Vertical Clearance
Start from the top down. If you have vines climbing your trees, do not pull them down. You’ll damage the bark of the host tree. Cut the vine at the base and again at eye level. Let the top part die and fall off naturally over the next year. It will rot. This ‘window cut’ technique starves the vine without risking the tree’s health. Focus on the drip-line. This is the area directly beneath the outer circumference of the tree’s branches. In a neglected yard, this area is often a nightmare of compacted mulch and invasive weeds. You need to find the root flare. If you see a ‘mulch volcano’ piled against the trunk, get a hand trowel and start digging. If the flare is buried, the tree is suffocating. This is horticultural engineering 101. A yard cleanup isn’t just about aesthetics; it’s about life support for the plants you actually want to keep. Once the vertical obstructions are managed, you can see the ground. You can see the slope. You can see where the water is going—or where it’s getting stuck.
Phase 2: Grubbing and Root Extraction
This is where the real work happens. You need to understand the difference between taproots and fibrous root systems. Dandelions have taproots; they go deep. Grasping them and pulling just snaps the top off. You need a weeding tool that can reach three inches down to sever the root. For larger brush, the mattock is your best friend. Swing the pointed end into the earth about six inches away from the base of the plant. Use the handle as a lever. You’ll hear the snap of the lateral roots. That is the sound of victory. Once the root ball is loose, lift the whole thing out. Do not leave it on the ground. Invasive roots can often re-establish themselves if they have soil contact. Pile them on a tarp or a pallet. This is a critical part of landscaping that most people ignore. They clear the top and think they’re done. Two weeks later, the yard looks like a jungle again. Dig deeper.
- Identify the species before you cut.
- Wear puncture-resistant gloves for brambles.
- Keep your tools sharp with a mill file.
- Work in 10×10 foot grids.
- Manage your hydration; this is high-intensity labor.
Phase 3: Soil Preparation and Grading
Once the brush is gone, you’re left with bare earth. This is a dangerous time for a yard. Without cover, the soil will erode, and the seed bank—thousands of dormant weed seeds—will explode into life the moment they hit sunlight. You must act fast. Check your grade. Does the land slope away from your foundation at a minimum of 2 percent? If not, use your mattock and a flat shovel to move soil. This is the groundwork for any future irrigation or sod install. If the soil is hard-packed, you don’t need a power aerator. You can use a broadfork. It’s a manual tool that you step on to drive tines into the ground, then lean back to crack the soil open. It allows oxygen and water to reach the subsoil without flipping the soil layers and bringing more weed seeds to the surface. It is a more refined way to manage soil microbiology. You are creating an environment where desired plants can out-compete the invaders.
Phase 4: The Path Forward
A manual cleanup is not a one-time event; it is the beginning of a management cycle. You have disrupted the overgrowth, but the land wants to return to its wild state. You need to establish a baseline. If you’re planning a sod install, the soil needs to be level and nutrient-rich. Test your pH. Most turf grasses prefer a slightly acidic environment, around 6.5. If you’re at a 5.0, your grass will starve no matter how much fertilizer you throw at it. Use pelletized lime. It takes time to work into the soil profile, especially without tilling. This is why we plan for 2026 now. We are working with the seasons, not against them. If you’ve cleared the yard in the fall, use a cover crop like winter rye to hold the soil in place. It’s cheap, it adds organic matter when you chop it down in the spring, and it smothers out the early weeds. It’s biological warfare on a backyard scale.