
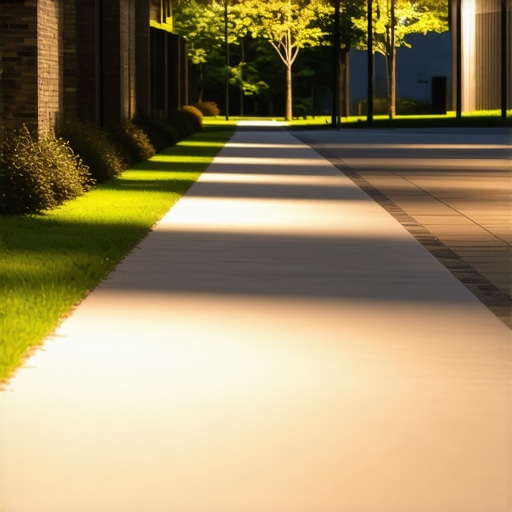
Designing for Visibility Instead of Glare
Effective landscape lighting requires understanding the inverse square law of light and the physiological response of the human eye to high-contrast glare. Most homeowners install high-lumen fixtures that point directly into the line of sight, causing the pupils to constrict and making the surrounding dark areas even more dangerous. I recently got called out to tear up a $30,000 patio that was sinking because the previous contractor ignored the hydrostatic pressure of the soil and, to make matters worse, they had installed 500-lumen floodlights at eye level along the walkway. Walking that path at night felt like being interrogated by the police. It was dangerous, structurally unsound, and technically incompetent.
The planning phase is where 80% of the project success lives. You don’t just ‘stick lights in the dirt.’ You analyze the topography, the foot traffic patterns, and the photometric requirements of the space. Professional landscaping requires a balance between aesthetic appeal and biological safety. If you are doing a sod install or a major yard cleanup, that is the exact moment to trench your low-voltage lines. Once that grass is down, you don’t want to be cutting into a fresh root system. My crew knows that if the voltage drop isn’t calculated before the first spade hits the ground, we aren’t starting. We use 12-gauge or 10-gauge multi-strand copper wire to ensure that the last light on the run has the same lumen output as the first. This isn’t a suggestion; it is a requirement for a system that lasts 20 years instead of 20 months.
“A retaining wall doesn’t fail because of the stone; it fails because of the water trapped behind it. Similarly, a lighting system fails not because of the bulb, but because of the moisture intrusion at the connection points.” – Hardscape Engineering Axiom
How do I light a walkway without causing glare?
To light a walkway without blindness, you must use shielded fixtures that direct light downward (path lights) or use indirect techniques like moonlighting. Focus on low-lumen LEDs (between 100-200 lumens) with a warm color temperature of 2700K to 3000K to prevent pupillary constriction. Use frosted lenses and glare guards to ensure the light source remains invisible to the walker.
The Technical Mechanics of Low-Voltage Systems
In the world of professional irrigation and hardscaping, we deal with corrosion constantly. Your lighting system is no different. We use 316 stainless steel or solid brass fixtures because aluminum will pit and degrade in acidic soil within three years. When we perform a yard cleanup for a new client, we often find cheap big-box store lights with plastic stakes snapped off in the ground. That is garbage. We use 10-inch heavy-duty stakes and heat-shrink connectors filled with dielectric grease. Wire nuts are for dry walls, not for the wet, pressurized environment of a landscaping bed. If your contractor uses blue wire nuts outside, fire them. They are inviting wicking, where moisture travels up the copper wire into the fixture, rotting the LED board from the inside out.
| Fixture Type | Recommended Lumens | Beam Spread | Primary Purpose |
|---|---|---|---|
| Path Light | 100 – 150 | 360 Degrees (Downward) | Walkway Safety |
| Well Light | 200 – 400 | 30 – 60 Degrees | Uplighting Trees |
| Hardscape Light | 50 – 100 | Linear / Wide | Under-cap lighting |
| Moonlight | 250 – 500 | 60 Degrees (Downward) | Naturalistic Wash |
What is the best color temperature for outdoor lighting?
The industry standard for residential landscaping is 2700K to 3000K. This warm white spectrum mimics the psychological comfort of incandescent bulbs and highlights the natural greens and browns of sod and stonework. Avoid 5000K ‘Daylight’ bulbs; they look blue, harsh, and industrial, making your home look like a gas station parking lot. High-quality fixtures will have a Color Rendering Index (CRI) of 80 or higher, ensuring that the colors of your Japanese Maple or your Emerald Zoysia look accurate at night.
Integration with Irrigation and Soil Grading
You cannot talk about lighting without talking about water. An irrigation system that isn’t tuned will destroy your lighting. If your rotors are hitting your brass fixtures every morning, you are going to get calcium deposits and hard water staining that will obscure the lens. During a sod install, we map out the light placement specifically to avoid micro-climates of high moisture. We also consider soil compaction. If you’re trenching through heavy clay, you need to use conduit in high-traffic areas to prevent the weight of vehicles or heavy mowers from crushing the lines. I tell my apprentices: ‘The tamper should literally bounce off the compacted base.’ If it doesn’t, the ground will settle, the wire will stretch, and the connection will fail. Don’t skip the compaction.
“Soil pH and moisture levels directly impact the rate of galvanic corrosion in underground electrical components; professional installs require sealed, direct-burial rated cabling.” – Agronomy Extension Standards
How much modified gravel do I need for a lighting transformer base?
While the transformer itself is usually wall-mounted, any junction boxes or heavy landscape features used for mounting should sit on a 4-inch base of CR6 or 21A modified gravel. This ensures drainage and prevents frost heave from tilting your fixtures. In regions with heavy freeze-thaw cycles, failing to provide a compacted gravel base means your lighting alignment will be ruined by next spring. Every fixture should be checked for plumb after the first heavy rain. It is about precision, not just ‘good enough.’
- Use Direct Burial (DBR/Y-6) connectors for all splices.
- Calculate Total Wattage and add a 20% cushion for the transformer.
- Mount the photocell away from other light sources to prevent flickering.
- Check voltage at the hub; it should be between 10.5V and 12.5V.
- Bury lines at least 6 inches deep to avoid aeration damage during lawn care.
The Maintenance Cycle: Beyond the Install
Your landscaping is a living, breathing organism. As plants grow, they will block your light. A professional yard cleanup twice a year should include cleaning fixture lenses with a mild vinegar solution to remove mineral scale and trimming foliage back from the beam spread. If you don’t maintain the drip line of the trees where you’ve mounted lights, the bark will eventually grow over the fixture, a process known as codit or compartmentalization. This will crush the fixture. Move your tree lights every two years. It will rot if you don’t. This is the difference between a contractor and a partner in your property’s value. We build for the ten-year mark, not the day the check clears. Check your timer settings after every power outage or seasonal time change. An unadjusted system is a waste of amperage.