
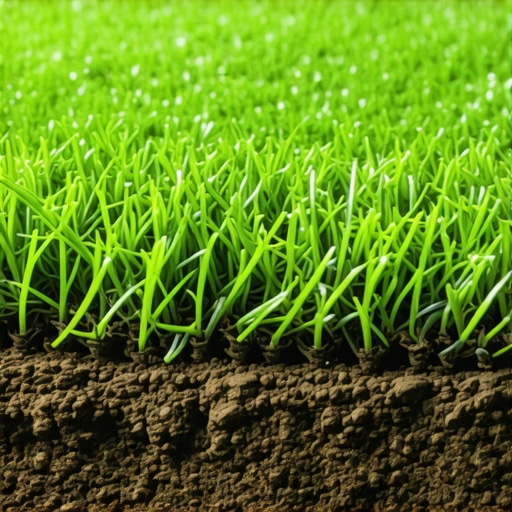
Why Your New Sod Feels Spongy and How to Fix the Subgrade
There is an undeniable sense of pride that comes with investing in high end landscaping. You’ve spent the time and money to transform your property into a masterpiece, expecting that “sharp lawn” look that defines the best homes in Reeds Spring. But then, a few days after the installation, you walk out across your new turf and notice something unsettling: it feels like you’re walking on a marshmallow. Instead of the firm, resilient surface of a professional golf course, your yard feels mushy, unstable, and – to put it bluntly – spongy.
My name is Rachel Pryor. With over 15 years of experience in teaching, marketing, and sales consulting, I’ve spent a significant portion of my career helping homeowners in Branson West and Lampe navigate the complexities of property maintenance and landscape design services. I know that when you pay for sharper edge landscaping, you expect precision. While a certain degree of softness is expected during the first week of a sod installation, persistent “sponginess” is a red flag. It usually points to one of two things: a critical error in your watering schedule or, more significantly, a failure in the subgrade preparation. In this guide, we will dive deep into why your sod feels this way and how to achieve the firm, sharp lawn you were promised.
Identifying the “Spongy” Feeling: Is it Normal?
Before you panic and call your landscaping services provider in a frenzy, it is important to understand the biological reality of a new sod installation. When sod is harvested at the farm, its root system is sliced thin. When it arrives at your home in Reeds Spring, it is essentially a “rug on a hardwood floor” for the first 14 days. It hasn’t yet knitted its roots into the native soil, meaning there is a literal physical gap between the sod layer and the subgrade.
During the first 7 to 10 days, the ground should feel somewhat soft. You are saturating the ground to encourage root growth, and the organic matter in the sod itself is holding a significant amount of moisture. However, there is a difference between “establishment softness” and “problematic sponginess.” If you find that why your sod feels spongy under your feet involves deep indentations that don’t spring back, or if the water squishes up through the blades of grass when you step, you are dealing with a structural or maintenance issue.
A sharp lawn should begin to feel firm by the end of the second week. If you are entering week three and the ground still feels like a sponge, the issue is no longer just “newness.” It is time to look at the foundation and the moisture levels beneath the surface.
Cause #1: The Watering Trap (Too Much of a Good Thing)
The most common reason new sod feels spongy is simple over-saturation. Many homeowners, terrified that their expensive new grass will die, turn their irrigation systems into a monsoon. While moisture is vital, too much of it turns the subgrade into a slurry of mud. According to the Purdue Extension guide (AY-28-W), more sod installations fail from improper follow-up care than any other cause. The guide specifies that new sod needs water 1 to 2 times per day during establishment to keep the entire thickness wet and the soil underneath moist to 1 inch. However, once that moisture exceeds the soil’s ability to drain, you create a “mush factor.”
If you suspect overwatering is the culprit, perform a simple “sniff test.” Lift a corner of a sod piece (if it hasn’t rooted yet). If the soil beneath looks black and has a “sour” or swampy smell, you are dealing with anaerobic conditions. This means the roots are literally drowning and beginning to rot. When roots rot, they lose their structural integrity, contributing to that spongy, unstable feeling underfoot. To prevent this, you may need to transition from heavy soakings to a more strategic approach, such as the Stop 2026 Sod Drying: The Afternoon Mist Strategy, which keeps the blades cool without drowning the subgrade.
In the Branson West area, our humidity can often slow down evaporation. If your professional lawn care services team installed the sod during a particularly humid stretch, you may need to dial back the timers sooner than you think to keep the lawn from becoming a bog.
Cause #2: Poor Subgrade Preparation (The “Sharp Lawn” Foundation)
If your watering is on point but the lawn still feels like a trampoline, the problem lies beneath. A sharp lawn isn’t just about the grass on top; it’s about the hardscaping and landscaping principles applied to the dirt underneath. Poor subgrade preparation is the leading cause of long-term sponginess and unevenness.
One of the most frequent mistakes made by amateur landscaping services is failing to properly compact the soil before the sod is laid. If the soil was recently tilled or filled in to level the yard, it is full of air pockets. When you start the heavy watering required for new sod, that water fills the air pockets, causing the soil to “fluff” and then eventually settle unevenly. If the soil wasn’t rolled with a weighted water roller prior to installation, the weight of a person walking on it will compress those air pockets, creating a spongy sensation.
Furthermore, we have to consider the “Soil Layer Trap.” This occurs when the soil on the sod rolls (usually a heavy peat or farm loam) is drastically different from the native soil in Reeds Spring or Lampe (which is often rocky or clay-heavy). This difference in texture creates a “perched water table,” where water sits at the interface of the two soil types instead of draining through. This layer of trapped water acts as a lubricant, making the sod feel like it’s sliding or floating on a cushion of mud. This is why landscape design services must include a “transition zone” or core aeration to help integrate the two soil types. For a comparison of how critical base prep is, you can look at how to prep the base for artificial turf so it never sinks or bubbles; the principles of compaction and drainage are nearly identical.
How to Fix a Spongy Subgrade: Step-by-Step
If you’ve identified that your subgrade is the issue, don’t worry – you don’t necessarily have to rip everything out and start over. Achieving sharp edge landscaping results requires patience and a few corrective steps.
Step 1: The Drying Phase
The first step to fixing a spongy lawn is to stop the cycle of saturation. You need to let the subgrade firm up. Stop watering for 24 to 48 hours, depending on the heat in Branson West. You want the soil to move from “muddy” to “moist.” Watch the grass closely; if it starts to take on a blue-gray tint or if your footprints remain visible in the grass blades, it’s getting too dry. But that brief drying window allows the soil particles to settle and bind together.
Step 2: Tamping and Rolling
Once the soil has firmed up slightly, it’s time to address the air pockets. For large areas, a water-filled lawn roller can help press the sod into the subgrade. However, for the perimeter of your lawn, a roller often can’t get close enough to the landscape edging. This is where tamping 2026 sod edges: why a hand tamper is crucial. A hand tamper allows you to apply targeted pressure to the edges, ensuring that the “sharp edge” of your lawn stays firm and doesn’t sag over time.
Step 3: Top-Dressing
If the sponginess is caused by low spots in the subgrade that are collecting water, you may need to top-dress. This involves spreading a thin layer (no more than 1/4 inch at a time) of a sand and masonry soil mix over the top of the sod. This helps fill in the minor depressions and adds mineral weight to the organic sod layer, helping it compress the subgrade naturally. If you find gaps between your sod pieces contributing to the instability, check out our guide on repairing 2026 sod gaps: the grass-seed and soil mix.
Advanced Challenges: Slopes and Drainage in Branson West & Lampe
The topography of the Ozarks presents unique challenges for professional lawn care services. In Lampe and Branson West, we rarely deal with perfectly flat lots. If your new sod is on a slope, gravity is working against you. Water naturally migrates to the lowest point of the yard, meaning the bottom of a hill will almost always feel spongier than the top.
On steep inclines, the water can actually travel underneath the sod, washing away the fine particles of your subgrade and leaving behind a mushy mess. To prevent this, we often recommend staking 2026 sod on steep hills: the wooden peg hack. These pegs keep the sod from shifting while the subgrade settles and the roots take hold. Furthermore, if your “sponginess” is actually a drainage problem, you might need to consider building 2026 dry creek beds for sloped drainage fixes. A dry creek bed diverts the “marshmallow-making” water away from your lawn and toward a proper exit point.
It’s also worth noting that the same hills that cause drainage issues in the summer create headaches in the winter. If you live in a high-elevation part of Lampe, you know that the best way to handle heavy snow removal on steep Lampe driveways often involves planning your landscaping to accommodate runoff, which directly impacts how firm your subgrade remains year-round.
When to Call for Professional Lawn Care Services
While many cases of spongy sod can be fixed with a modified watering schedule and a bit of rolling, there are times when the expertise of Urban Landscaping X is required. If you have followed the drying and tamping steps and the ground remains mushy, you may have a subsurface issue that DIY methods can’t reach.
- Sprinkler Leaks: A common cause of localized sponginess is a cracked lateral line or a leaking sprinkler head. If one specific area of your sharp lawns is always wet, you likely have a mechanical failure in your irrigation system.
- Major Grading Issues: If the subgrade was not sloped away from the home’s foundation, water will pool in the “V” where the lawn meets the house. This requires professional regrading to fix.
- Severe Soil Compaction: In some parts of Reeds Spring, the clay is so dense that water simply cannot penetrate it. If the subgrade wasn’t tilled or amended before the sod went down, the water is sitting in a “bowl” of clay, keeping your sod perpetually spongy.
When you want sharper edge landscaping, you are paying for the peace of mind that the job is done right from the dirt up. Professional landscape design services include an assessment of soil percolation and grade, ensuring that your investment doesn’t turn into a mud pit.
Conclusion: Achieve the Sharp Lawn You Deserve
A firm, resilient lawn is the hallmark of a healthy landscape. While the initial “spongy” feeling of new sod can be alarming, it is often a manageable part of the establishment phase. By monitoring your watering, ensuring proper compaction of the subgrade, and addressing the unique drainage needs of our Branson West and Lampe terrain, you can ensure your yard transitions from a marshmallow to a masterpiece.
Remember, a sharp lawn starts with a sharp foundation. If you are struggling with a lawn that just won’t firm up, or if you are planning a high end landscaping project and want to ensure the subgrade is perfect from day one, contact the experts. At Urban Landscaping X, we specialize in lawncare and snow removal, offering the precision and local expertise that Reeds Spring homeowners demand. Whether you need a subgrade consultation or full landscape design services, we are here to help you get that “sharper edge” look.
Technical Tip: When ordering your sod, always use a 5% waste factor to ensure you have enough extra pieces to fill in gaps or replace any sections that may have suffered from root rot during the spongy phase. For more on this, see our guide on calculating 2026 sod delivery: don’t forget the 5% waste.