
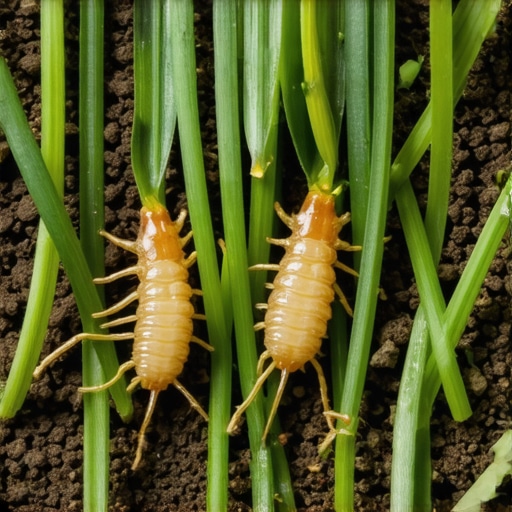
The Forensic Autopsy of a Dying Lawn
You walk across your yard and something feels wrong. It is not just the color; it is the tactile response of the earth. The ground feels spongy, almost like walking on a thick, wet carpet that has detached from the subfloor. This is the visual and sensory start of a grub infestation. If you can grab a handful of turf and pull it upward with zero resistance, watching it peel away from the soil like a piece of cheap linoleum, you are not looking at a watering issue. You are looking at a structural failure of the root system caused by subsurface mastication. It is a biological demolition. It is the end of your turf unless you understand the engineering of the soil beneath you.
What are lawn grubs and why do they destroy turf?
Lawn grubs are the C-shaped larval stage of various beetles, including Japanese beetles and June bugs, which feed on turfgrass roots during spring and fall, effectively severing the plant’s ability to uptake water and nutrients from the soil. These larvae possess powerful mandibles designed to slice through fibrous root tissue. When the density of these pests exceeds 10 per square foot, the biomass of the root system cannot regenerate fast enough to compensate for the consumption rate. The result is a total collapse of the plant’s vascular system. The xylem and phloem, the very veins of your grass, are rendered useless because the ‘pump’—the root—has been eaten. This is not a surface-level cosmetic problem; it is a foundational biological threat that requires a clinical approach to remediation.
The Chemical Nightmare: A Lesson in Soil Science
A homeowner called me in a panic last September after they completely torched their front lawn by applying three different types of big-box store ‘grub killers’ in a single week. They spent $400 on chemicals and ended up with a $5,000 repair bill. The problem was not just the grubs; it was the chemical burn and the resulting soil toxicity. They applied a high-nitrogen fertilizer-pesticide combo during a 95-degree heatwave. The nitrogen pushed the grass to grow while the grubs were still eating the roots, and the salt index of the fertilizer sucked the remaining moisture out of the scorched plants. I had to explain that they hadn’t just killed the grubs; they had sterilized the microbial life in the top two inches of the soil profile. We had to wait six weeks, flush the soil with heavy irrigation, and then perform a full yard cleanup before we could even think about a sod install. It was a textbook case of why DIY ‘spray and pray’ methods are a disaster. You cannot solve a biological problem with reckless chemistry.
“White grubs are the most widespread and destructive pests of turfgrass in the United States.” – Cornell University Turfgrass Program
How to spot grub damage before it is too late
Look for irregular brown patches that do not recover with irrigation and feel “spongy” underfoot; if the turf lifts like a carpet, you have a severe infestation of at least 10 grubs per square foot requiring immediate intervention. You must differentiate between localized drought stress and grub activity. Drought-stressed grass will wilt, but the roots will remain anchored. Grub-damaged grass is a corpse already detached from its life support. Take a shovel and cut a one-foot square of turf three inches deep. Flip it over. If you see more than five or six white, C-shaped larvae with tan heads, your threshold for ‘natural balance’ has been crossed. You are now in a state of active infestation management.
How can I tell if I have grubs or just drought stress?
To distinguish between the two, perform the ‘Tug Test.’ Grab a handful of the brown grass and pull firmly. If the grass stays rooted but feels brittle, it is likely drought or dormancy. If it slides out of the earth with no roots attached, grubs are the primary culprit. Furthermore, check for increased skunk or raccoon activity. These animals are the natural ‘engineers’ of the yard, and they will tear up your turf to reach the protein-rich grubs below. If your yard looks like it was rototilled overnight, the animals are just following the food source.
| Symptom | Grub Infestation | Fungal Disease (Blight) | Drought Stress |
|---|---|---|---|
| Root Attachment | Loose/Peels up | Firmly Rooted | Firmly Rooted |
| Patch Shape | Irregular/Spread out | Circular/Defined rings | Uniform across high spots |
| Soil Moisture | Often moist underneath | Variable | Bone dry |
| Animal Activity | High (Skunks/Birds) | None | None |
The Engineering of Eradication: Professional treatment protocols
Professional eradication involves applying preventative systemics like chlorantraniliprole in late spring or curative dylox in late summer, timed precisely to the hatching of the first instar larvae to ensure maximum chemical efficacy and minimal environmental runoff. Timing is everything in agronomy. If you apply a preventative too late, the grubs have already reached their third instar stage—the point where they are most resistant to chemicals and have the highest caloric intake. At that point, you are throwing money into the wind. You need a curative agent with a short half-life that makes contact with the larvae immediately. This requires an irrigation protocol that moves the product through the thatch layer and into the top two inches of the soil without washing it away into the storm drains.
When is the best time to apply grub control?
The optimal window for preventative treatment is typically from May to June, just as the adult beetles are beginning their flight and egg-laying cycle. For curative treatments, the window is August through September when the young larvae are feeding near the surface. Applying chemicals in the dead of winter or early spring when grubs are deep in the soil profile is a waste of resources. They are dormant and tucked below the frost line where your chemicals cannot reach them. You must hunt them when they are active.
“A lawn is a managed ecosystem; if you ignore the soil biology, the surface will eventually fail.” – Agricultural Extension Standards
The Recovery Phase: Sod Install and Soil Remediation
Once the grubs are neutralized, you are left with a dead biomass that must be cleared. This is where yard cleanup becomes a technical necessity. You cannot just throw seed or sod over dead, grub-infested thatch. It will rot. You must mechanically de-thatch the area, remove the organic debris, and assess the soil pH. If the soil is too acidic, your new roots will struggle to establish. If you are opting for a sod install, the site preparation is 90% of the success. We excavate the top two inches, grade the soil to ensure drainage away from the foundation, and utilize a starter fertilizer with a high phosphorus middle number to stimulate immediate root elongation. Your irrigation must then be calibrated for ‘little and often’ watering to keep the sod seams moist until the roots knit into the native soil.
Professional Yard Cleanup Checklist
- Remove all dead turf and thatch using a power rake.
- Perform a soil test to check for NPK and pH imbalances.
- Aerate the soil to a depth of 3 inches to relieve compaction.
- Top-dress with a compost-sand mix to improve soil structure.
- Apply a high-phosphorus starter fertilizer.
- Check irrigation coverage to ensure no dry spots remain.
Maintenance is the final step. To prevent a re-infestation, you must manage your irrigation. Beetles love moist soil for egg-laying. By allowing your soil to dry out slightly in the peak of summer, you create a hostile environment for the eggs. Deep, infrequent watering—exactly one inch per week—forces the grass roots to grow deeper, making the plant more resilient to the minor root loss that occurs in any healthy ecosystem. Don’t skip the aeration. Compacted soil is a playground for pests and a prison for roots. Keep the soil breathing, keep the water moving, and the grubs will find someone else’s yard to eat.