
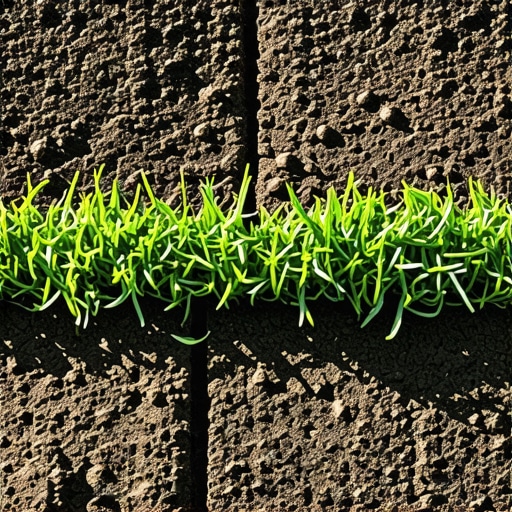
The Forensic Autopsy of Sod Separation
New sod pulls apart at the seams primarily due to desiccation and root shrinkage caused by improper soil-to-root contact, lack of irrigation, or failure to knit the edges during installation. This structural failure occurs when the individual rolls of turf lose turgor pressure within their cellular walls, leading to a physical contraction of the sod mat. When a 24-inch wide roll of sod loses just 2% of its moisture content, the resulting shrinkage can create a half-inch gap at every seam. If you see dirt between your rolls, your lawn is literally shrinking away from its new home. It is not a cosmetic issue; it is a mechanical failure of the installation process.
The Apprentice Lesson: Soil Grading is Non-Negotiable
I always drill into my new crew members: if you don’t fix the soil grading first, every plant you put in the ground is just expensive compost. I remember a job back in ’04 where a homeowner had hired a cheap crew to lay 10,000 square feet of TifWay 419 Bermuda. Within six days, the lawn looked like a cracked desert floor. They had laid the sod directly over compacted red clay without a single pass of a power rake. The roots couldn’t penetrate the 3,000 PSI surface of the clay. Because those roots had nowhere to go, they stayed in the thin layer of peat the sod was grown in. When the sun hit it, that peat dried out, the roots shriveled, and the entire lawn contracted. We had to rip the whole thing up, till the soil to a 4-inch depth, and start over. It was a $12,000 mistake that could have been avoided with a $200 soil prep rental. Soil-to-root contact is the only thing that matters in the first 72 hours.
The Physics of Desiccation and Capillary Action
The gap you see between your sod rolls is the result of moisture tension. When you cut sod at the farm, you are severing 90% of its root system. The plant is in a state of extreme physiological shock. It relies entirely on the moisture held within its immediate root zone. If the subsoil—the dirt you laid it on—is bone dry, it will actually act as a wick, sucking the remaining moisture out of the sod rolls through capillary action. This is why yard cleanup and pre-watering are vital. You cannot lay thirsty grass on thirsty dirt. The lack of moisture causes the blades to curl and the soil mat to harden and shrink. Once that shrinkage starts, the edges of the sod are exposed to the air. This creates a ‘chimney effect’ where air circulates around the sides of the roll, accelerating evaporation and killing the tender white feeder roots before they can ever reach the soil.
“A successful sod installation depends on the immediate establishment of the soil-to-root interface. Any air pocket between the sod and the soil serves as a thermal barrier that prevents root elongation and leads to localized dry spots.” – Agronomy Manual for Professional Turfgrass Managers
The Operational Lane: Sod Install Engineering
In the world of high-end landscaping, we treat a sod install like a civil engineering project. We aren’t just laying carpet. We are managing hydraulic conductivity and bulk density. If your soil is too compacted, the roots can’t breathe or move. If it is too loose, you get settling and air pockets. The goal is a firm, but friable, seedbed. This requires a mechanical breakdown of the surface and the addition of organic amendments to lower the bulk density. We use a 250-pound water-filled roller after the install for one reason: to force the air out. If you skip the roller, you are leaving thousands of tiny air gaps. Those gaps are where the roots go to die. Every seam must be butted tight—not overlapped, but compressed against the neighboring piece. This creates a physical bond that resists the natural urge of the grass to shrink under the sun.
The Sod Gap Root Cause Analysis
| Symptom | Technical Cause | Remediation Step |
|---|---|---|
| 1-Inch Gaps | Severe desiccation / No rolling | Fill with 50/50 sand-soil mix and saturate |
| Brown Edges | Edge drying (Chimney effect) | Hand-water seams twice daily; apply top-dressing |
| Sod Slides on Slopes | Lack of sod staples / Poor grading | Secure with biodegradable stakes; adjust irrigation |
| Mushy, Yellowing Sod | Anaerobic soil (Over-watering) | Reduce irrigation frequency; check subsoil drainage |
Why are there gaps in my sod after two weeks?
If you see gaps appearing two weeks after a sod install, you have a secondary rooting failure. By day 14, the ‘white hosing’ or feeder roots should have knitted into the subsoil. If they haven’t, it’s usually due to a pH imbalance or a high salts concentration in the soil. You might have skipped the soil test during the landscaping phase. If your soil pH is below 5.5 or above 7.5, the grass cannot uptake the nutrients required for root expansion. The plant stays stagnant, the initial moisture from the farm is gone, and the roll begins to contract. This is why a starter fertilizer with a high phosphorus count (the middle number in NPK) is essential. Phosphorus is the engine of root development. Without it, you’re just waiting for the grass to die.
How much water does new sod need?
New sod needs enough water to keep the underlying soil moist, not just the grass blades. During the first 10 days, this typically means watering 3 to 4 times a day for short bursts. However, the exact amount depends on your evapotranspiration (ET) rate. You should be aiming for about 1/4 to 1/2 inch of water per day, split into multiple cycles to prevent runoff. If you walk on the sod and it feels ‘squishy,’ you are drowning the roots and creating an anaerobic environment. If the soil underneath is dry to the touch when you peel back a corner, you are underwatering. You must find the balance where the soil stays consistently damp but not saturated. Once the sod is knitted—meaning you can no longer pull it up by hand—you should transition to deep, infrequent watering to force the roots to grow deeper into the profile.
“Turfgrass root growth is inhibited when soil temperatures exceed 85 degrees Fahrenheit or when soil moisture drops below the permanent wilting point for more than 48 hours.” – Penn State Agricultural Extension
The Professional Sod Install Checklist
- Call 811 to mark all utility lines including irrigation sub-mains.
- Remove all old debris, rocks larger than 1 inch, and organic thatch.
- Conduct a soil test to determine lime and fertilizer requirements.
- Rough grade the area to ensure a 1% slope away from the home foundation.
- Apply a high-phosphorus starter fertilizer (e.g., 10-20-10).
- Lay sod in a staggered, brick-like pattern to minimize seam alignment.
- Butt edges tightly without overlapping or leaving gaps.
- Roll the entire area with a water-filled roller to eliminate air pockets.
- Initiate the first irrigation cycle within 30 minutes of laying the first roll.
Remediation: Fixing the Damage
If your sod has already pulled apart, you cannot simply push it back together. The root mat has hardened. Your only move now is to fill those gaps. Use a mixture of 50% screened topsoil and 50% masonry sand. This ‘bridge’ will protect the exposed edges of the sod and provide a medium for the lateral runners (rhizomes or stolons) to grow into. If you leave the gaps open, the edges will continue to die back, and weeds will invade the void. After filling the gaps, you must adjust your irrigation. You’ve clearly failed the moisture test. Increase the frequency of your watering but shorten the duration. You need to keep that new soil-sand mix wet so the grass can reclaim the space. It will take time. It won’t be immediate. But with proper moisture management and a high-phosphorus boost, the grass will eventually knit together. Just don’t let it happen again. Fix your soil, fix your water, and respect the biology of the turf.