
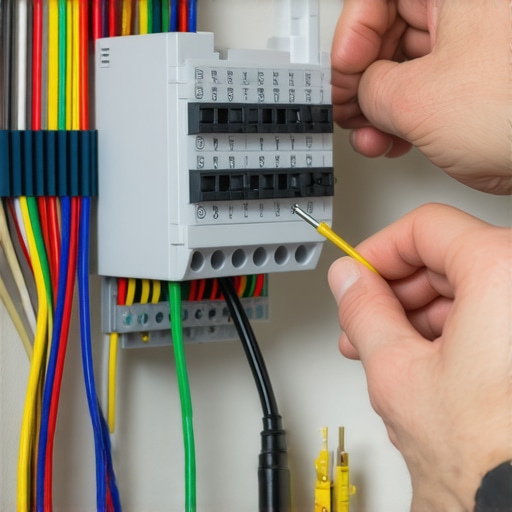
Mastering the Nervous System of Your Landscape
Wiring a smart irrigation controller involves mapping existing 24VAC zone wires to a digital interface to automate watering based on real-time weather data. Success requires identifying the common wire, ensuring terminal connectivity, and calibrating soil-moisture sensors to prevent turf disease and root rot. I always drill into my new crew members: if you do not fix the wiring and soil logic first, every plant you put in the ground is just expensive compost. You can buy the highest grade sod install or spend thousands on a yard cleanup, but if the brain of the system is miswired, you will drown the roots or scorch the crown within a single season. I have seen guys spend $10,000 on landscaping only to have it die because they could not tell the difference between a common wire and a master valve lead. It is about precision, not guesswork.
The Technical Anatomy of Your Controller
Before you rip your old Hunter or Rain Bird clock off the wall, you need to understand what you are looking at. Most residential systems run on 18-gauge multi-strand burial wire. You will see a series of colored wires and usually one white wire. That white wire is your Common (C). It completes the electrical circuit for every single solenoid in the yard. If that wire has a nick or a loose connection, the whole system goes dark. Professional irrigation isn’t just about water; it is about electrical resistance and circuit integrity. We measure performance in Ohms. A healthy solenoid should read between 20 and 60 Ohms. Anything higher indicates a failing coil; anything lower suggests a short circuit. Do not ignore these numbers. [image_placeholder]
“Efficient irrigation depends more on the timing and uniformity of application than on the volume of water delivered.” – Irrigation Association Technical Manual
Step-by-Step Wiring Protocol
First, take a photo of your existing wiring. This is your insurance policy. Disconnect the power. If you are working on an outdoor mount, ensure your housing is NEMA 3R rated for weatherproofing. 1. Label everything. Use masking tape to mark Zone 1, Zone 2, and so on. 2. Identify the Common. This usually goes into the terminal marked ‘C’ or ‘COM’. 3. Master Valve/Pump Start. If you have a master valve that shuts off the main water supply when the system is idle, it goes into the ‘M’ or ‘MV’ slot. 4. Inserting the wires. Most smart controllers like Rachio or Orbit B-hyve use push-terminals. Strip the wire back exactly 1/2 inch. Any more and you risk a short; any less and the connection won’t hold. 5. Power up. Connect the transformer. A smart controller will immediately attempt to ping your local Wi-Fi. If your signal strength (RSSI) is lower than -70 dBm, the smart features will fail intermittently. You might need a Wi-Fi extender in the garage. No signal means no weather updates, which defeats the purpose of the upgrade.
| Component | Function | Wiring Requirement |
|---|---|---|
| Common Wire (White) | Completes the circuit for all zones | Terminal C |
| Zone Wires (Colored) | Signals individual solenoid valves | Terminals 1, 2, 3… |
| Master Valve (Yellow/Blue) | Controls main water flow | Terminal M / MV |
| Rain Sensor | Interrupts circuit during rain | Sensor Terminals (S1/S2) |
| 24V AC Transformer | Provides electrical power | Power Input / Plug |
How much wire do I need for a new irrigation zone?
Calculating wire length requires accounting for the distance from the controller to the furthest valve plus 10% for expansion and slack. Use 18AWG for runs under 800 feet; anything longer requires 14AWG to prevent voltage drop. Voltage drop is the enemy of irrigation. If the solenoid only receives 18 volts instead of 24, it won’t have the magnetic force to lift the plunger. The valve will hum, but no water will flow. It is a common DIY failure point. Check your connections with a multimeter before burying anything.
What happens if I cross the common wire?
Crossing the common wire with a hot zone wire typically results in a blown fuse or a ‘Zone Short’ error on your smart app. Most modern controllers have internal circuit breakers that trip to protect the motherboard. If you see this error, use a voltmeter to check the resistance between the common and the offending zone wire. If it reads 0, you have a direct short. It is likely a melted wire in the valve box or a staple driven through the wire during a previous landscaping project. This is why we use waterproof grease nuts for all outdoor splices. Standard wire nuts will corrode in weeks.
“Over-irrigation is the leading cause of fungal pathogens like Rhizoctonia solani in residential turfgrass.” – University of Georgia Agricultural Extension
The Information Gain: Evapotranspiration Logic
The real ‘intelligence’ in a smart controller isn’t the Wi-Fi; it is the Evapotranspiration (ET) data. ET is the sum of evaporation from the soil and transpiration from the plants. Most people water for 20 minutes every day. This is wrong. Turf needs deep, infrequent watering—exactly 1 inch per week—to force roots to chase the moisture down into the subsoil. A smart controller calculates how much water left the soil today based on solar radiation, wind, and humidity, and replaces only that amount. It prevents the shallow root systems that lead to lawn death during a heatwave. If you just did a fresh sod install, you need to override these settings for the first 14 days to keep the root zone saturated, then taper off to let the ET logic take over. Don’t skip the rain sensor integration either. Even the best Wi-Fi controllers can have data lag; a local rain sensor provides an immediate physical kill-switch for the system.
Final Checklist for System Launch
- Verify all wire strippings are 1/2 inch with no copper exposed outside the terminal.
- Check that the common wire is seated firmly in the ‘C’ terminal.
- Test Wi-Fi signal strength at the mounting location before drilling.
- Map each zone in the app to the correct plant type (e.g., Xeriscape vs. Cool-season grass).
- Run a 2-minute ‘Test Cycle’ for every zone to check for ‘chattering’ valves.
- Inspect valve boxes for leaks triggered by the new high-frequency cycling.
Once the wiring is verified and the app is synced, your landscaping is finally protected by a system that thinks for itself. This isn’t just a gadget; it is an engineering upgrade to your home’s infrastructure. Keep your wires clean and your signal strong. The dirt doesn’t lie.